Table of Contents
This guide provides a practical overview of Instructions on How to Use Outlook from AZ for Beginners, including its main features, benefits, limitations, and important considerations.
In the tutorial below, TipsMake. com will guide you to use basic Microsoft Outlook on PC. Invite you to track!
1. Add an account to Outlook
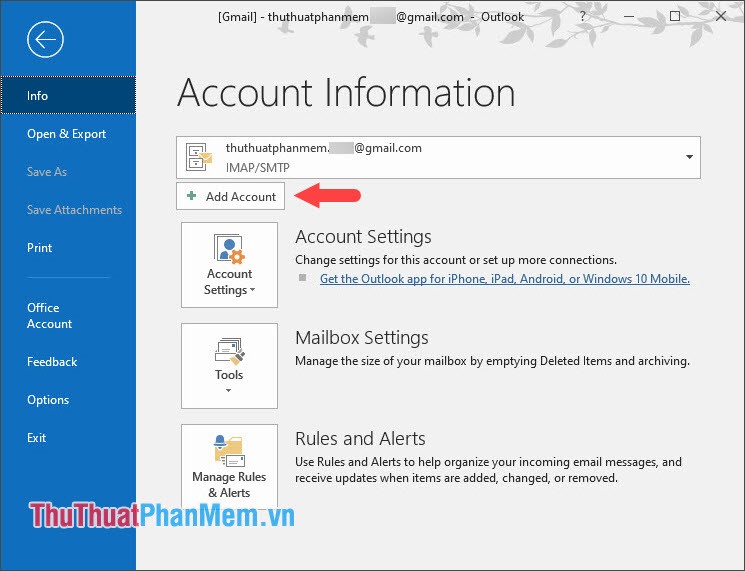
Step 1: You go to File => Info => Add Account .
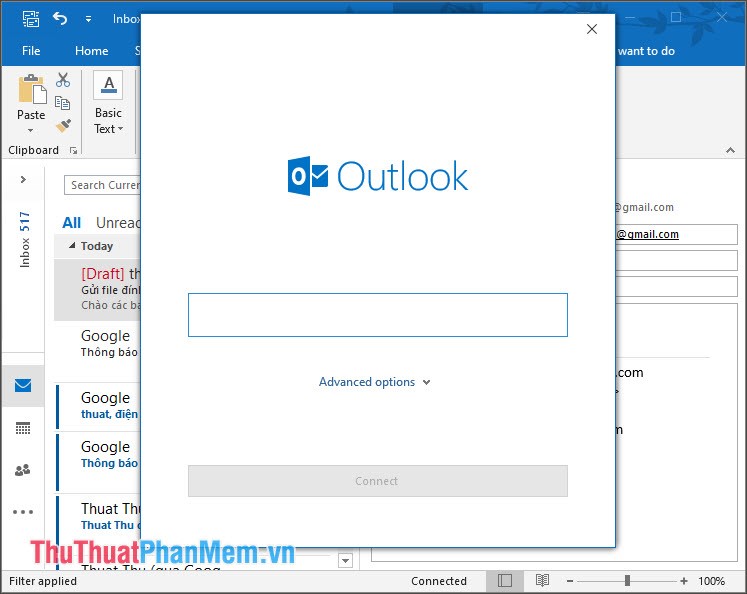
Step 2: You add any e-mail account to the Outlook application and then click Connect .
2. Quick navigation bar (Nagivation)
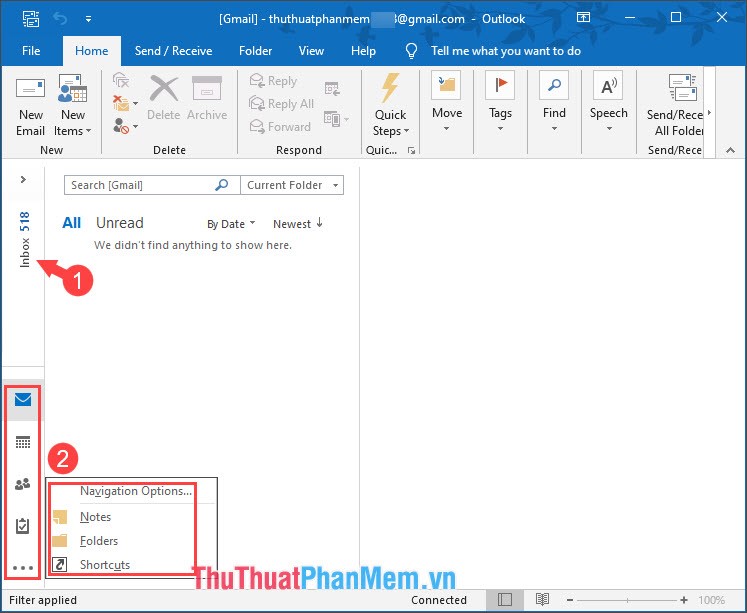
On the quick navigation bar in the left corner has functions such as checking Inbox (1) and some other utilities (2) in Outlook such as Mail, Calendar (Calendar), People (People), Tasks ( Task), Notes (Notes), Folder (Folder).
3. Compose E-mail with Outlook
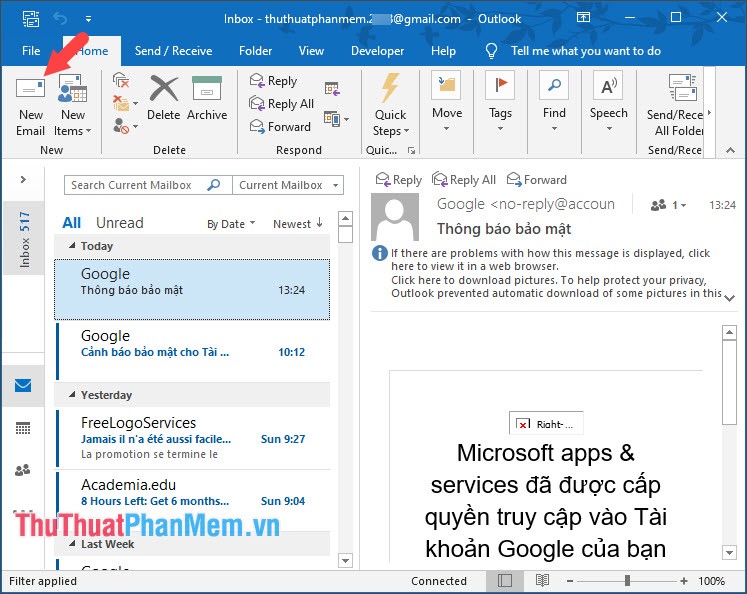
Step 1: In the Email interface, we click on New Email .
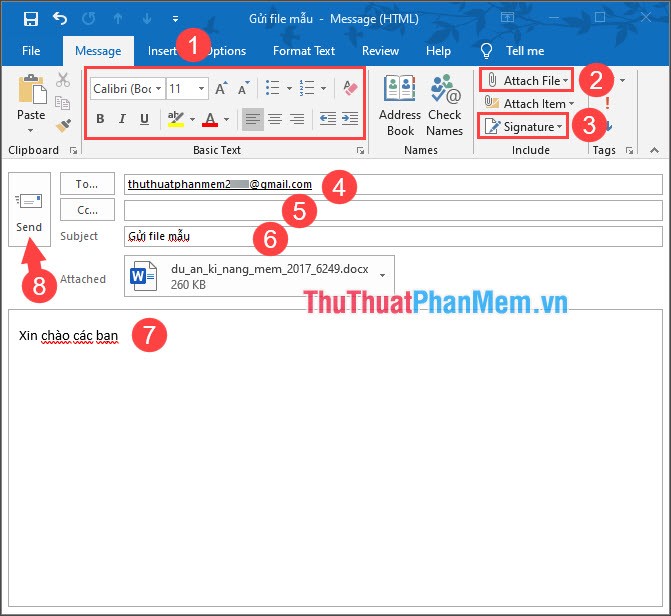
Step 2: We adjust the font format such as font, color, size. in section (1) . To add an attachment, we click on the Attach File (2) item. To insert a signature, click on Signature (3) . Next, we choose the email of the recipient (4) , make a copy and send it to another user (5) , set the subject (6) and write the contents of the Email (7) . Once completed, press Send (8) to send.
4. Reply to Email
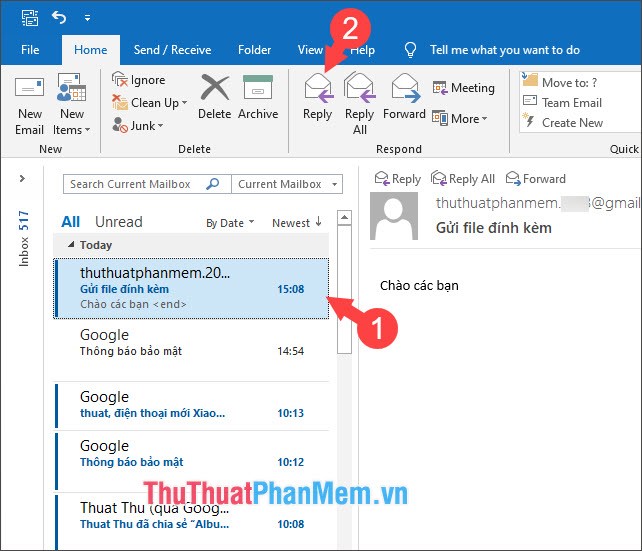
Step 1: You select the Email to answer (1) and click on Reply (2) .
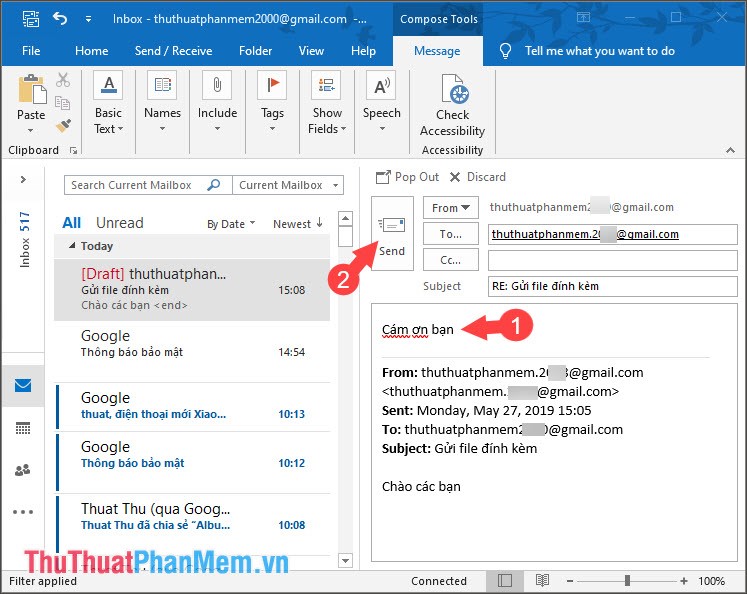
Step 2: In the Reply email interface, we enter the content to answer (1) and click Send (2) .
5. Create an appointment in Calendar
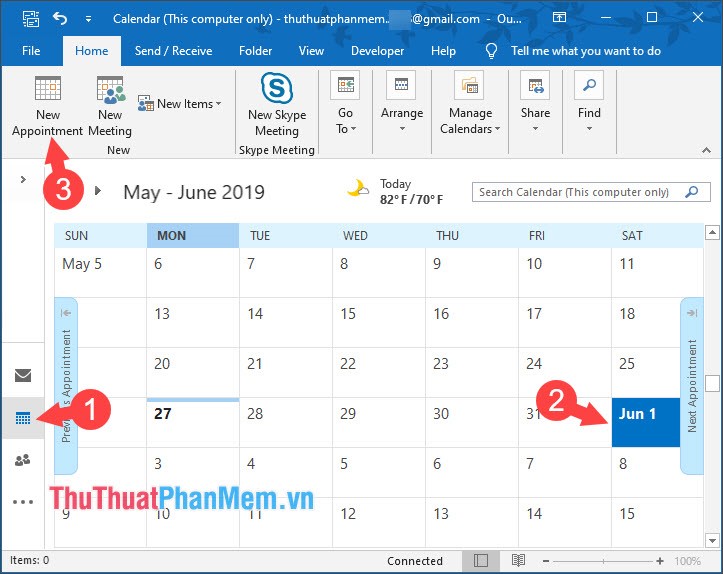
Step 1: You turn to the Calendar (Calendar) (1) and select a date you want to create an appointment (2) and select New Appointment (3) .
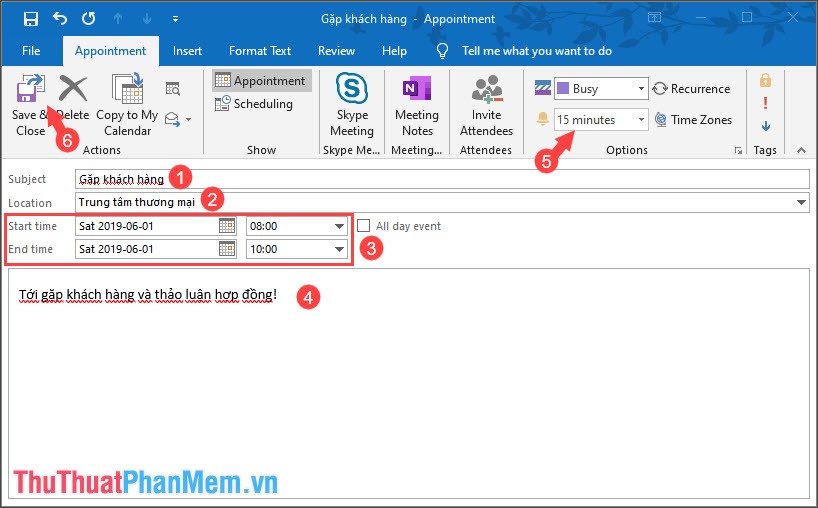
Step 2: You set the title (Subject) (1) , write the location to remember (Location) (2) , set the start time (Start time) and the end time (End time) (3) . Enter the appointment content (4) , then we can choose the time to repeat (5) . Finished, you click Save & Close (6) to save.
6. Create Outlook contacts in People section
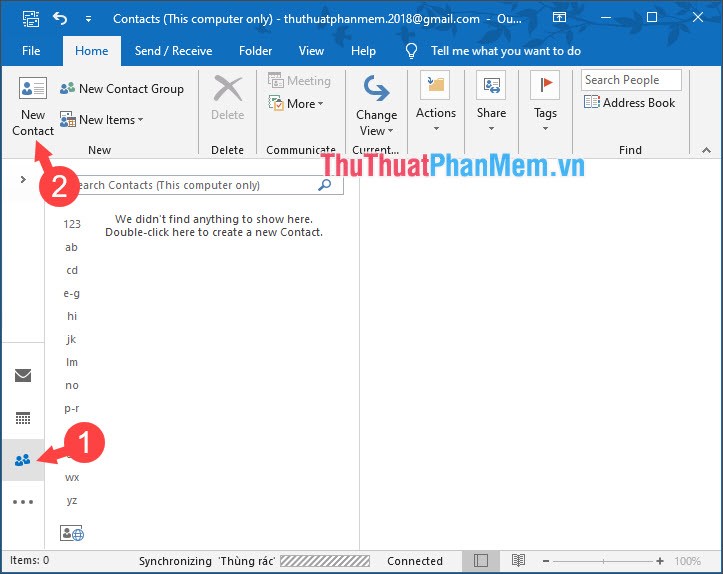
Step 1: You switch to People (People) (1) and switch to the New Contact (2) .
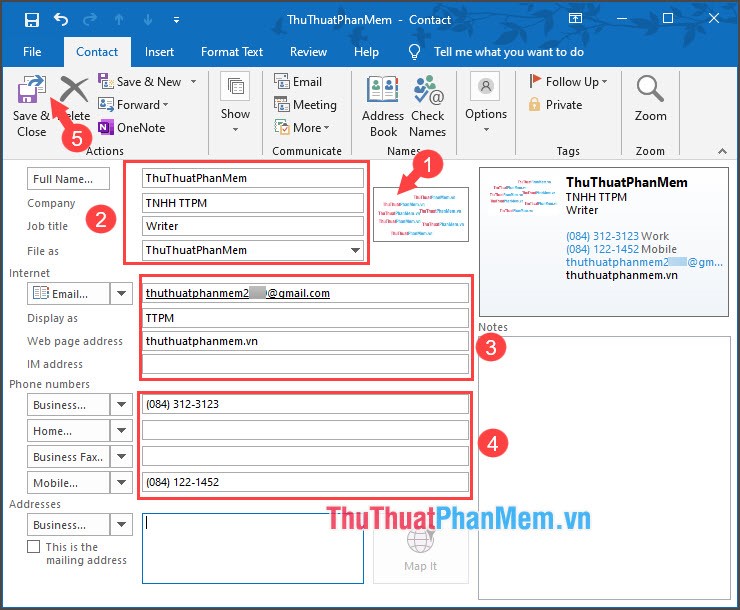
Step 2: Click on box (1) to insert a avatar. In section (2) , we fill in information such as full name (Full Name.), company name (Company), Profession (Job title). In section (3) we set up some additional information such as e-mail address, websites. Section (4) , we save the personal phone number. Then click Save & Close (5) to save.
With the basic Outlook user guide for beginners shared in the article, we can easily familiarize and master some of the basic and useful functions of Outlook in a few steps. Please visit TipsMake. com regularly to update the latest technology knowledge and tips!
FAQ
What should I know about Instructions on How to Use Outlook from AZ for Beginners?
Focus on the key features, requirements, limitations, and practical use cases explained in this guide.
How do I get the best results with Instructions on How to Use Outlook from AZ for Beginners?
Follow the recommended steps, use current software or information, confirm compatibility, and review settings before major changes.
Are there any risks or limitations?
Potential limitations depend on compatibility, data quality, cost, privacy, support, and how the product or method is used.
Related Articles
 What Is Outlook Mail? How to Register and Use Outlook Mail6 minutes read
 Install Add-In in Outlook: How to Install and Remove Add-Ins3 minutes read
 Instructions on How to Use Outlook 2013 for New People14 minutes read
 Shortcuts in Outlook. Com: Outlook. Com Shortcuts3 minutes read
 How to Schedule an Event in Outlook3 minutes read
 How to Create AI Theme for Outlook3 minutes read
Reader Comments 0
Sign in with email or Google to join the discussion.