Table of Contents
If UltraViewer stays on Getting my ID or leaves the ID field blank, the app has usually failed to reach UltraViewer's service. Start with the least disruptive checks: confirm that the internet works, restart UltraViewer, install the current official build, then review its port, proxy, and firewall settings.
1. Confirm the problem is the network path
- Open a few websites in a browser on the same computer. If they also fail, fix the internet connection first.
- Exit UltraViewer completely from the notification area, reopen it, and wait briefly for an ID.
- Restart the computer and, if practical, the router.
- If you use a VPN, filtering DNS service, or corporate proxy, test only with changes your network administrator permits. A work or school network may intentionally block remote-control tools.
If the ID appears on another trusted network, such as a phone hotspot, the original router, firewall, proxy, or network policy is the likely cause. Do not use another network to evade an organizational restriction.
2. Update or reinstall UltraViewer
Download the current setup file from the official UltraViewer site. Installing a current build can replace damaged files and outdated connection components.
On Windows 11 or 10, open Settings > Apps > Installed apps (or Apps & features on older releases), find UltraViewer, open its menu, and select Uninstall.
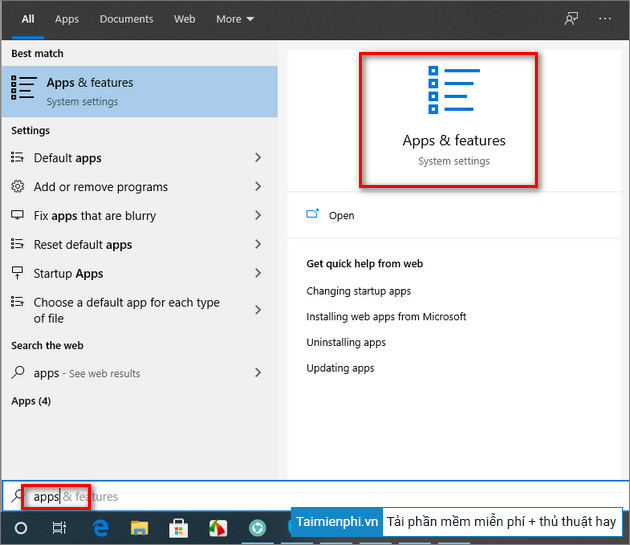
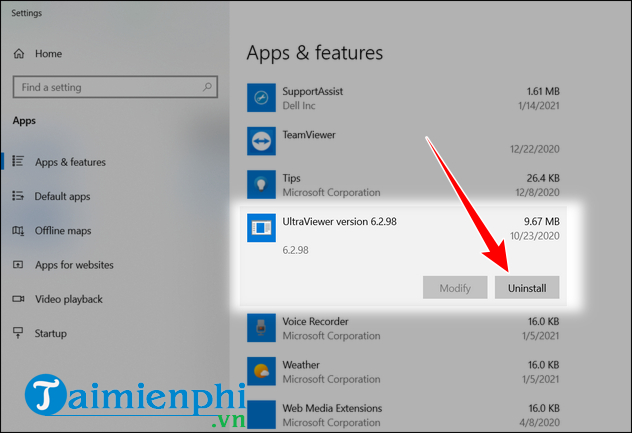
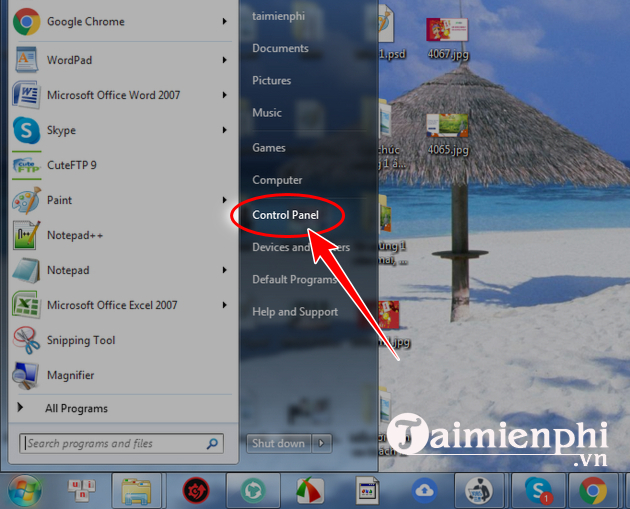
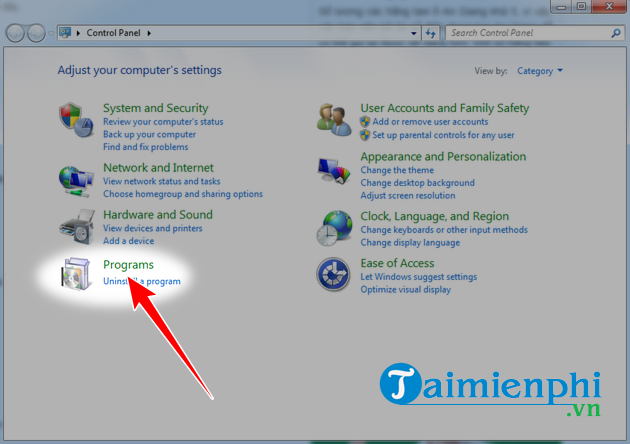
On an older Windows Control Panel, use Programs > Programs and Features, select UltraViewer, and choose Uninstall. The screenshots below show this legacy route; Windows 7 itself is no longer a safe platform for internet-connected remote access.
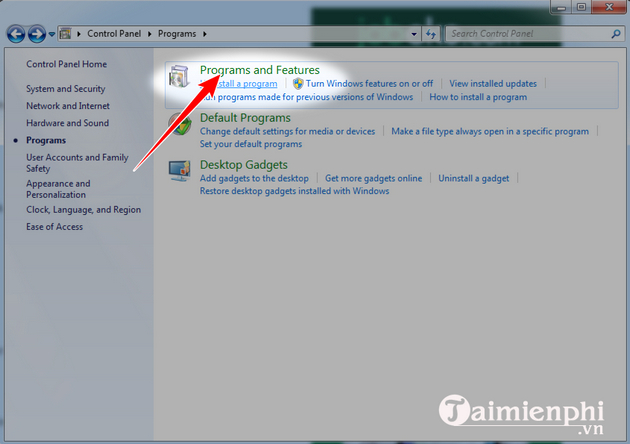
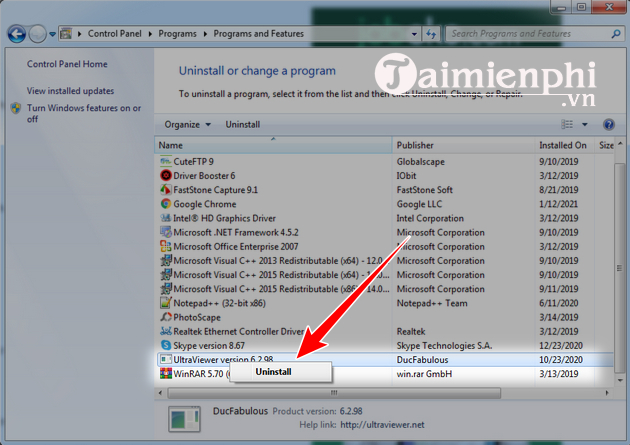
Restart Windows, then reinstall the official build. Our UltraViewer installation guide explains each setup screen. If the ID is still missing, continue with the connection settings.
3. Try UltraViewer's alternate connection port
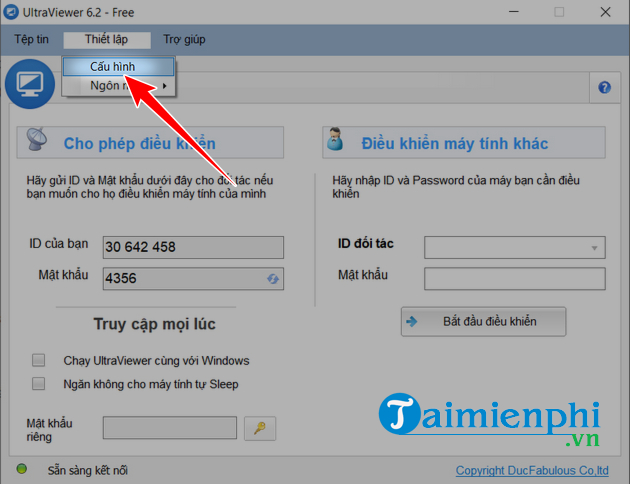
UltraViewer documents ports 443 and 2112. In the app, open Settings > Options or Settings > Configuration, depending on the version. Find Connect using port and select Port 2112, save the change, then restart UltraViewer.
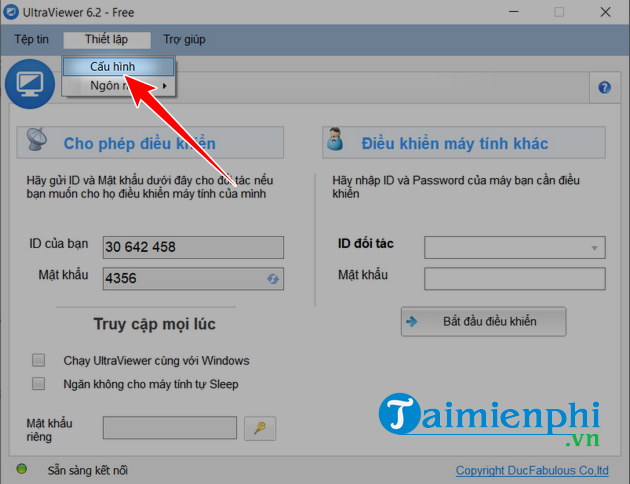
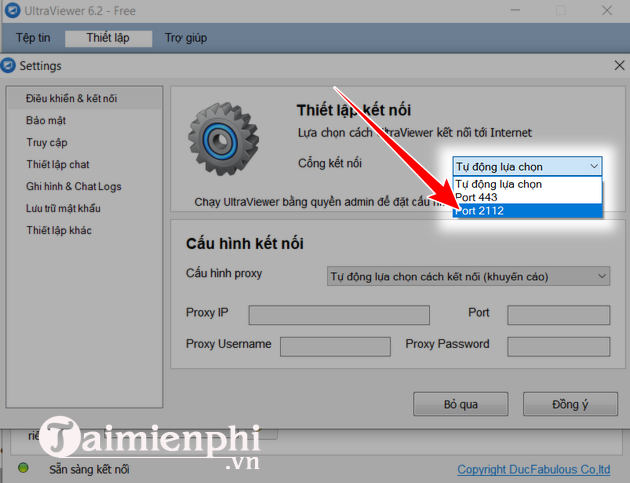
If port 2112 works on a home network but not a managed network, ask the network administrator whether the port and UltraViewer domains are allowed. Do not create broad inbound firewall rules or expose the port on a router; the goal is to let the signed UltraViewer application make its required outbound connection.
4. Correct the proxy setting
Open UltraViewer's connection settings and locate Configure proxy. If the computer does not use a proxy, select No proxy or Connect directly to the Internet, then restart the app.
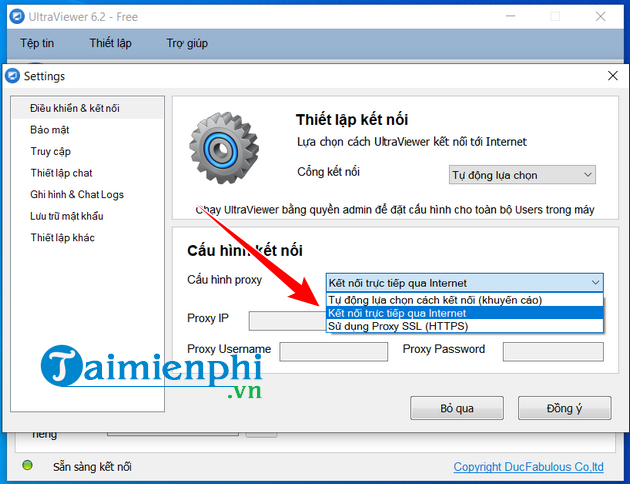
Do not choose a direct connection on a company network that requires a proxy. Instead, use the proxy details provided by the administrator. Also check Windows Settings > Network & internet > Proxy for an old manual proxy that no longer applies.
5. Review firewall and security-software decisions
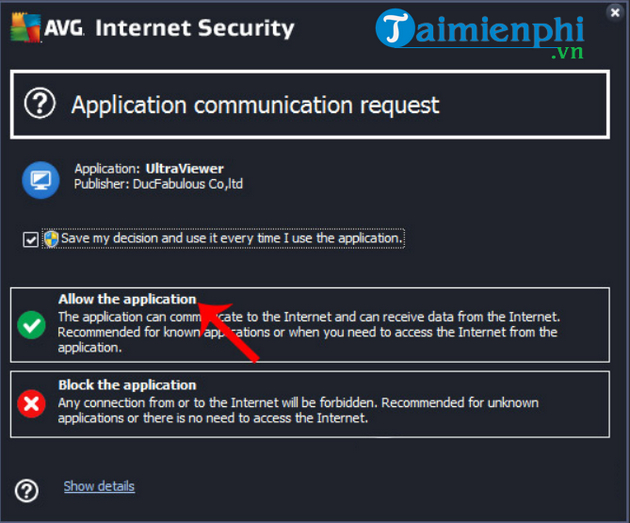
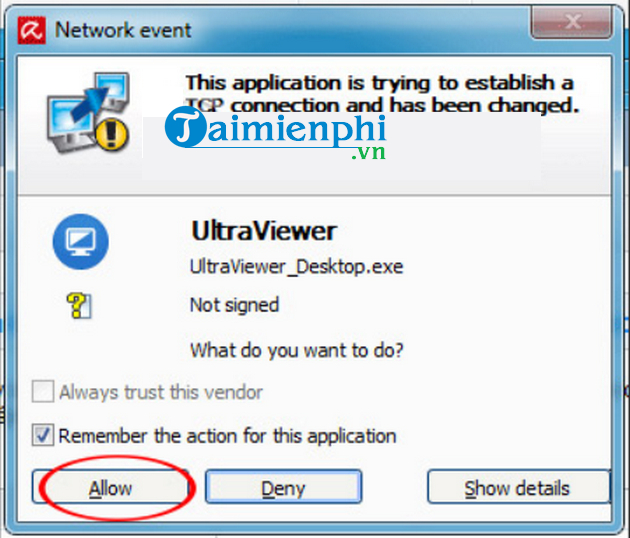
A firewall can block UltraViewer_desktop.exe or its outbound traffic. Open Windows Security > Firewall & network protection > Allow an app through firewall and check whether the installed, digitally signed UltraViewer executable is blocked.
- Allow only the official signed executable in the network profiles where you actually use it.
- Do not disable antivirus or the firewall completely.
- Do not approve an unknown executable merely because its name contains “UltraViewer.” Check its file location and digital signature.
- If a third-party security suite quarantined the file, review its detection details or ask the security vendor/administrator before restoring it.
Older AVG and Avira prompts may look like these screenshots. Current versions can use different labels; verify the application and publisher before allowing network access.
6. Check for a wider service or policy issue
- Try the current UltraViewer installer on another Windows computer on the same network. If neither receives an ID, the network or service is the likely source.
- Check whether the device's date and time are correct; a badly wrong clock can break secure connections.
- Ask an administrator to review outbound access for port 443 or 2112 and the vendor's required domains. UltraViewer says its service uses changing server addresses under *.ultraviewer.net.
- If the issue persists across different networks and a clean current installation, contact UltraViewer support with the app version, Windows version, exact status message, and the troubleshooting steps already tried.
The vendor's Getting my ID troubleshooting page confirms the update, firewall, port 2112, and direct-proxy checks. If UltraViewer is not permitted or compatible in your environment, choose one of these remote-access alternatives rather than weakening network security.
Related Articles
 Link Downlaod Ultraviewer 6.24 minutes read
 How to Fix Ultraview Not Being Able to Retrieve ID7 minutes read
 How to Fix the Error Does Not Show Id on Ultraviewer4 minutes read
 How to Install Ultraviewer on Windows 11 and How to Use It3 minutes read
 How to Fix the Common Error Ultraviewer When Connecting to a4 minutes read
 Simple UltraViewer Usage Guide for Remote Computer Control5 minutes read
Reader Comments 0
Sign in with email or Google to join the discussion.