Table of Contents
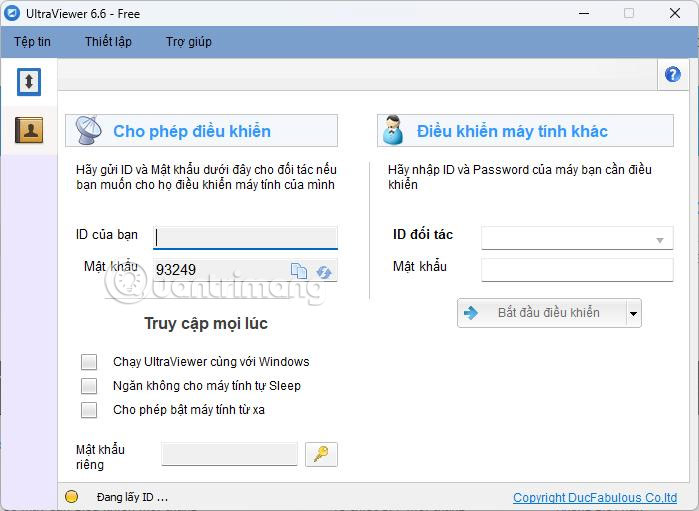
If UltraViewer remains on “Getting my ID” or shows no ID, first restart the app and test the Internet connection. Then switch UltraViewer to port 2112 with a direct connection, check firewall policy, and reinstall the current official build if necessary. Do not disable security software permanently or bypass an organization’s network controls.
1. Confirm that the problem is local
- Open a normal website in a browser.
- Exit UltraViewer completely, including its notification-area icon, and reopen it.
- Restart Windows if the ID is still blank.
- Try another network, such as a trusted phone hotspot, if permitted.
If UltraViewer works on another network, the original network's proxy, DNS, firewall, or filtering policy is the likely cause. If several computers on different networks fail at the same time, check UltraViewer's official support channels for a service problem.
2. Update or reinstall UltraViewer
Download the current installer only from the official UltraViewer download page. A normal installer provides the full feature set; avoid unofficial download mirrors and unknown “fixed” packages.
- Check the installed version under Help > About.
- Close UltraViewer.
- Install the current version over the existing copy, or uninstall and reinstall it if the first attempt fails.
- Restart Windows and check whether an ID appears.
If the problem began after an interrupted installation, a clean reinstall is more useful than repeatedly changing network settings.
3. Use port 2112 and a direct connection
UltraViewer's own troubleshooting guidance recommends this configuration when the app is stuck retrieving an ID:
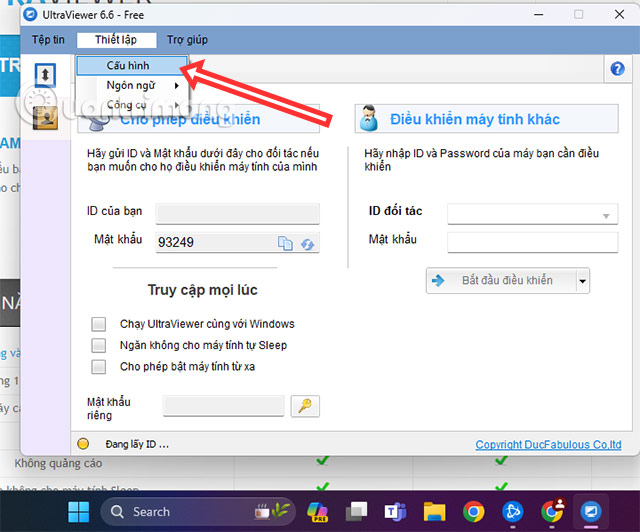
- Open UltraViewer and select Settings.
- Choose Options or Configuration.
- Set Connect using port to Port 2112.
- Under Proxy Configuration, choose Connect directly to the Internet unless the network administrator provided a required proxy.
- Select OK, close UltraViewer completely, and reopen it.
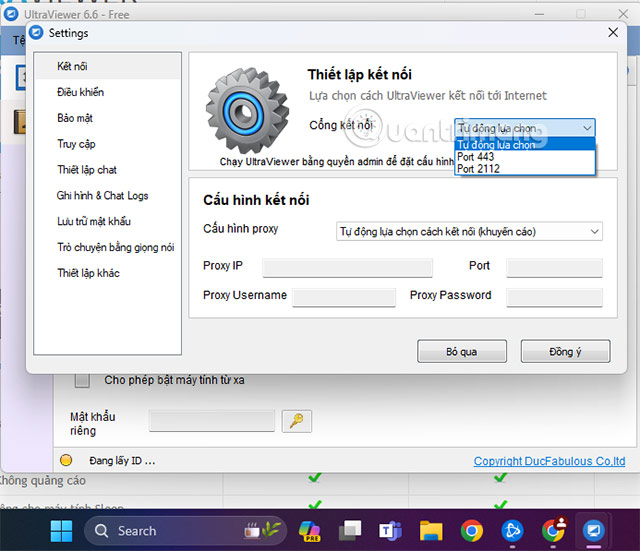
UltraViewer documents ports 443 and 2112. If port 2112 is blocked but 443 is allowed, test the other supported option. Do not forward these ports from the public Internet to the PC; this issue concerns outbound application connectivity, not router port forwarding.
4. Check firewall and antivirus rules
Security software can block UltraViewer_desktop.exe or its outbound connection. Review the alert or quarantine history and allow the application only after verifying that it came from the official installer.
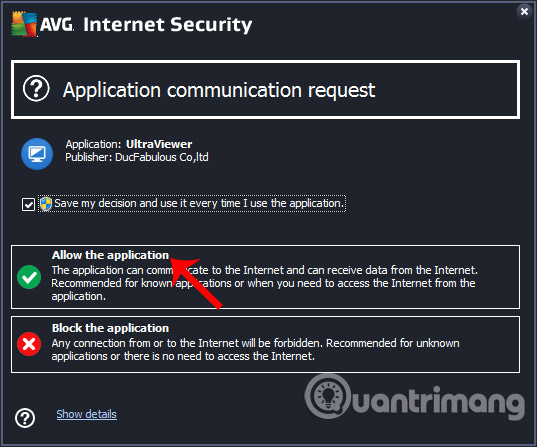
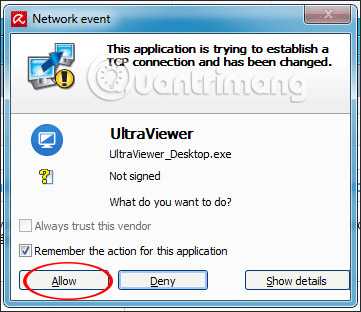
Windows Firewall
- Open Windows Security > Firewall & network protection.
- Select Allow an app through firewall.
- Confirm that the installed UltraViewer executable is allowed on the appropriate network profile.
On a company, school, or hospital network, ask the administrator to review the policy. UltraViewer uses changing server addresses under domains such as *.ultraviewer.net, so maintaining a hard-coded IP list is unreliable. Do not try to bypass an intentional remote-access restriction.
5. Check VPN and proxy settings
- Disconnect a personal VPN temporarily and retry.
- Open Settings > Network & Internet > Proxy and confirm that an unknown manual proxy is not enabled.
- If the organization requires a proxy, obtain the correct settings from IT instead of selecting direct Internet access.
- Remove untrusted “IP changer” tools that intercept traffic.
6. Test DNS and the supported ports
In PowerShell, these read-only checks show whether DNS resolves and whether a TCP connection can reach a representative UltraViewer host:
Resolve-DnsName server1.ultraviewer.net
Test-NetConnection server1.ultraviewer.net -Port 443
Test-NetConnection server1.ultraviewer.net -Port 2112
A failed DNS lookup points to DNS or filtering. A successful DNS lookup with failed port tests suggests a firewall, proxy, ISP, or network-policy issue. One server result is not a complete service-status test because UltraViewer operates multiple servers.
7. Repair Windows network components only if needed
If other applications also have name-resolution or connection problems, open Terminal as administrator and run:
ipconfig /flushdns
netsh winsock reset
Restart Windows after the Winsock reset. Do not change DNS merely because a single ping times out; servers may block ICMP even when the application connection is healthy.
8. Scan for malware and test another PC
Run a full scan with Windows Security or the installed security product. Then test UltraViewer on another authorized Windows computer using the same network:
- If both fail, investigate the network or service.
- If only one fails, focus on that PC's installation, proxy, firewall, or Windows networking.
Information to collect for support
- UltraViewer version and Windows version;
- the exact status or error text;
- whether ports 443 and 2112 succeed;
- whether another trusted network works;
- security software and proxy/VPN in use;
- the time the problem occurred.
Use UltraViewer's official “Getting my ID” troubleshooting page for current vendor guidance. For Windows firewall symptoms, see the TipsMake guide to resolving blocked-app alerts.
Related Articles
 How to Retrieve VPN Passwords Saved on Windows 103 minutes read
 Instructions to Retrieve Skype Password: Regain Skype Password2 minutes read
 Instructions to Retrieve Facebook Password4 minutes read
 How to Retrieve Messages Sent on iPhone?3 minutes read
 How to Retrieve a Tik Tok Password When It Is Lost3 minutes read
 How to Retrieve Gmail Password, Google Login Password6 minutes read
Reader Comments 0
Sign in with email or Google to join the discussion.