Table of Contents
This guide provides a clear, practical overview of instructions for installing Windows Linux subsystem on, with useful context, important details, and straightforward takeaways for everyday readers.
Among them is the Windows Linux Subsystem, which is a feature that allows running Linux commands right on Windows without having to install a virtual machine.
After installation you can use the Linux commands on Windows as software to work and you can completely install Linux software on it.
In this article, I will guide you to install Ubuntu which is the most popular Linux version today.
How to install Windows Linux Subsystem on Windows 10
+ Step 1: Set up and enable Windows Linux Subsystem on Windows 10. In this step, we will have two ways to do it:
Method 1: You open the Turn Windows features on or off of Windows.
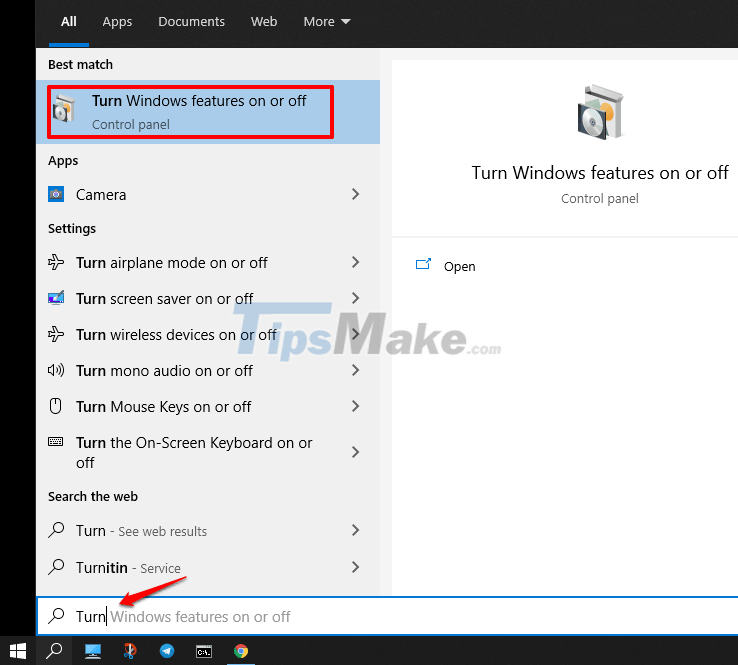
Check the box as shown below => then click OK. Then the program will ask to reboot => then you just press restart the machine only.

Method 2: Use the command to activate Windows Linux Subsystem on Windows 10
You open up Windows PowerShell using the combination (Windows + X) => and select Windows PowerShell (Admin).
Or you can press Windows + S and search with the keyword powershell => and click on Run as administrator as shown below.
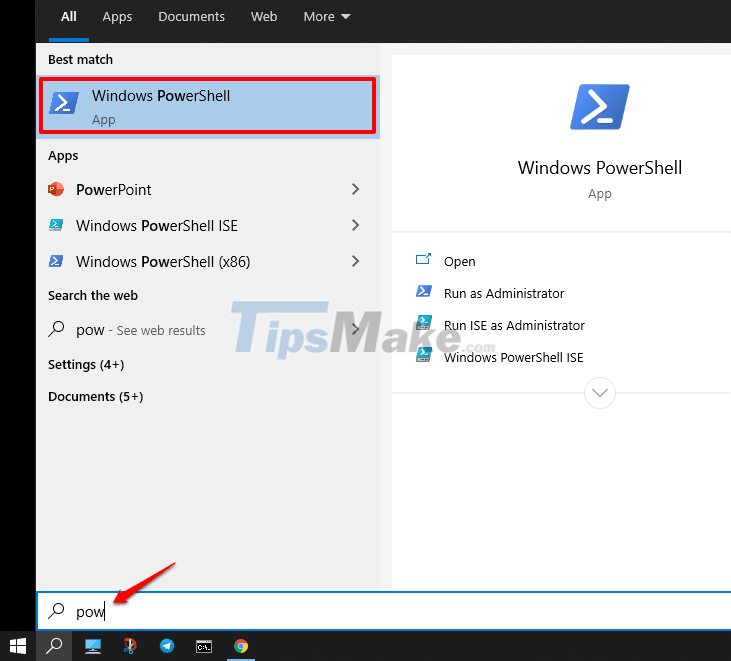
Then run the following command to install it:
Enable-WindowsOptionalFeature -Online -FeatureName Microsoft-Windows-Subsystem-Linux
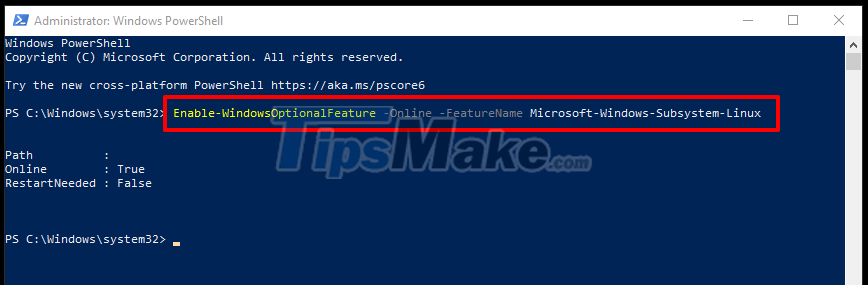
Well, there are two simple ways for you to activate and use Windows 10's Windows Linux Subsystem tool.
+ Step 2: Install Ubuntu on Windows 10
Now go to the Microsoft Store as shown below:
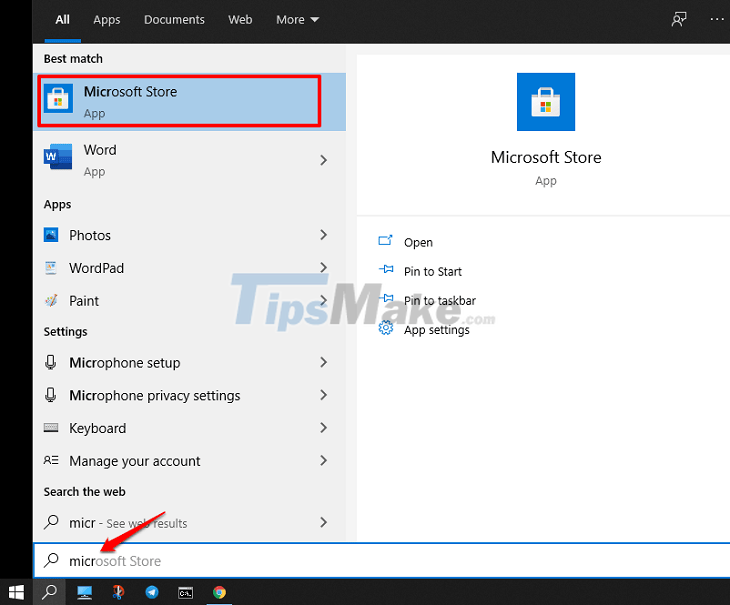
In the search bar, enter the keyword ubuntu (if you do not like, you can enter the name of other Linux versions)
- (1) Ubuntu 20.04LTS Version (New)
- (2) Ubuntu 18.04LTS Version (older)
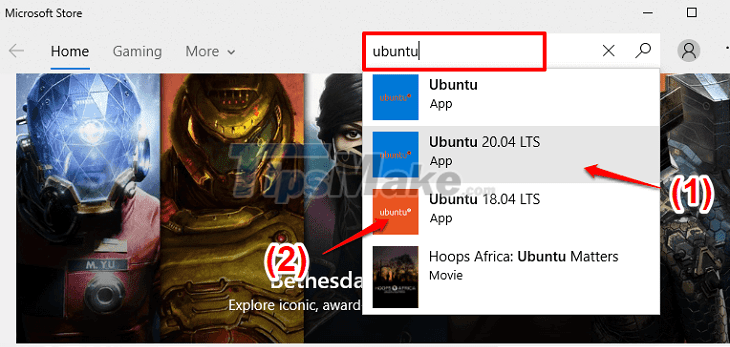
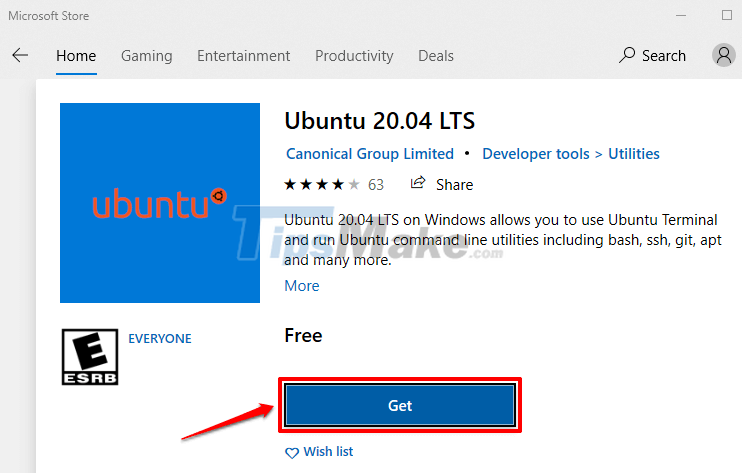
Here I choose Ubuntu version 20.04LTS. In this step you click Get to start the installation.
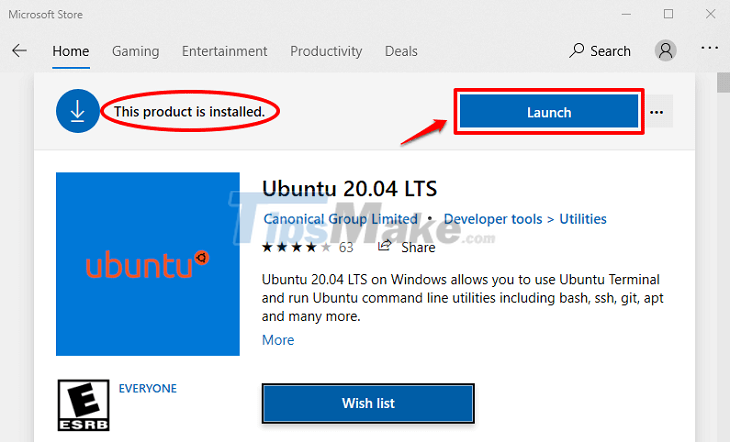
The installation process may take a bit of time and after installation there will be a message This product is installed and you just need to press Launch to run.
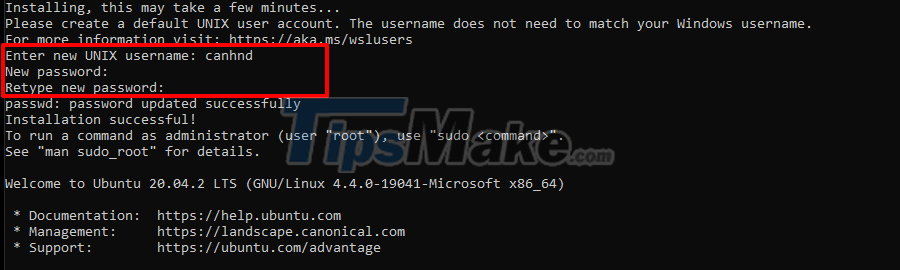
After running up, a command line window will appear as shown below. Here you will enter the configuration information for Ubuntu such as username and password.
=> After selecting the username and password, there will be a screen as below.
Now open the application and try to install Python using the command see. First you open the application as shown in the image below.
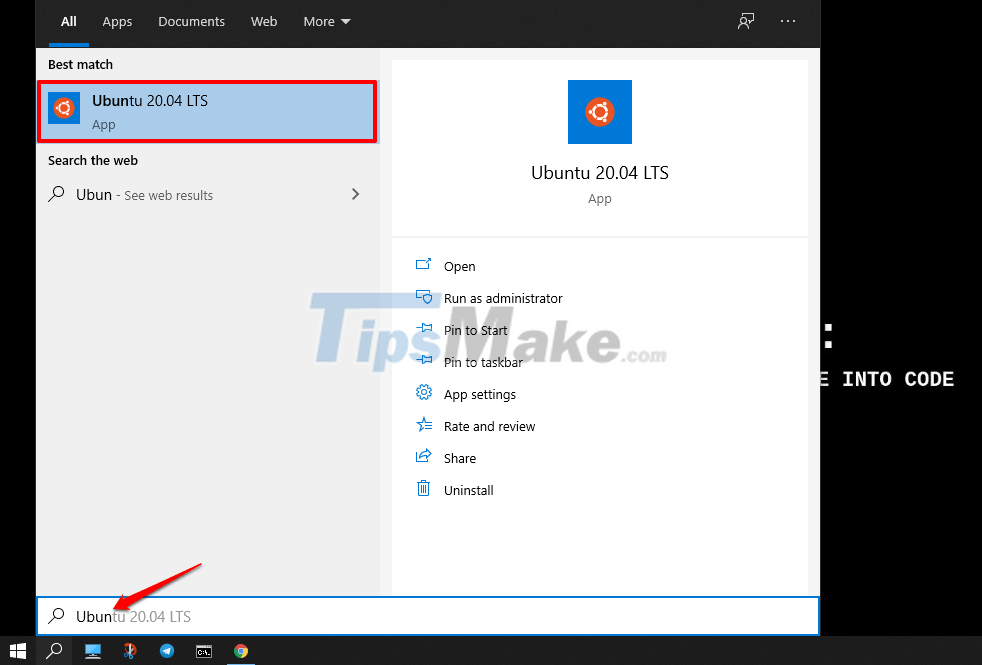
Then run the command sudo apt-get update and the command sudo apt-get install python to install python just like if you were using Linux!

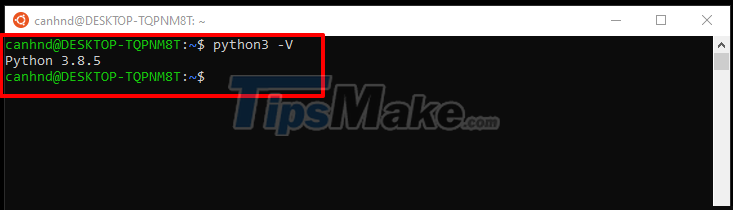
And this is after I check the Python version I installed earlier
Epilogue
Okay! So in this article I have shown you how to install Windows Linux Subsystem on Windows 10 operating system. Also straightforward is not it.
Hopefully the article helps you get more tips for working with Linux on Windows without having to install a virtual machine or run these two operating systems in parallel . See you in the next posts.
Key Takeaways
Use the information above as a practical reference for instructions for installing Windows Linux subsystem on. Review each step carefully, confirm any requirements, and choose the option that best fits your situation.
FAQ
What does this guide explain about Instructions for Installing Windows Linux Subsystem on?
It explains the main concepts, practical considerations, and useful steps related to instructions for installing Windows Linux subsystem on without requiring advanced knowledge.
Who can benefit from learning about Instructions for Installing Windows Linux Subsystem on?
This information is useful for readers who want a clear overview, practical guidance, and reliable steps related to instructions for installing Windows Linux subsystem on.
What should I check before applying this information?
Review the requirements, confirm that your device, software, or situation matches the instructions, and back up important data before making major changes.
Related Articles
 How to Run Linux Desktop Using Windows Subsystem for Linux9 minutes read
 How to Install Windows Subsystem for Linux 2 on Windows 105 minutes read
 Install Centos on Windows 10 Wsl5 minutes read
 How to Enable the Windows Subsystem for Linux3 minutes read
 Windows Subsystem for Linux: Complete Guide7 minutes read
 How to Install Arch Linux in Windows Subsystem for Linux5 minutes read
Reader Comments 0
Sign in with email or Google to join the discussion.