Instructions for installing Dev-C ++
This article explains how to compile programs written in ANSI C with OpenGL and GLUT using the Dev-C ++ compiler.
This article explains how to compile programs written in ANSI C with OpenGL and GLUT using the Dev-C ++ compiler.
Bloodshed Dev-C ++ is a free C ++ compiler and development environment for Windows operating systems. Like most C ++ compilers, it can also be used to compile ANSI C. By installing library files and GLUT headers, it can be used to write programs that use OpenGL. . This is necessary to run programs in Edward Angel's Interactive Computer Graphics, 5th edition and possibly other computer graphics books.
This article does not explain how to compile OpenGL with C ++. The 6th edition of Angel's book using C ++ will not work with these instructions.
These instructions have been tested on a variety of Windows 2000 and Windows XP systems. These systems come with the necessary files for OpenGL, but are not necessary files for GLUT.
Dev-C ++ does not work well with Microsoft Windows Vista.
I. Download and install Dev-C ++
Link download: http://www.bloodshed.net/dev/devcpp.html
Detail:
Download Dev-C ++ 5.0 beta 9.2 (4.9.9.2) (9.0MB) with Mingw / GCC 3.4.2 Although this is a "beta" version, it works perfectly well. Click SourceForge to access the list of download pages and select a page. The file will look like devcpp4.9.9.2_setup.exe. Save this file in C: Temp.
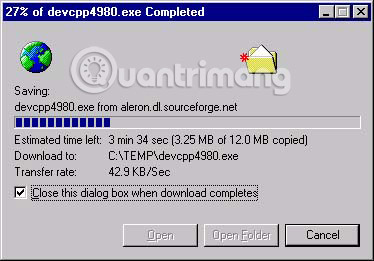
When the download process is complete, click the "Open" button to start the installation process (or go to C: Temp and double-click devcpp4.9.9.2_setup.exe). You will see a few screens that require you to choose a language (English) and agree to the license terms. Select "typical" installation.

Accept the proposed destination location to install:
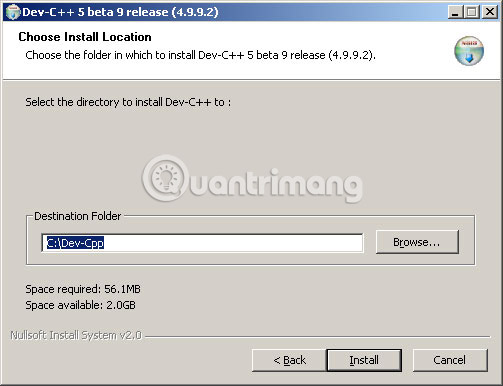
Many subdirectories and files are extracted to this target location:

Select 'Yes' when asked if you want to install Dev-cpp for all users.
Note : If the installation fails, please reinstall and try selecting "No" in this step.
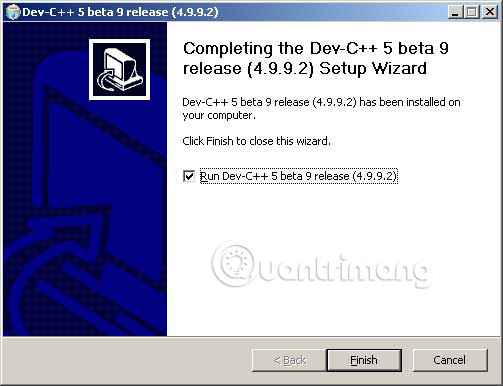
A screen indicating the installation process is complete:

Keep the traces in the above dialog box. Click "Finish". The configuration screen for the first time will appear:
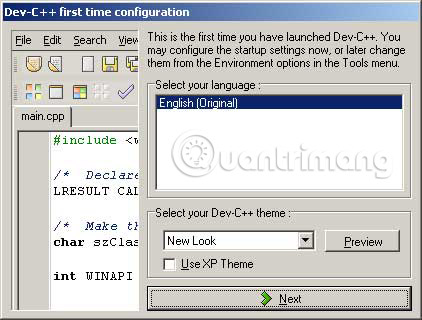
Select "English" and " New Look ". In some subsequent screens. Select "Yes" for the suggestions displayed.

Finally, you are finished. Click OK.

II. Start DEV-C ++ and try installing with a simple C program
Detail:
The program will automatically start.
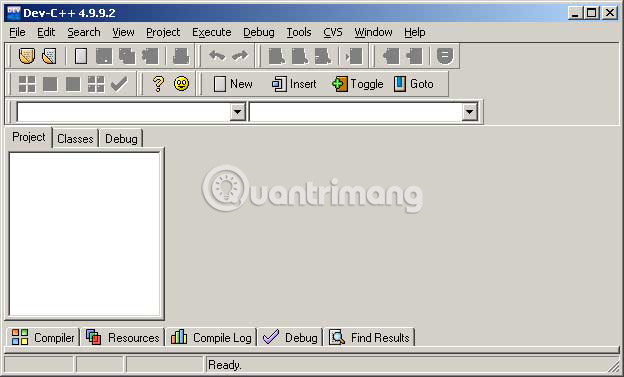
Click File> New> Project . Select a name for the project (such as "myProject"). Click " C Project ". Click on " Empty Project ". Click "OK".
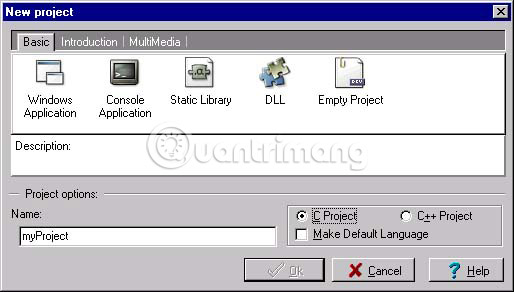
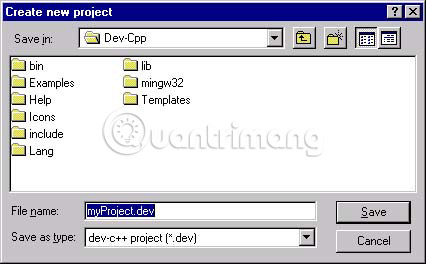
In " Create New Project ", click "Save" (later you may want to create separate subfolders for your different projects).
Click File> New> Source File and in " Add source file to current project ", click "Yes". You should now see a screen where you can edit the source file.
Enter a simple C program, as shown below. Now click File> Save As and save the file as "hello.c" (or another name).
Important note : Make sure the file extension is .c. With any other extension (such as the recommended .cpp), you will have problems compiling.

Now click Execute> Compile and Run .
The program will be compiled, run and write its results into a DOS window. If you have a system command ("pause") in the program, the result will be in the window until you press a key. Another way to run the program (after it has been compiled) is to start a DOS window outside the Dev-Cpp system, then navigate to the subdirectory that contains your project and type hello.exe.

At this point, the compiler and development environment have been installed. You need to find Dev-C ++ listed in "Programs" on the Start menu and will now be able to write, compile and run C programs (and C ++). You will have everything, including files, libraries, and dlls for OpenGL (as well as all other standard packages) but without GLUT. GLUT manages windows and other user interface components necessary for OpenGL programming and needs to be installed separately.
If you don't need GLUT, you can quit it now.
III. Download and install GLUT
To run OpenGL with GLUT (that's what the programs in Angel's book use), you need to get 3 files and put each file in its proper directory. All files you need (and more) are contained in a zip file.
Detail:
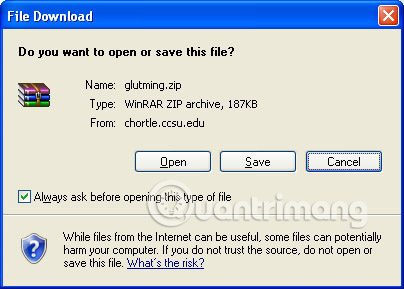
Download link: http://chortle.ccsu.edu/Bloodshed/glutming.zip
Download the glutming.zip file and save this zip file in a convenient location (probably C: temp).
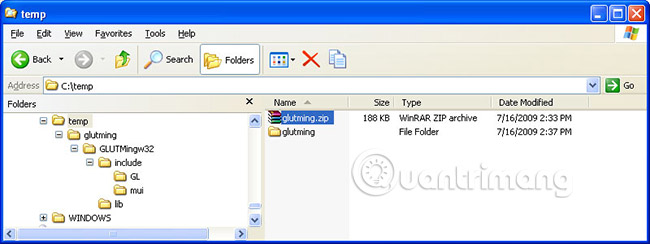
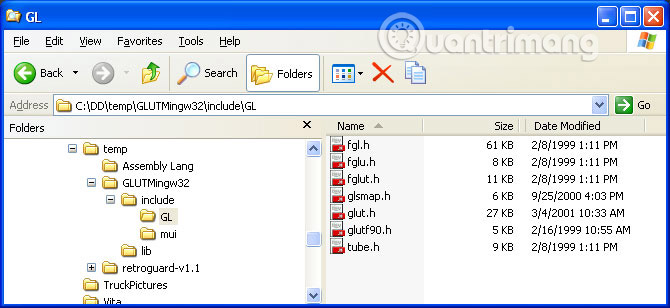
Double click glutming.zip (or extract it). You will see the files in the zip archive. (Your decompression program may differ from the program shown here, but will work similarly).

Click "Extract" to extract all subdirectories and files. Select some convenient directories to extract them (probably C: tempglutming). You only need 3 files, but still have to extract all of them.
Only 3 files in different subdirectories are needed. Each of these 3 files must be placed in subdirectories with other files of the same type. Use Explorer to move files where needed.
Note : If you only see some files listed in Explorer, click View> Options> View and then select the " Show all Files " button.
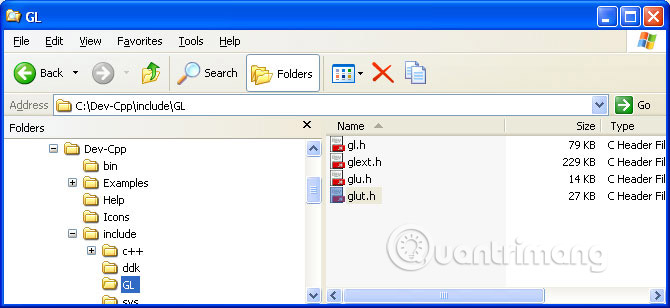
glut.h - copy this file to C: Dev-CppincludeGL
Copy from your "unzipped" subdirectory (wherever they are):
Here:
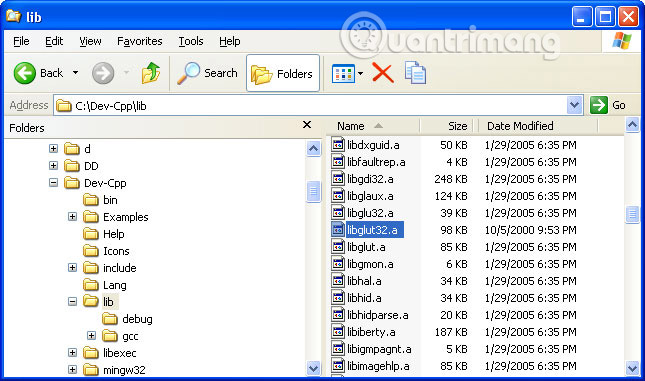
libglut32.a - copy this file from the unzipped folders to C: Dev-Cpplib
There may be a newer version of this file there. Replace that version with the version you unzipped (if you keep the newer version, your program will not link correctly).
Copy from "unzipped" subdirectory:

Here:
glut32.dll - move this file to C: WINNTSystem32, or similar location.
The location for this file depends on your operating system. The folder that it was moved to is the folder containing the Dynamic load library (* .dll). An easy way to find where to put it is to find glu32.dll (use the Search tool from the Start menu).
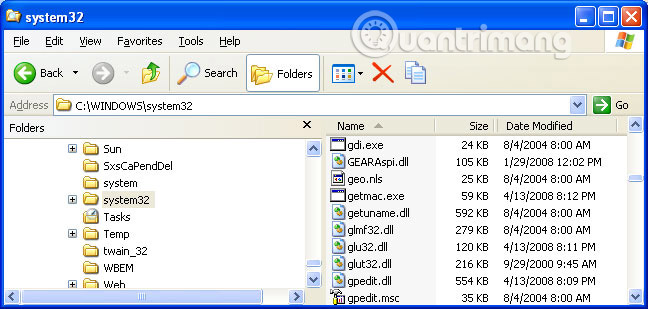
Folders to use should also have glu32.dll and opengl32.dll files . These files should be included with your operating system.
IV. Check Dev-cpp with GLUT
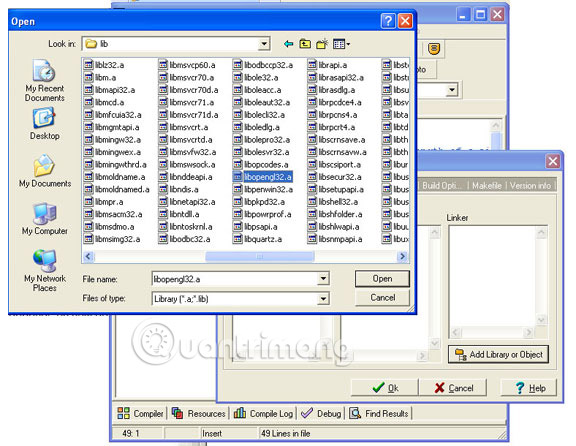
An important step in compiling and running a C program containing OpenGL and GLUT functions is to let the linker know where the libraries are. This is done by clicking Project> Project Options> Parameters> Add Library or Options and then navigating to the libraries you need including: libopengl32.a, libglu32.a and libglut32.a. Libraries should be added in this order.
Detail:
a. Create a subfolder for a project. Do this first, before you start Dev-Cpp. Create a new subdirectory with "Explorer" by clicking File> New> Folder .

For example, create a folder C: GLproject.
b. Start Dev-cpp:
c. Start a new project by clicking File> New> Project . In the resulting panel, name the "rectangle" project, click " Empty project " and " C ": Click OK.
Note : To compile with OpenGL, you must create a project. You need to have a project (not just a single C file) to link in OpenGL libraries.

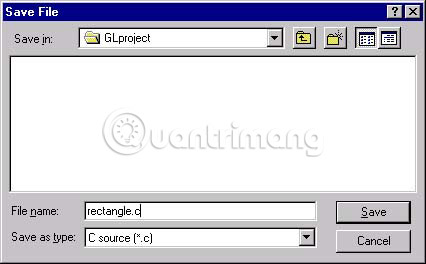
d. In the next panel, navigate to your directory C: GLproject and click "Save".

e. In Dev-C ++, click File> New> Source File and then in the next " Add to Project " control panel, select "Yes". Click File> Save As and then name the file. Navigate to the project subdirectory to save the file in it. Name the file "rectangle.c"
Make sure the file names end in ".c" because anything else will cause major problems.
f. Click and drag over the following program to highlight it, then click Edit> Copy from the browser menu bar.
#include
const int A = 500; / * chiều dài của một side của cửa sổ Monitor * /
const float B = 500; / * length của một side của các clipping rectangle * /
const float C = 200; / * chiều dài của cửa sổ của chương trình Draws * /
void myinit (void)
{
glClearColor (0.7, 0.7, 0.7, 0.0); / * gray background * /
glMatrixMode (GL_PROJECTION); / * In World coordinates: * /
glLoadIdentity (); / * position the "clipping rectangle" * /
gluOrtho2D (-B / 2, B / 2, -B / 2, B / 2); / * at -B / 2, its right edge at + B / 2, its bottom * /
glMatrixMode (GL_MODELVIEW); / * edge at -B / 2 and its top edge at + B / 2 * /
}
void display (void)
{
glClear (GL_COLOR_BUFFER_BIT); / * clear the window * /
glMatrixMode (GL_MODELVIEW); / * Các bản sau sau được sử dụng * /
glLoadIdentity (); / * in terms of World coordinates * /
glBegin (GL_POLYGON); / * draw a filled polygon * /
glColor3f (1.0, 0.3, 0.2); / * draw in light red * /
glVertex2f (-C / 2, -C / 2); / * (x, y) * /
glVertex2f (C / 2, -C / 2); / * (x, y) * /
glVertex2f (C / 2, C / 2); / * (x, y) * /
glVertex2f (-C / 2, C / 2); / * (x, y) * /
glEnd ();
glFlush (); / * send all commands * /
}
void main (int argc, char ** argv)
{
glutInit (& argc, argv);
glutInitWindowSize (A, A); / * A x A pixel screen window * /
glutInitDisplayMode (GLUT_RGB | GLUT_SINGLE);
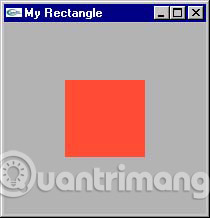
glutCreateWindow ("My Rectangle"); / * window title * /
glutDisplayFunc (display); / * tell OpenGL main loop what * /
myinit (); / * set attributes * /
glutMainLoop (); / * pass control to main loop * /
}
g. Now, click in the Dev-cpp editing window and then click Edit> Paste in its menu. The program will appear in the edit window.
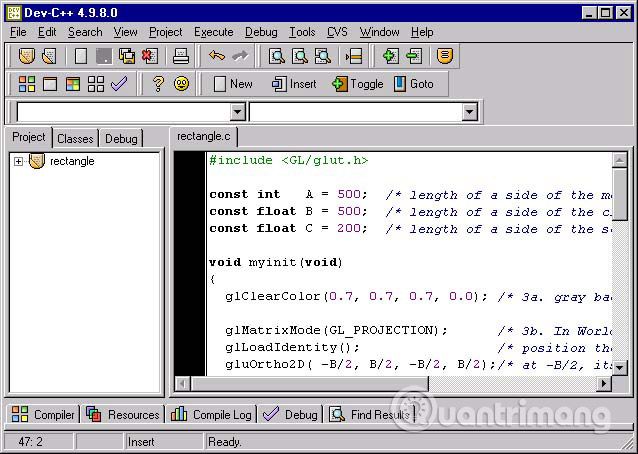
hour. Click File> Save . The file in your project directory will now contain the OpenGL program.
i. Let Dev-cpp know which library to link to. Click Project> Project Options .
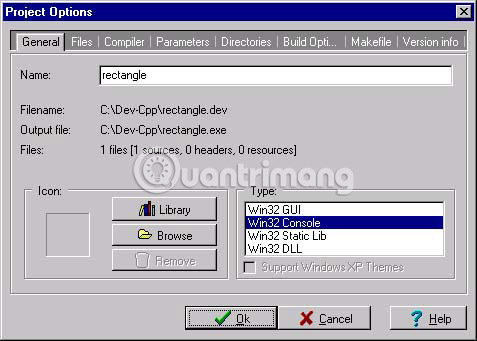
j. Now click "Parameters". Click the " Add Library or Object " button and navigate to the libraries that will be added. They are found in C: Dev-cpplib
- ./lib/libopengl32.a
- ./lib/libglu32.a
- ./lib/libglut32.a
Add them in that order. Note that the slash will appear in the Unix style "/" and not the "DOS type".
When you have finished adding these 3 libraries, you will see:
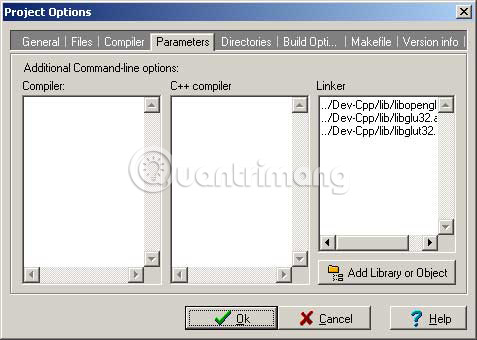
The exact template has the form "././ ." you see depends on the complexity of the directory structure in which your source file resides.
Click OK.
k. Click Execute> Compile and Run . The program will be compiled, linked and run:
If everything doesn't work (very popular), click the " Compile Log " tab to find some confusing error messages. If you see an error like this, it means you made the wrong order when adding libraries to the project:

Try to edit the library list or start over.
You have now completed the steps.
Good luck!
See more:
- Installation instructions C
- Web programming in C ++
- Multithread in C ++
- Instructions for installing Vietnamese for IDM for all versions
- Instructions for installing Node.js
- Instructions for installing screensavers on Windows
- Instructions for installing SPSS on your computer are simple and easy to follow
- Instructions for downloading and installing AutoCAD 2021 on PC and Laptop computers
- Instructions for installing the Window 10X emulator on Window 10
- Detailed instructions on how to install Windows 7 for beginners
- Instructions for installing Minecraft texture packs
- Cursor and Array in C ++
- C ++ exercises have solutions (sample code) for variables, data types, and operators
- Operator overload and Load overlap in C ++
- Cursor this in C ++
- Dynamic memory in C ++
- Preprocessor in C ++
- How to install C-Free to program C/C++ on Windows
- Overload the one-seat operator in C ++
- Web programming in C ++
- Variable type in C / C ++


-
 Create an AI voiceover for poems and inspiring stories.
-
Instructions on creating a Froggy Jumps game on Educaplay
-
How to make a piano game using Scratch
-
Instructions on how to add ChatGPT to Google Sheets
-
How to rotate any page horizontally in Word
-
How to install SPSS on a MacBook: A step-by-step guide.
 Create an AI voiceover for poems and inspiring stories.
 Instructions on creating a Froggy Jumps game on Educaplay
 How to make a piano game using Scratch
 Instructions on how to add ChatGPT to Google Sheets
 How to rotate any page horizontally in Word
 How to install SPSS on a MacBook: A step-by-step guide.