Instructions for fixing 'Your PC/Device needs to be repaired' error
In the process of using a Windows computer, you've probably encountered a lot of annoying problems related to system errors, right? Yes, and one of them is the 'Your PC/ Device needs to be repaired' error.
This error will make your computer unbootable. That causes a lot of inconvenience for users. That's why today I will show you some ways to fix the 'Your PC/Device needs to be repaired' error most effectively.
#first. The cause of the error 'Your PC/Device needs to be repaired'
This is a classic error on the Windows operating system that many people have encountered, there may be many different error codes such as 0x0000098, 0xc000000f, 0xc0000034, 0xc0000225, 0xc000014C, etc.
However, all of them have the main cause because the BCD (Boot Configuration Data) file is lost or has a problem that makes it unable to read the data properly.
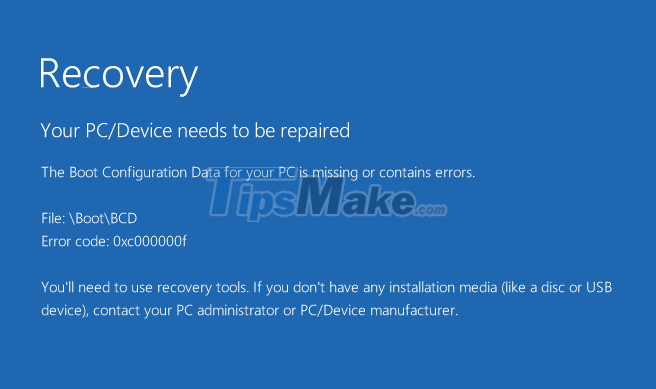
Causes of the error of the BCD file in the system:
- You accidentally deleted by mistake (maybe without knowing, by accident or someone intentionally)
- Software or hardware conflicts can also cause the above error
- The virus destroys the BCD file, causing it to be corrupted or lost, or not working properly.
In general, the causes of the above problem are many. However, if the problem persists after you've tried to fix it, you need to find out what caused the BCD file to fail.
And here are some ways to fix the 'Your PC/Device needs to be repaired' error.
#2. Use the Startup Repair feature
When suffering from the above problem, you cannot use the Recovery Mode feature available on Windows. That's why we must use the Windows installation USB to be able to use the Recovery Mode feature available on the Windows installer.
NOTE: First, create a Windows installation USB first, but it is important to create a Windows installation USB similar to the current Windows version of your computer. For example, if your computer is using Windows 10 64bit, create a USB containing the Windows 10 64bit installer. OK !
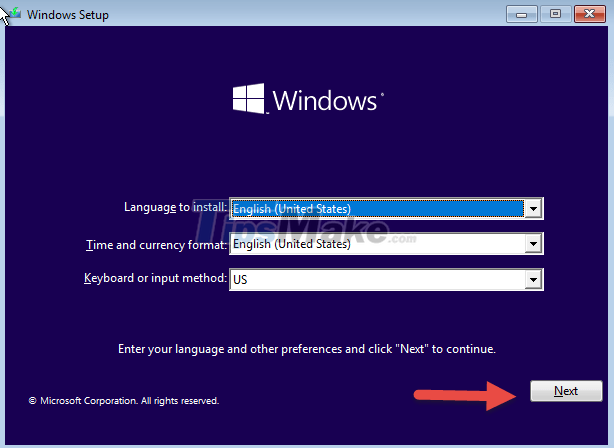
+ Step 1: After you have the Windows installation USB, then boot into the Windows installation USB. How to boot, please review this article to know how to enter BOOT MENU!
=> When the Windows installation dialog box appears => click Next.
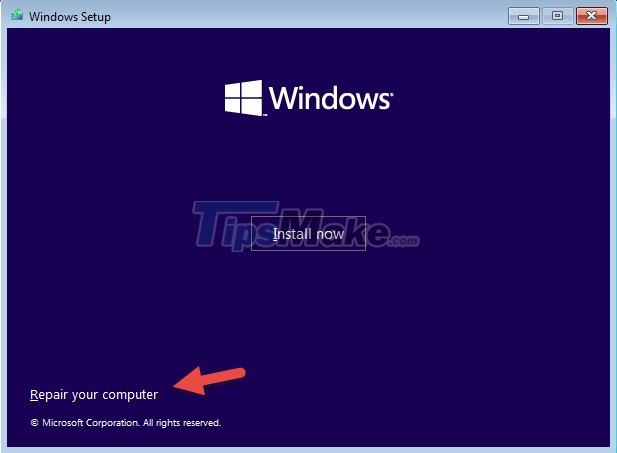
+ Step 2: Then you choose Repair your computer.
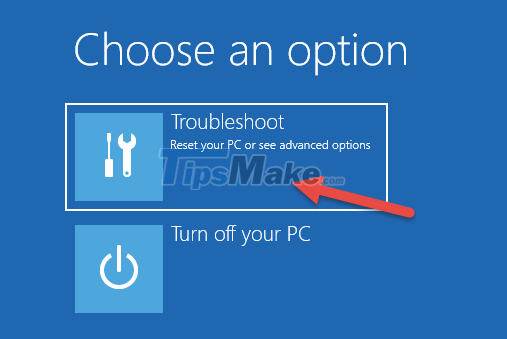
+ Step 3: Wait for a while, after the new screen appears, continue to click on the Troubleshoot feature.
+ Step 4: Next click on Startup Repair.
NOTE: If you have previously created a backup file with the System Image feature, you can use the System Image Recovery feature to restore it.
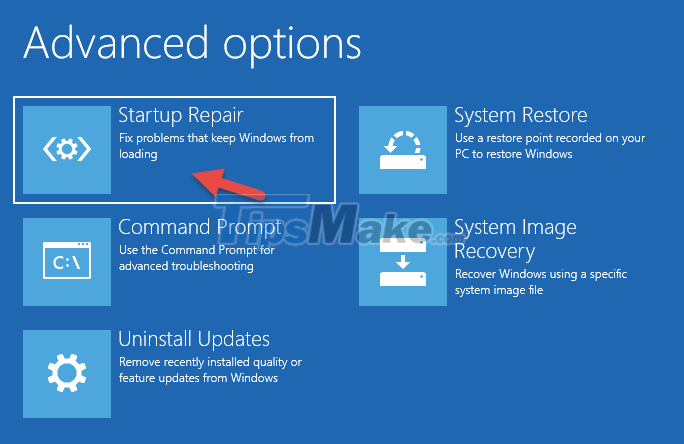
Step 5: Now you just have to wait. If successful, the computer will automatically restart and enter Windows normally.
#3. Using Commands in Command Prompt (CMD)
If using the Startup Repair feature cannot fix the above error, you can use the Command Prompt command in Recovery Mode to fix the error. This way will have a higher success rate.
+ Step 1: You repeat Step 1 -> 3 in part #2 above.
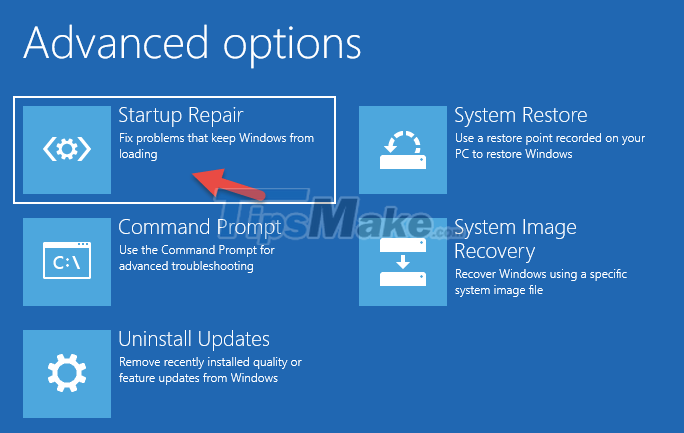
+ Step 2: Next, instead of choosing Startup Repair, click Command Prompt to open the CMD command line window.

+ Step 3: When the Command Prompt window appears, locate and navigate to your system partition, then enter the following commands (after each command press Enter):
For example, the system drive is drive C, then enter the command C: => then press Enter.
Continue to enter the commands below in turn.
bootrec / fixmbr
bootrec / fixboot
bootrec / scanos
bootrec / rebuildbcd
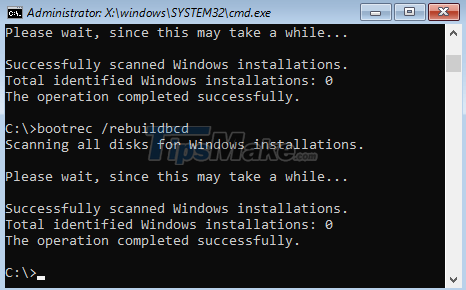
Once done, restart your computer and wait for the results.
#4. Using the System File Checker tool
If the above methods do not work, you can use SFC (System File Checker) to fix the above error. This is a tool that allows to scan, check and fix all system files. Therefore, maybe the above tool will be useful in this case.
+ Step 1: You reopen the CMD window as instructed in part #3.
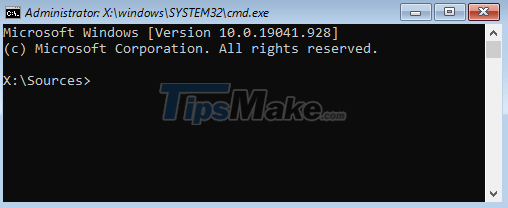
+ Step 2: Then locate and navigate to the system partition (usually C drive) => then enter the command below and press Enter to launch:
sfc /scannow
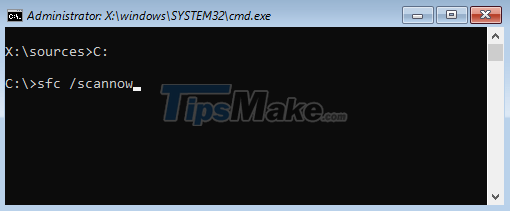
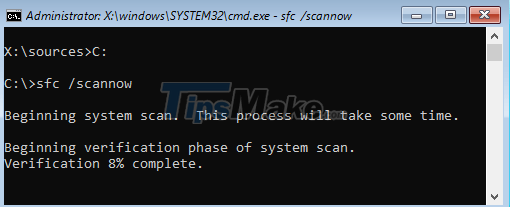
+ Step 3: Now you just have to wait, after it's done, restart your computer and see the results.
#5. Reinstall Windows
If all of the above methods do not work, consider reinstalling Windows for stability. Because sometimes it takes longer to fix an error than to reinstall Windows.
But before you decide to install Windows, please copy back the important files on the Desktop and the files in the Download, Video, Picture folder. if any. To do this, please refer to the article:
#6. Epilogue
Ok, so I have shown you some effective ways to fix the 'Your PC/Device needs to be repaired' error on your Windows computer.
Hope this article will be useful to you. These are just the ways that I have collected and applied successfully, so there may be shortcomings. If you know any other cool ways, don't forget to share them so we can learn more together. Good luck!