Instructions for installing and using n8n on Windows 11
n8n is more than just an automation tool – it's a super open-source assistant that saves you hours every day..
n8n is a powerful open-source workflow automation tool (similar to Zapier but self-hosted and free). You can connect hundreds of apps ( Google Sheets , Telegram , HTTP API, AI , etc.) with minimal coding.
This article from TipsMake.com will guide you on how to install a local application on Windows 11 using Docker Desktop (the most recommended method due to its stability, ease of management, and no data loss upon restart).
How to install n8n via Docker Desktop
Part 1: Preparing and Installing Docker Desktop
- System requirements : Windows 11 (Pro/Home are both fine), RAM ≥ 4GB (8GB+ recommended), internet connection.
- Install Docker Desktop (if you don't already have it):
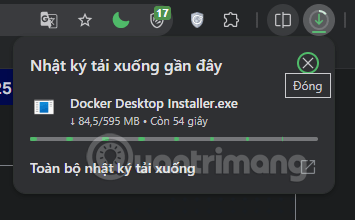
- Download from the official website: https://www.docker.com/products/docker-desktop/
- Run the .exe file with administrator privileges .
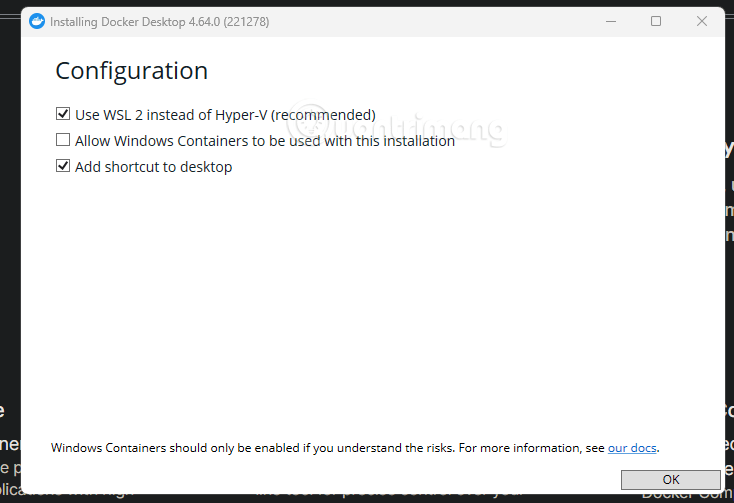
During the installation process:
Check the box for " Use WSL 2 instead of Hyper-V" (the default backend, best for Windows).
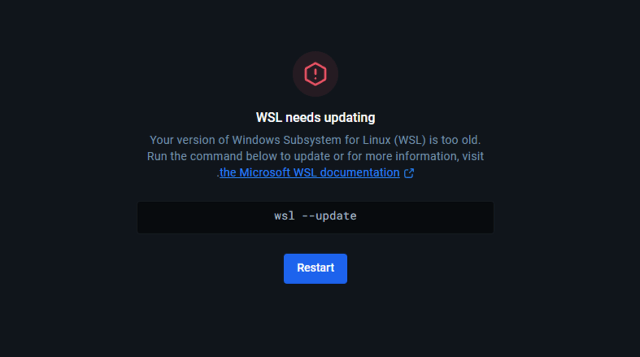
If prompted to update WSL , accept and restart your computer if necessary.
After installation: Open Docker Desktop → wait for the whale icon in the system tray to turn green (Engine running).
Fix any WSL errors you encounter (usually the first time):
Step 1: When you restart and run Docker Desktop, it will usually prompt you to update WSL. This is a common situation after installing Docker Desktop. To fix this, copy the `wsl --update` command.
Step 2: Next, open PowerShell (Run as administrator) by clicking Search and typing PowerShell:
Paste wsl -- updateand press Enter.

- This command will download and install the latest WSL kernel (this may take 1-2 minutes and requires an internet connection).
- If successful: You will see a message like "The operation completed successfully" or "Updating WSL. done".
- If it shows the error "already up to date" → it's still good, meaning it's already recent.
- If you get the error "Class not registered" or similar → try this alternative command:
PowerShell
wsl -- update -- web - download Step 3: Restart your computer if prompted.
- In many cases, after an update, it will require a Windows restart. Always restart your Windows system to apply the changes.
Step 4: Continue installing Docker Desktop
- After restarting (if necessary), reopen the Docker Desktop installer (the .exe file you downloaded).
- Continue the installation process (if it was interrupted, it will resume).
- Check the box for " Use WSL 2 instead of Hyper-V" if prompted (this is the default and best backend).
- Installation complete → Docker Desktop will start.
Step 5: Check if WSL is working correctly. After that, open PowerShell (admin) and run:
wsl -- version→ You should see a version around 2.1.x or newer (e.g., 2.2.4 or higher, depending on the time of 2026).
Part 2: Installing and running n8n using Docker Desktop GUI (no need to type many commands)
Open Docker Desktop and switch to the Images tab (on the left).

In the search box, type n8n or n8nio/n8n → Press Enter.
Find the n8nio/n8n image (tag latest ) → click Pull if it's not already there (download ~2GB, takes 2-10 minutes depending on your internet connection).

After pulling the image → click the Run (or play ▶️) button on that image.
In the "Run a new container" window, fill in the information and select " Optional settings ".

Container name : Enter n8n (easy to manage).
Ports :
- Host port: 5678
- Container port: 5678 (self-map).
Volumes (to save workflows permanently):
- Create the volume first: Tab Volumes → Create volume → name n8n_data → Create.
- To go back: Click + → Select Volume → Source: n8n_data → Container path: /home/node/.n8n .
- (Alternatively, use a local folder: Host path → select a folder like C:UsersMinhn8n_data).
Environment variables (added for Vietnam timezone and security):
Click + add each one:
- TZ → Asia/Ho_Chi_Minh
- GENERIC_TIMEZONE → Asia/Ho_Chi_Minh
- N8N_ENFORCE_SETTINGS_FILE_PERMISSIONS → true
- N8N_RUNNERS_ENABLED → true
- (Security options: N8N_BASIC_AUTH_ACTIVE → true, N8N_BASIC_AUTH_USER → admin, N8N_BASIC_AUTH_PASSWORD → strong password).
Once you have finished filling in the information in Run a new container, select Run.

Go back to the Containers tab → you will see container n8n status Running (green).
Part 3: Accessing and setting up n8n for the first time
- Open your browser (Chrome/Edge): Type http://localhost:5678
- First time: Owner account setup page:
- Enter your email address (a real email address for recovery).
- Set a strong password .
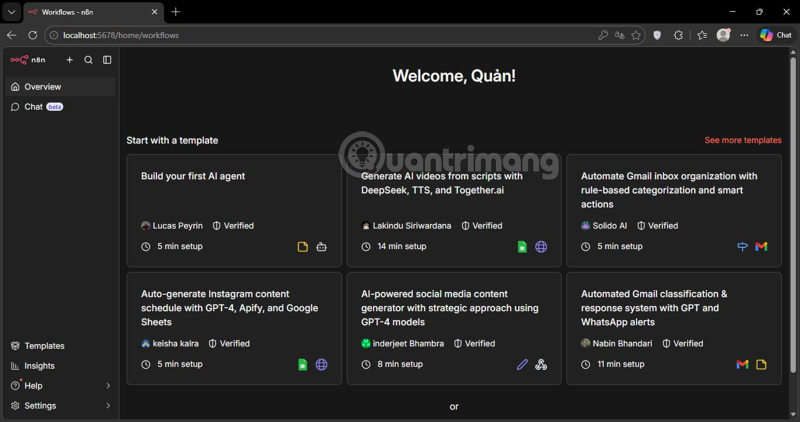
- Click Continue → skip onboarding if you wish.
- Go to dashboard: You now have n8n running locally!
If you cannot open localhost:5678 :
- Check if the container is running → Restart if it's exited.
- Temporarily turn off Windows Firewall (Settings > Windows Security > Firewall > Turn off Private/Public).
- Change the port: Stop container → Remove → Run again with Host port 5679 → access localhost:5679.
- View Logs in Docker Desktop (Containers → click container → Logs) to debug.
Part 4: Basic n8n Usage
- Create your first workflow :
- Click + New (or Add workflow ).
- Drag a node using Manual triggering or Schedule Triggering .
- Connecting to other nodes: For example, HTTP Request (calling APIs), Google Sheets (adding data), Telegram (sending messages), AI Agent (using Grok/OpenAI).
- Click Execute Workflow to test → if the output is green, it's successful.
- Save and activate :
- Click Save → turn on Active (toggle at the top) to make the workflow run automatically.
- Some common nodes :
- Trigger: Cron/Schedule, Webhook, Manual.
- Action: Set (adjust data), HTTP Request, Email Send, Code (JS/Python).
- Apps: Google, Telegram, Discord, Notion, Airtable, etc. (hundreds of built-in apps).
Part 5: Management and Improvement
- Stop/Start : Containers tab → Stop/Start container.
- Update n8n : Tab Images → Pull back n8nio/n8n:latest → Stop/Remove old container → Run new version.
- Warning: Python runner (often seen in logs): This is normal if you're not using Python code nodes. If you need Python, set up external runners (I can provide separate instructions if you'd like).
- Backup : Back up folder/volume n8n_data (contains workflow, credentials).
- Advanced production : Use docker-compose.yml (from github.com/n8n-io/n8n-hosting), replace SQLite with PostgreSQL, HTTPS (Nginx/Reverse proxy), and basic authentication.
n8n is more than just an automation tool – it's an open-source "super assistant" that saves you hours every day by transforming repetitive tasks into smart, secure, and fully controllable workflows. With its increasingly powerful AI integration, n8n is becoming the top choice for anyone who wants to "work smarter" rather than "work harder."