Improve efficiency with Services in Mac 10.6
What has changed with the release of OS X 10.6 is that Apple has now made the Services menu a context menu.
Snow Leopard, OS X 10.6, has been released, how many of you really miss using the Services menu for your essential tasks?
Services are rarely used but it is an extremely useful feature of Mac OS X in previous versions. Now, however, with the release of 10.6, this feature has been significantly improved and is very useful for use by ordinary users.
What has changed with the release of OS X 10.6 is that Apple has now made the Services menu a context menu. Therefore, for example, if you have a line of text selected in TextEdit, then only the services that are working with the selected text sample will exist.
Similarly, if you select a file in the Finder, then only useful services will be displayed.
Another useful thing that Apple has done is that they have added support for Automator service creation, an automated workflow utility included in OS X. Therefore creating services also become easier.
In this article, I will show you a simple process of creating your own service using Automator, password protection for any DPF file you choose in the Finder, then Allows you to email them to friends.
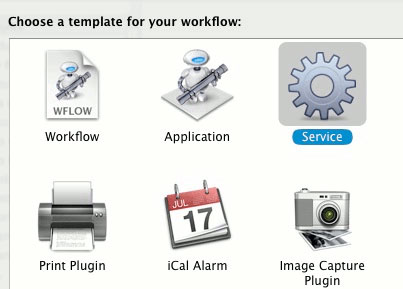
1. Launch Automator from the Applications folder and select the Services template when required.
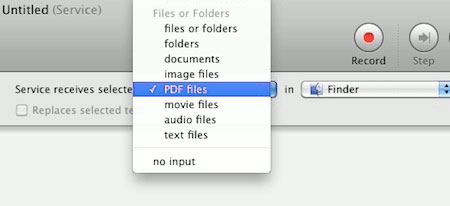
2. From the right of the Automator window, select the content to be performed that the services will use. We select PDF files from the first menu that appears and Finder from the second menu.
3. At this point, you must select the workflow for the reasonable service. The categorized workflow in the Library on the left of the slider in the Automator window follows the type of service they provide.
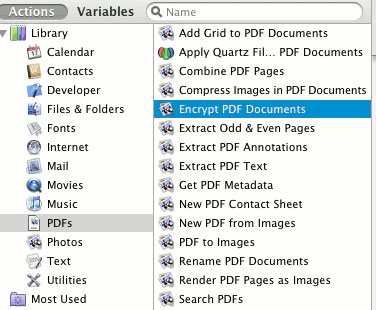
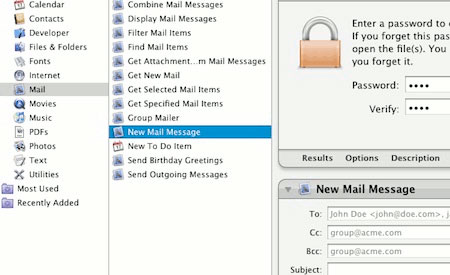
Double-click the Encrypt PDF Documents workflow and it will appear in the right sidebar, as part of the service you are creating.
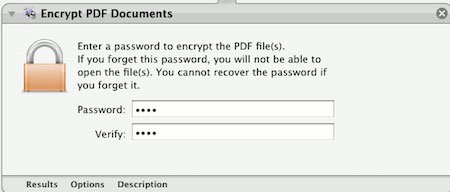
Enter the password you want the PDF document to be encrypted with it.
4. Here, your service is able to retrieve the DPF document and encrypt it with the password you provided. The second step is to email this PDF file. To do that, we need to go to another workflow from the Library.
Under Library go to Mail , double-click the New Mail Message workflow , then it will be added to your service.
If you have multiple accounts defined in Mail.app , select an account that you want to use for this service, or allow the default account Default Account to be used for all email sent. by this service.
What Automator does now is to use the first workflow and encrypt the selected PDF file in the Finder, then move that document to the second workflow. The New Mail Message workflow will create a new email with this document attached and wait for you to enter the address in the To, CC or Bcc fields and send the email.
Save the service by the descriptive name and Automator will automatically register it with the Finder.
You can test by selecting a PDF file in the Finder and calling the Service from the Service menu in the Finder.
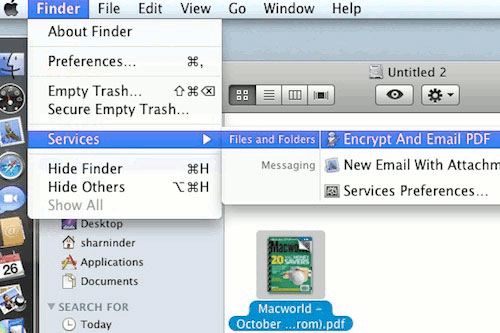
Once you click on the Encrypt and Email PDF service, the selected PDF file will be encrypted with the password you selected and Mail.app will automatically be launched with encrypted PDF as an attachment.
Was this article helpful?
Your feedback helps us improve.
Related Articles
 What is Efficiency Mode on Windows 11? How to enable Efficiency Mode.2 minutes read
 The Impact of FinTech Innovations on Users and Industries6 minutes read
 How to Improve Typing Speed15 minutes read
 How To Improve Your Efficiency And Get More Work Done6 minutes read
 Effective Ways You Can Use To Improve Efficiency and Productivity In The Office6 minutes read
 How to turn off Efficiency Mode on Chrome2 minutes read
Reader Comments 0
Sign in with email or Google to join the discussion.