Table of Contents
This guide explains how to view Computer Configuration, with clear steps, practical tips, and important checks before you begin.

In the article below, TipsMake. com provides readers with basic ways to view computer configuration. Invite you to consult.
1. Check the system with Computer Properties
First, right-click My Computer / Computer / This PC and select Properties .

Here, you can view the basic information of the computer such as Supported operating systems (Windows Edition), CPU (Processor), Ram, computer activation status.

2. Use the dxdiag command
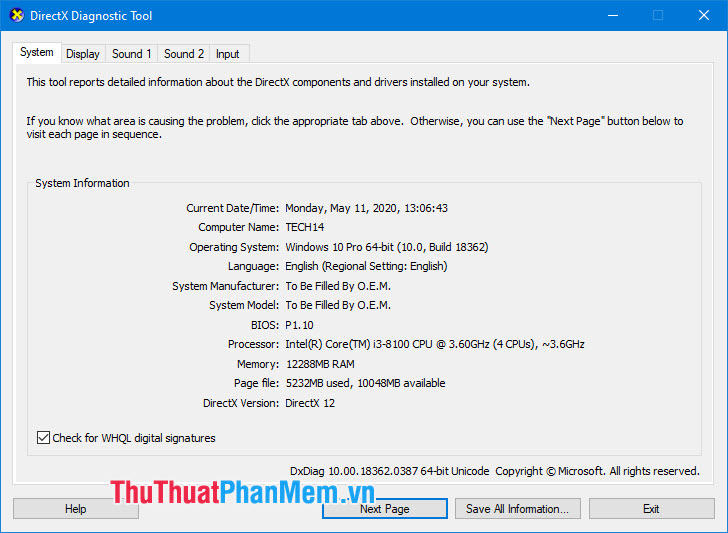
The dxdiag command is one of the most complete and basic methods of checking computer configuration. To check the configuration with this command, you must open the dialog box Run with the shortcut Windows + R . Next, enter the command dxdiag and click OK .

Then, the DirectX Diagnostic Tool dialog box will show you basic information about the computer such as CPU, RAM, Supported operating systems in the System section.
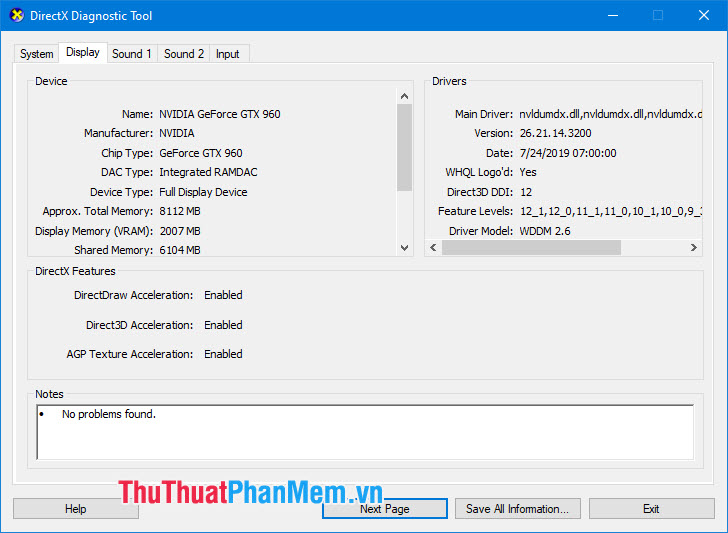
In the Display section will show you the parameters of the video card ( GPU ) being used on the computer.
3. Use the msinfo32 command
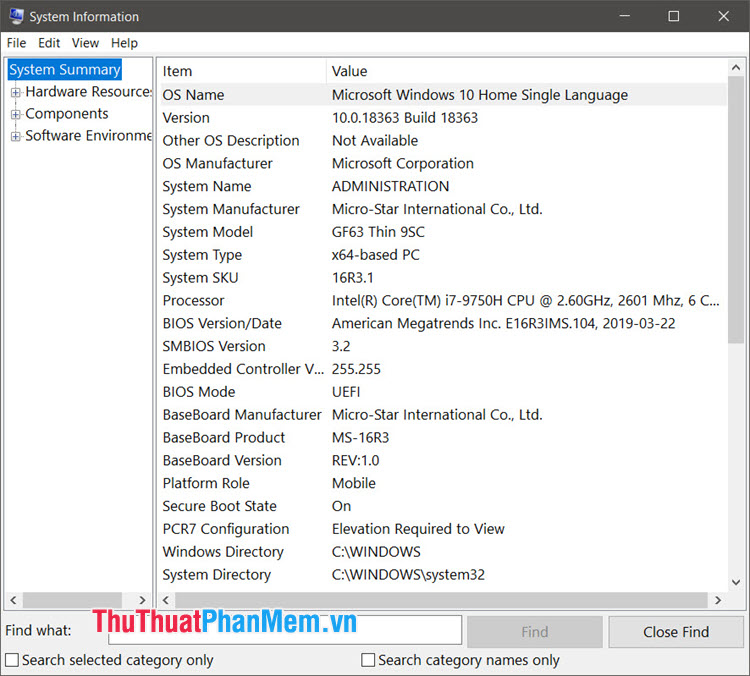
Compared to the dxdiag command, this command helps users see more in-depth information about hardware in the Supported operating systems. In addition, you can view the status of how utilities on the CPU such as Hyper-V, Virtualization . along with some other in-depth information.
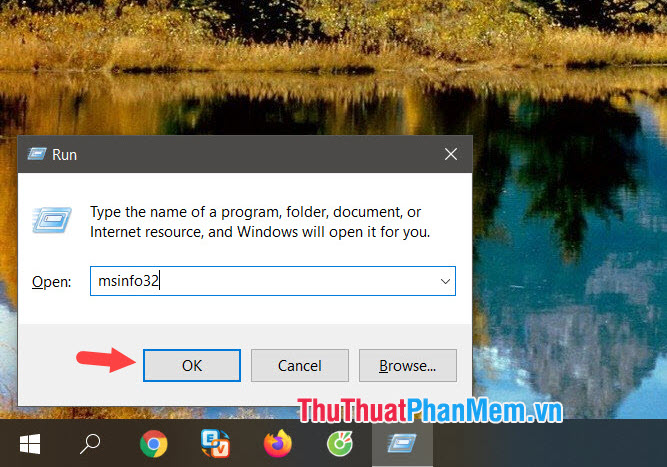
First, run the Run tool with the Windows + R key combination. Next, enter the command msinfo32 and press OK .
After the System Information dialog appears, you can view the details of the components on the right side of the screen. On the left corner of the screen is where you browse the catalog of hardware, computer software to view.
4. Use CPU-Z software
First, visit CPU-Z homepage to download and install.
Link: https://www. cpuid. com/softwares/cpu-z. html
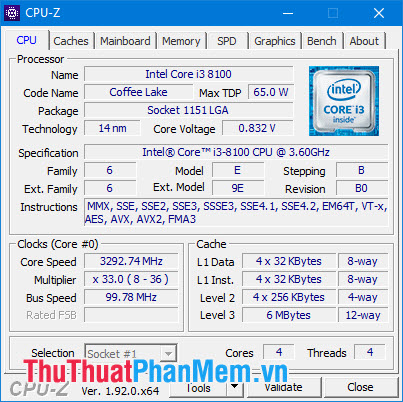
After you open the CPU - Z, we can view the parameters of your computer fully and intuitively. The first is the parameters of CPU such as the number of cores (Cores), the number of threads (Thread), the clock (Clocks).
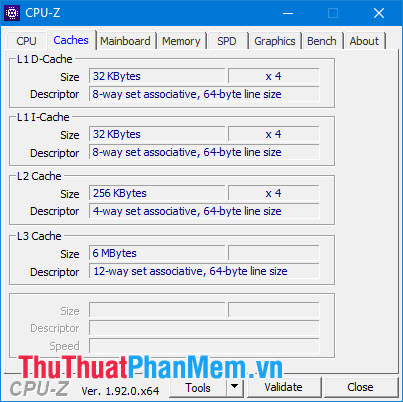
- The Cache section contains caching parameters on the CPU such as L1, L2, L3 cache .
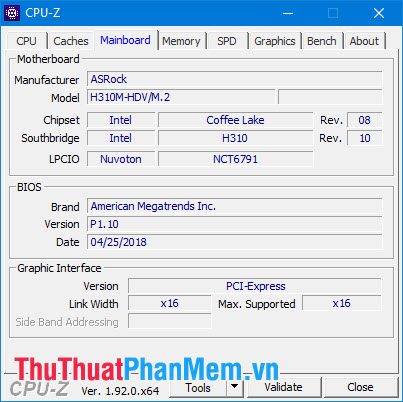
- The Mainboard section will give you information about the type of mainboard you are using such as mainboard code, Chipset, brand name.
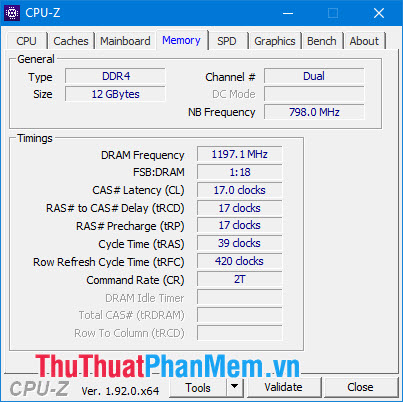
- Regarding Memory, we can see the general parameters of RAM on the computer such as type of RAM (Type), actual RAM capacity (Size), RAM clock (DRAM Frequency) and many other parameters.
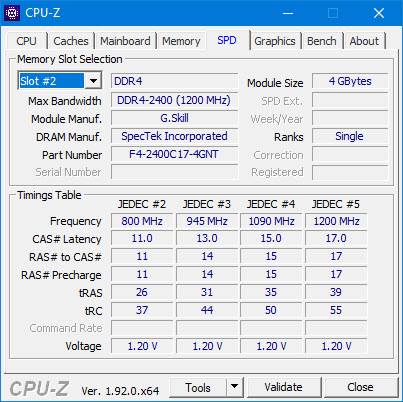
- The SPD section will go into detail about each RAM module on your computer. As shown below is the first RAM detail ( Slot # 1) on your computer.
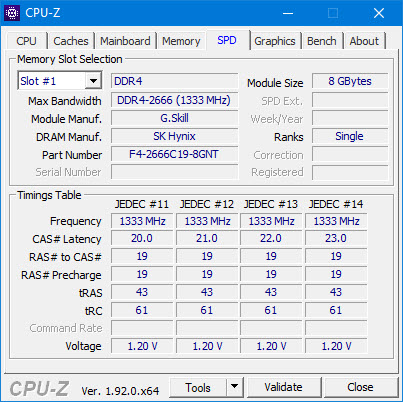
And the second RAM parameter (Slot # 2) on the computer:
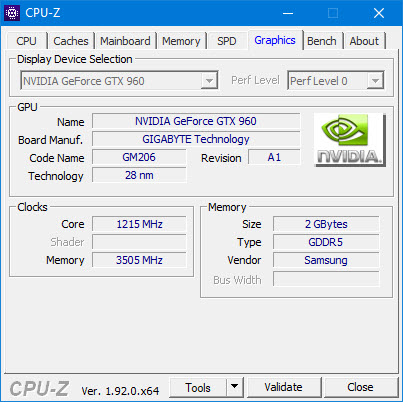
- For Graphics section, we can view information on the graphics card on the computer (GPU) such as GPU code ( Name ), the manufacturer name ( Board Manuf. ), The amount of GPU memory ( Memory ), pulse beat ( Clocks ).
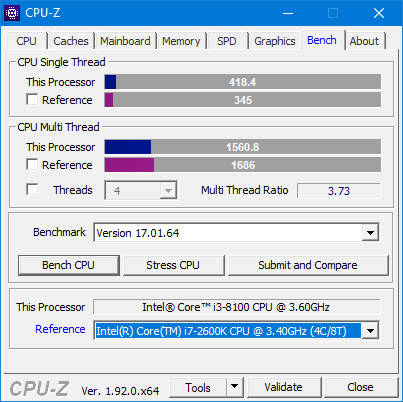
- And Bench section with the purpose of testing single-thread performance ( CPU Single Thread ), Multi-threaded ( CPU Multi Thread ) on your CPU with available tests. You can compare performance with some other typical CPU models in the Reference section. In addition, we can test "CPU heavy" CPU performance with the CPU Stress feature.
5. Using Piriform Speccy software
First, you need to download and install the Piriform Speccy application at https://www. ccleaner. com/speccy/download/standard
After installation, open the software. On the Summary page, you will see basic parameters of your computer hardware such as Supported operating systems, CPU, RAM, mainboard, GPU, Hard Disk. In addition, you can also check the temperature of the CPU components, mainboard, hard drive on the computer very conveniently.
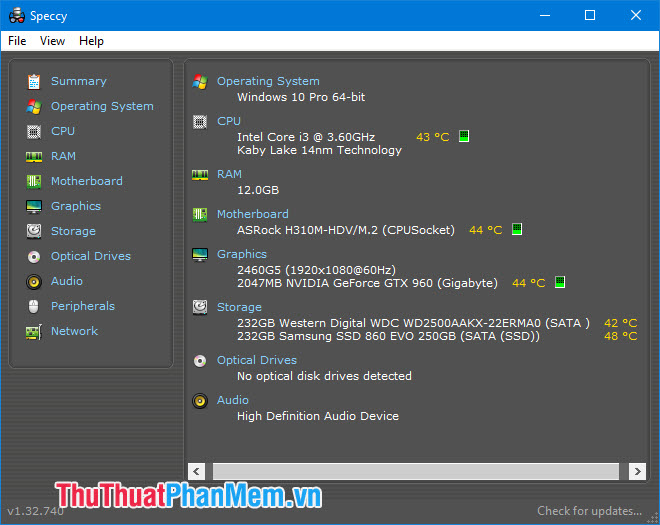
With the ways to check the computer on the article, we can hold information about the hardware on the computer to use software, games suitable to the machine configuration or to upgrade the hardware in the future. hybrid.
FAQ
What should I know about View Computer Configuration?
Focus on the key features, requirements, limitations, and practical use cases explained in this guide.
How do I get the best results with View Computer Configuration?
Follow the recommended steps, use current software or information, confirm compatibility, and review settings before major changes.
Are there any risks or limitations?
Potential limitations depend on compatibility, data quality, cost, privacy, support, and how the product or method is used.
Related Articles
 How to View Computer Configuration Information3 minutes read
 The Quickest and Simplest Way to View Your PC's Configuration Using CPU-Z7 minutes read
 Guide 3 Ways to Check Configuration, Computer Information Fast and Simple4 minutes read
 How to Check Computer Configuration: Step-by-Step Guide6 minutes read
 How to Check the Computer Configuration with CPU-Z, View Computer Hardware6 minutes read
 View iPhone Configuration, Check iPhone Hardware Information5 minutes read
Reader Comments 0
Sign in with email or Google to join the discussion.