How to upgrade from Debian 11 'Bullseye' to Debian 12 'Bookworm'
If you are already using Debian 11 Bullseye, you can directly upgrade to Debian 12 Bookworm from the terminal..
The latest Debian 12 release is finally available, providing many new options for the end user. Debian is known for its stability and diversity.
If you are already using Debian 11 "Bullseye", you can directly upgrade to Debian 12 "Bookworm" from the terminal. Here's how to do it.
Upgrade from Debian 11 to Debian 12 via CLI
You can use your existing Debian 11 installation to upgrade to the latest version. Follow the steps below to get started:
Step 1: Update existing packages
If you've been using Debian for a while, you probably already know the update/upgrade commands. Although there is a difference between update and upgrade commands, you can group them together in one command to update software packages easily:
sudo apt update && sudo apt upgrade -y
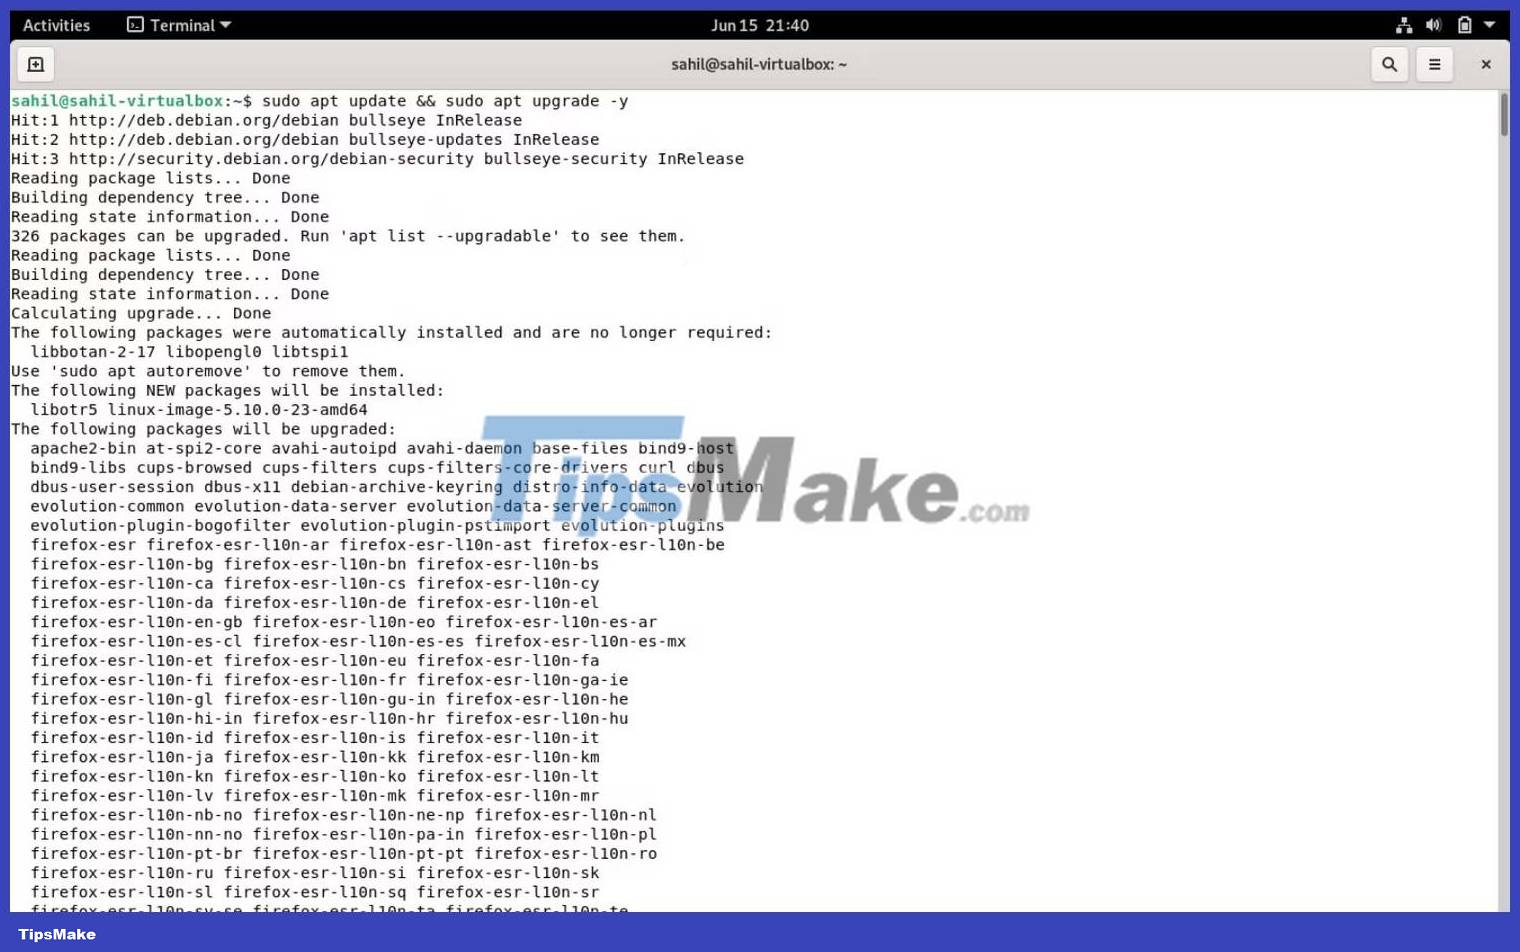
Once the update is complete, remove unnecessary packages before upgrading to Debian 12 with:
sudo apt --purge autoremoveStep 2: Edit the files sources.list
With installed packages updated and upgraded, you need to edit the sources.list file to update the details of the package sources. Open the source file with your favorite text editor:
sudo nano /etc/apt/sources.listNext, replace all instances of "bullseye" in the file with "bookworm".
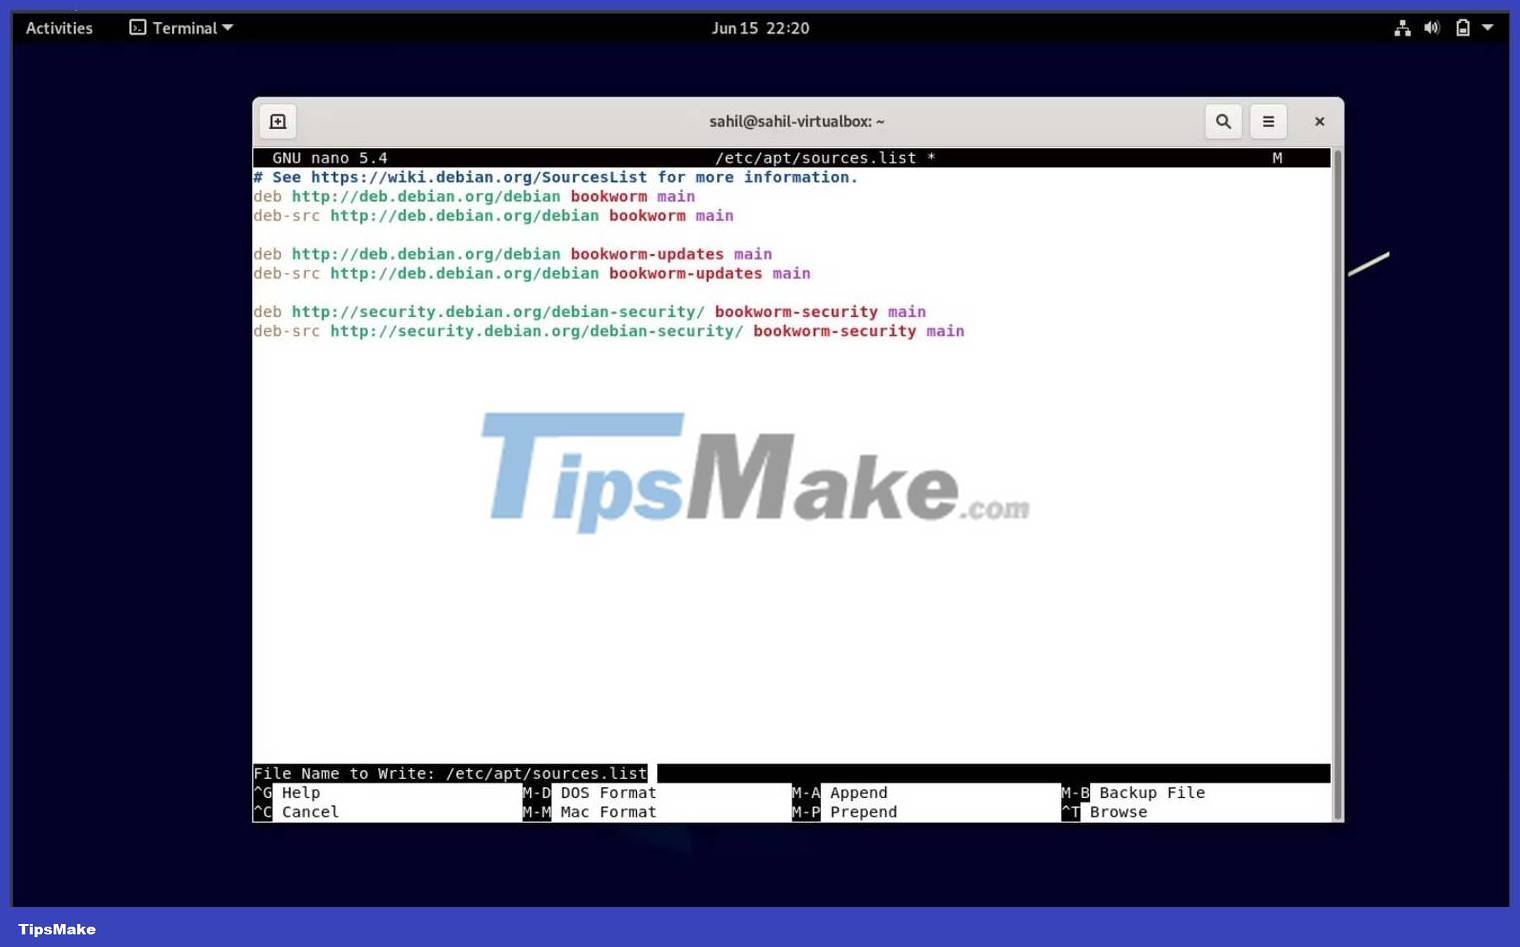
If you are using Nano, save the changes by pressing Ctrl + O . Then exit the editor by pressing Ctrl + X .
Step 3: Update installed packages on Debian
Now that you have the sources pointing to the Debian 12 repositories, it's time to update your packages. You can do so with the apt update command:
sudo apt updateOnce the system updates, it's time to upgrade your existing packages without adding any new packages to the upgrade process:
sudo apt upgrade --without-new-pkgs -y
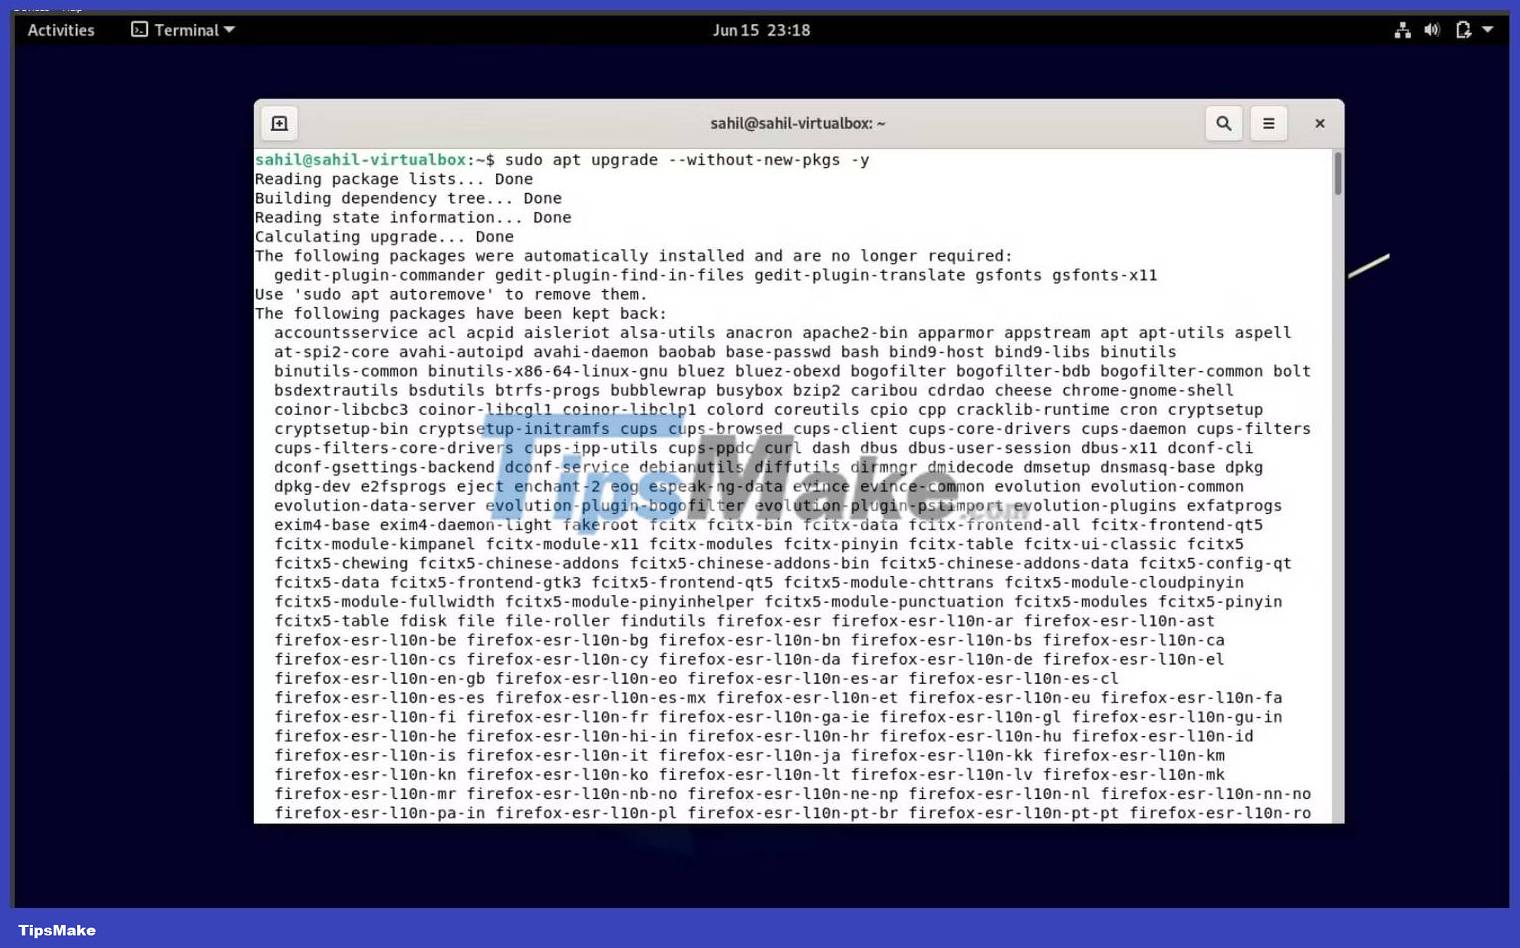
During the update process, follow the on-screen instructions and provide input if necessary.
Step 4: Perform a full system upgrade
With all the updates in place, it's time for the final upgrade to Debian 12 "Bookworm". Run the following command to upgrade your system to the latest Debian version:
sudo apt full-upgrade -y

After executing the full upgrade command, you must enter your sudo password. The upgrade process also takes time, so you should sit back and wait until the system upgrades.
Step 5: Reboot into Debian 12
When the installation is complete, reboot the system with the reboot command or via the Restart button:
sudo rebootWhen the system reboots, you should see a login screen with the Debian 12 logo. Confirm the upgrade by checking the version number of the operating system with the lsb_release and cat commands:
lsb_release -d cat /etc/debian_version

Extra step: Remove unwanted packages
Once the Debian 12 upgrade is finally complete, you can remove any unwanted packages that may have been carried over from the previous OS installation with:
sudo apt --purge autoremove -y

Download and install Debian 12 via ISO image
There is another way to download and try Debian 12 if you are not already using Debian 11 Bullseye. You can download the official ISO image from Debian's website and install it directly on your machine or on a virtual machine if you want to try it out before installing.