How to turn off Protected View in Office 2013 to edit files
Protected View in Office 2013 is a protection feature that helps limit risks when opening files from the Internet or email. However, many users want to disable this mode to edit documents more easily. Let's learn how to quickly disable Protected View with Free Download..
Protected View helps protect users from malicious files but can be annoying when editing documents. Here's how to turn off Protected View in Office 2013 to work more efficiently.
Disable Protected View in Office 2013
Note: You can do the same on Office 2010.
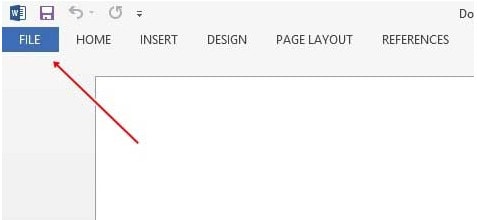
Step 1: Open Word 2013 and select the File Menu (Image below)
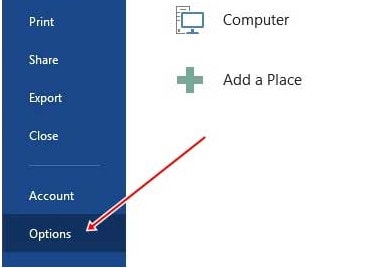
Step 2: Next select Options (Image below)
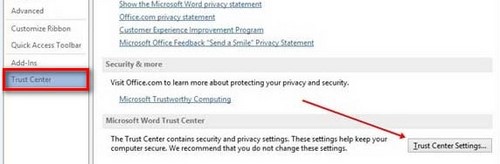
Step 3: Go to Trust Center and select "Trust Center Settings." (Image below)
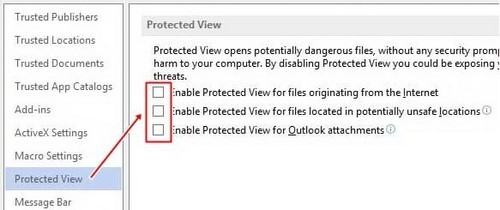
Step 4: Here you find "Protected View" (Image below)
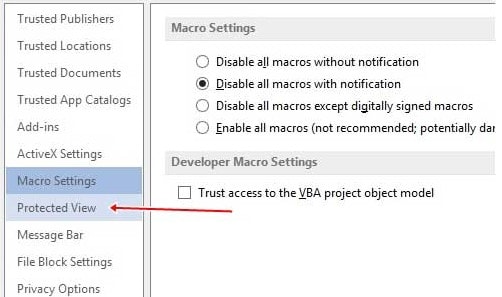
Step 5: Here you uncheck all 3 optional drives and then click OK to finish (Image below)
So, you have successfully disabled Protected View in Office 2013. This feature helps protect users from files that may contain malicious code from the Internet. However, if you often work with Word, Excel files downloaded from emails or trusted sources, disabling Protected View can make editing documents more convenient. In addition, you can also adjust other settings in the Trust Center of Office 2013 to enhance security and optimize the user experience.