How to turn a photo into a painting using the Generative Fill function in Photoshop
Whether you want to turn your photo into a watercolor, oil painting, or some other type of painting, here's how to create the effect using Generative Fill in Photoshop.
Step 1: Open your photo
Because the AI that generates the image always replaces the original image detail with new detail (even when applied at low intensity), the painting effect created with Generative Fill tends to work best on photos like landscapes and nature shots, where precise details are not as important as, say, someone's facial features.
So the tutorial will use this photo from Adobe Stock.
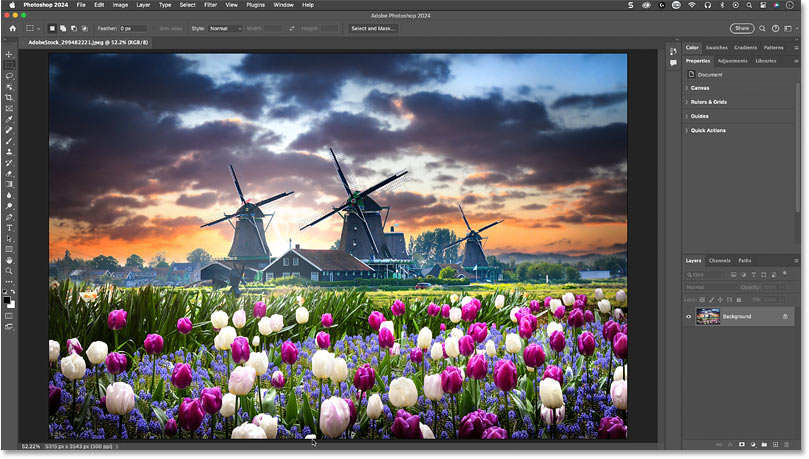
Step 2: Switch to Quick Mask mode
To apply a Generative Fill at less than 100% strength, you need to start in Photoshop's Quick Mask mode.
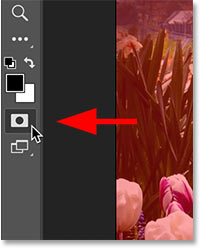
On the toolbar, click the Quick Mask icon (near the bottom, just below the color swatches). Or you can press the letter Q on your keyboard.

An easy way to know you're in Quick Mask mode is that the Background layer in the Layers panel is highlighted in red.

Step 3: Open Fill options
While Quick Mask mode is active, go to the Edit menu in the Menu bar and select Fill.
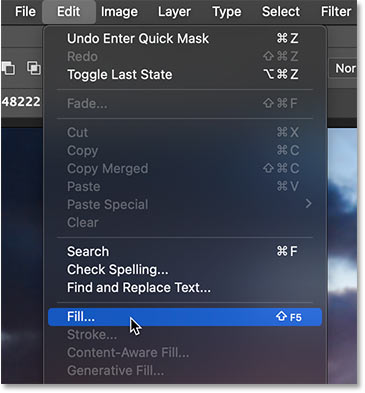
Step 4: Choose a dark gray fill color
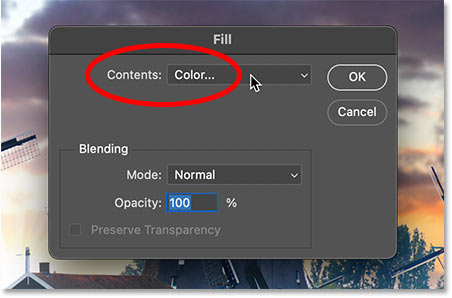
In the Fill dialog box, change the Contents option to Color.
Note that even if a Color is already selected, you still need to select it again for the Color Picker to open.
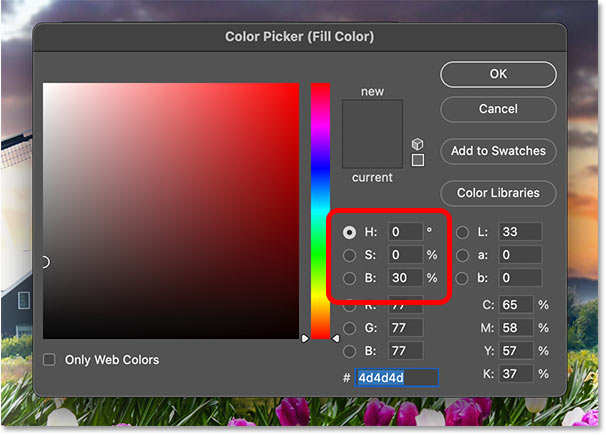
In the Color Picker, set the H (Hue) and S (Saturation) values to 0 to work with gray. Then set the B (Brightness) value to 30%.
Think of the luminance value as the AI intensity value. The higher the value, the more impact Generative Fill will have on the image (and the more the image will change). The lower the value, the more original detail will be preserved.
For this painting effect, 20 - 40% usually works best, and 30% tends to be the sweet spot. But you can always repeat these steps with different brightness values to compare results.
Step 5: Exit Quick Mask mode
Click OK to close Photoshop's Color Picker. Then click OK to close the Fill dialog box.
Since you're in Quick Mask mode, your image will appear with a red overlay (another easy way to tell you're in Quick Mask mode).
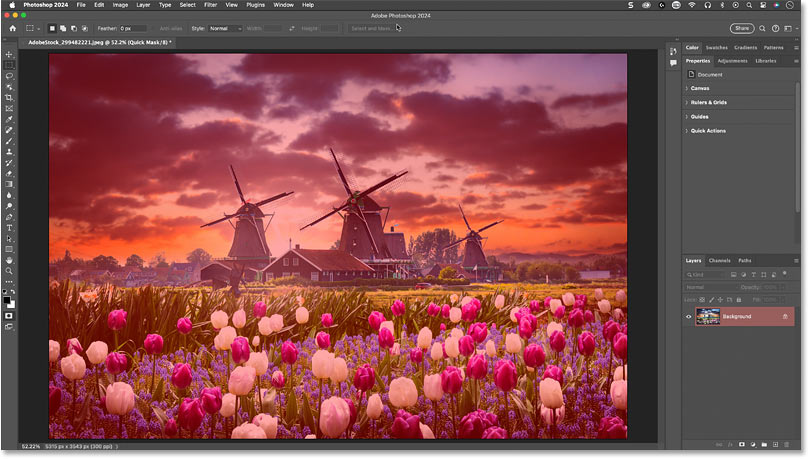
Exit Quick Mask mode by clicking the Quick Mask icon on the toolbar again or pressing Q on your keyboard.
Step 6: Select Generative Fill
In Photoshop's Contextual Task Bar, click Generative Fill.

Step 7: Enter the drawing prompt and click Generate
In the prompt box, type the type of painting you want to create. For example, we'll type watercolor painting.
Then click Generate.

Step 8: Choose the best result
You will need to wait a few seconds for Photoshop and Adobe Firefly to generate the results.
This is the original watercolor effect. Applying Generative Fill at just 30% strength allows for a lot of the original detail to be retained so that the flowers and windmills can still be distinguished.
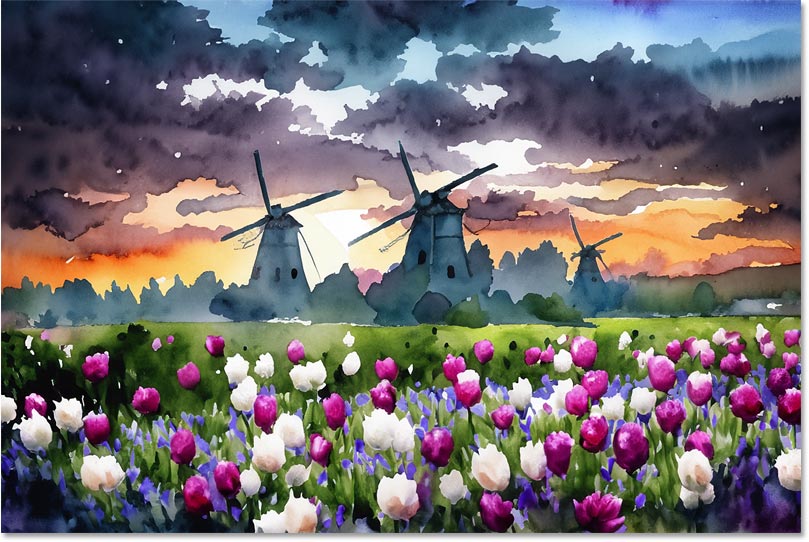
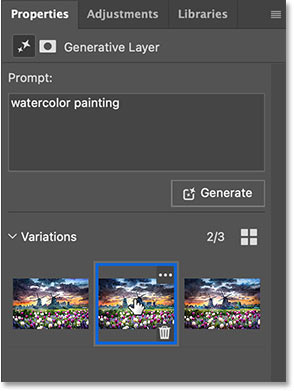
As usual with Generative Fill, you'll see three variations of the result in the Properties panel so you can choose the one you like best. Or click Generate to try again.
Step 9: Try different drawing styles
After creating the initial drawing effect, you can easily try out different drawing styles simply by changing the prompt in the Properties panel.
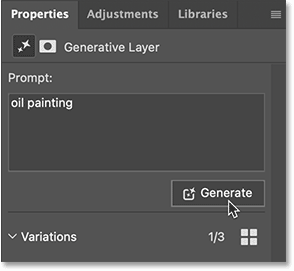
For example, change the prompt from watercolor to oil painting. Then click Generate.
This is my favorite of the 3 oil painting results.
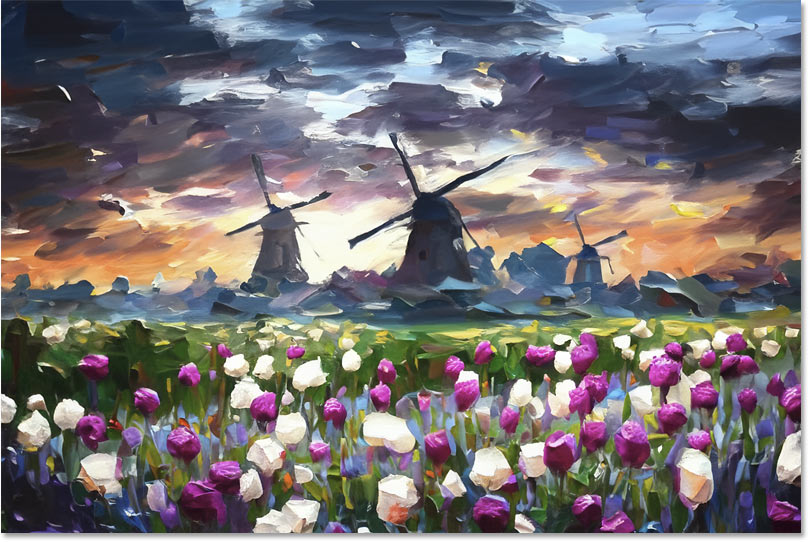
And that's it! That's how easy it is to turn a photo into a painting using Generative Fill in Photoshop.
You've just finished reading the article "How to turn a photo into a painting using the Generative Fill function in Photoshop" edited by the TipsMake team. You can save this article to your computer here to read later or print it out. We hope this article has provided you with many useful tech tips and tricks. You can search for similar articles on tips and guides. Thank you for reading and for following us regularly.
- How to use Photoshop's Generative Fill to change clothes for people in photos
- Photoshop for editing photos with text thanks to AI integration
- How to use Photoshop CS5 - Part 22: Introducing the Fill Content Aware feature
- Photoshop beta 25.0 supports creating AI images in Vietnamese
- How to fill color, fill background or object in Photoshop
- How to turn photos into drawings on WutaCam