Table of Contents
This guide explains how to take Screenshots of iPhone Phones, with clear steps, practical tips, and important checks before you begin.

Taking a screenshot on an iPhone is really simple. There are two main ways to take screenshots: using the hardware key (Home + Power) and the accessibility key (Assistive touch).
1. Take a screenshot using hard keys (Home + Power)
The way to shoot is very simple, all you need to do is press the Power button and the Home key at the same time, after the "click" sounds, your screenshot has been saved. With iPhone 3, 4 and 5, the Home button is at the top, iPhone line 6,7,8 is the Home button on the right side of the device.
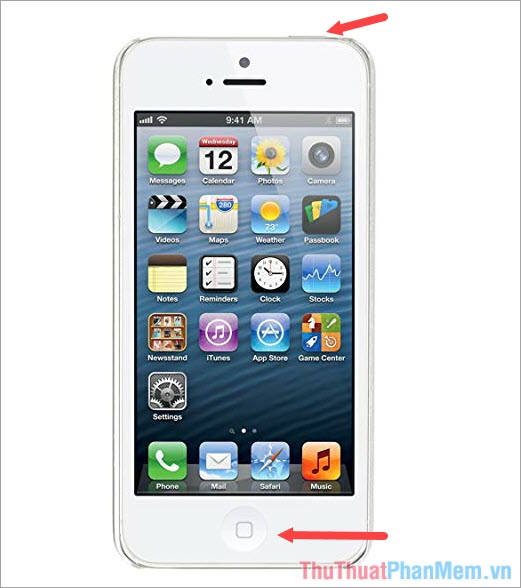
How to take screenshots on iPhone line 3, 4, 5
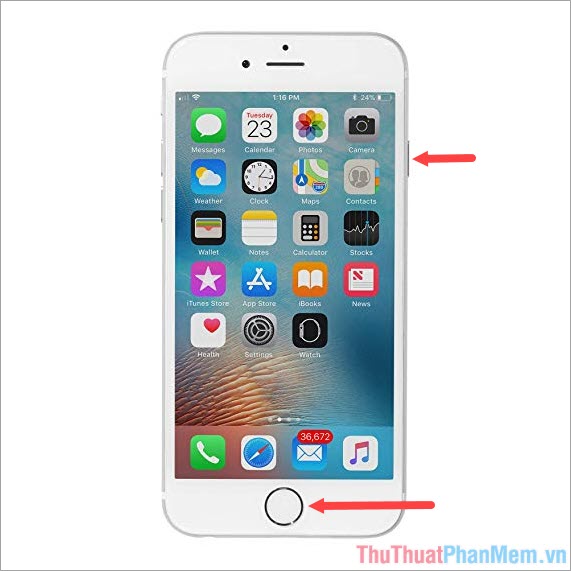
How to take screenshots on iPhone 6, 7 and 8 series
2. Take a screenshot using the accessibility key (Assistive touch)
Step 1: Go to Settings => General settings.
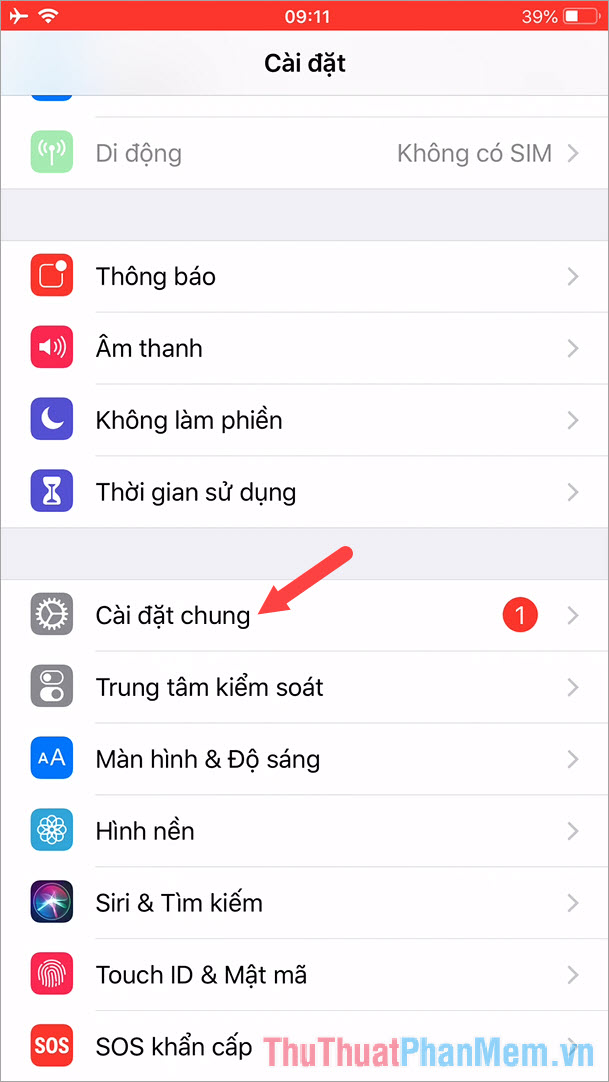
Step 2: Click to select Accessibility .
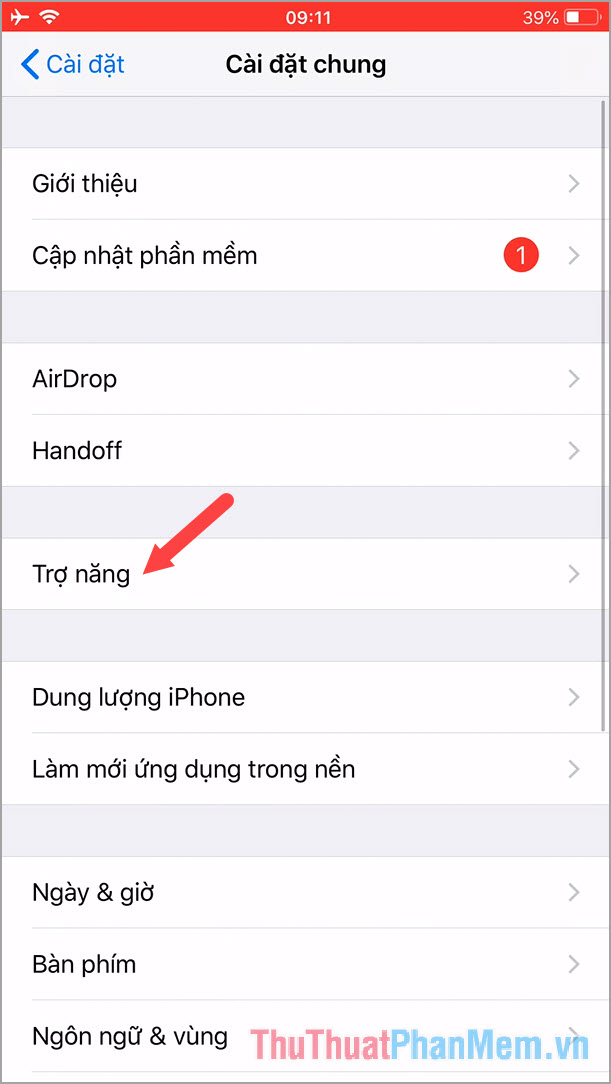
Step 3: Find and select AssistiveTouch .
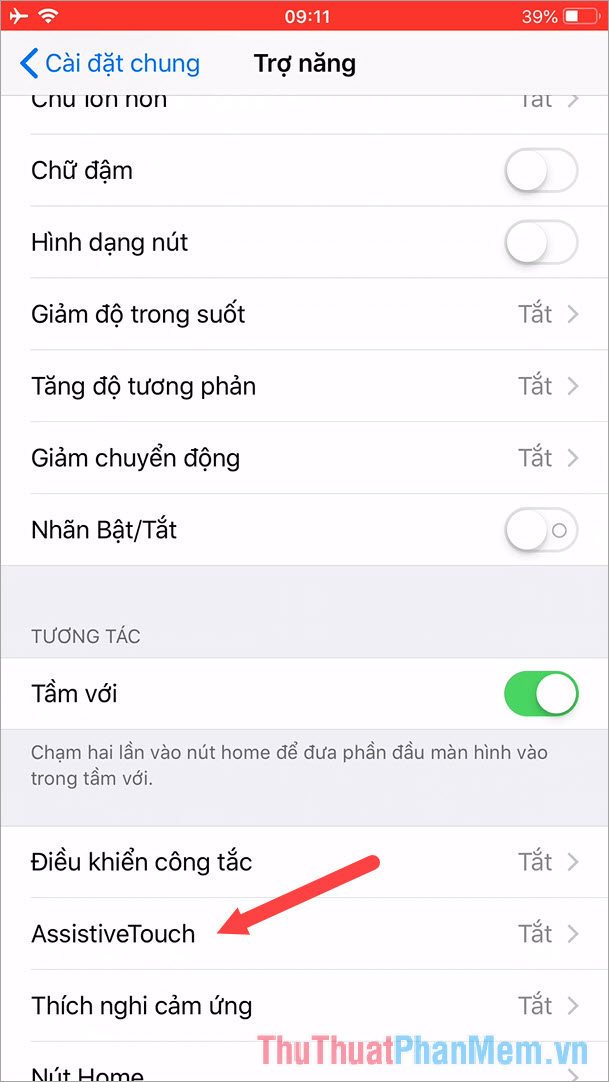
Step 4: You turn the switch in AssistiveTouch to on. After turning on AssistiveTouch, you touch the menu item Customize highest.
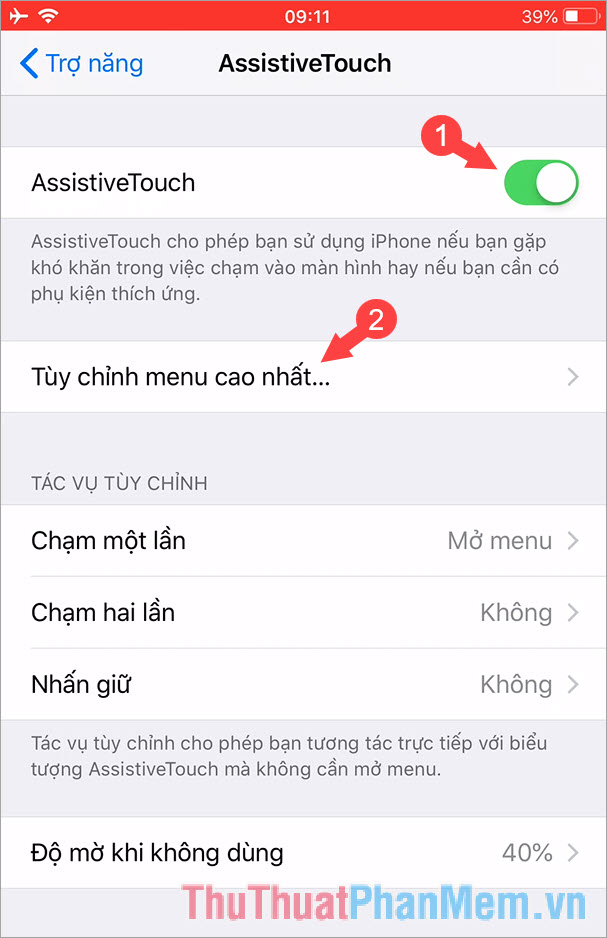
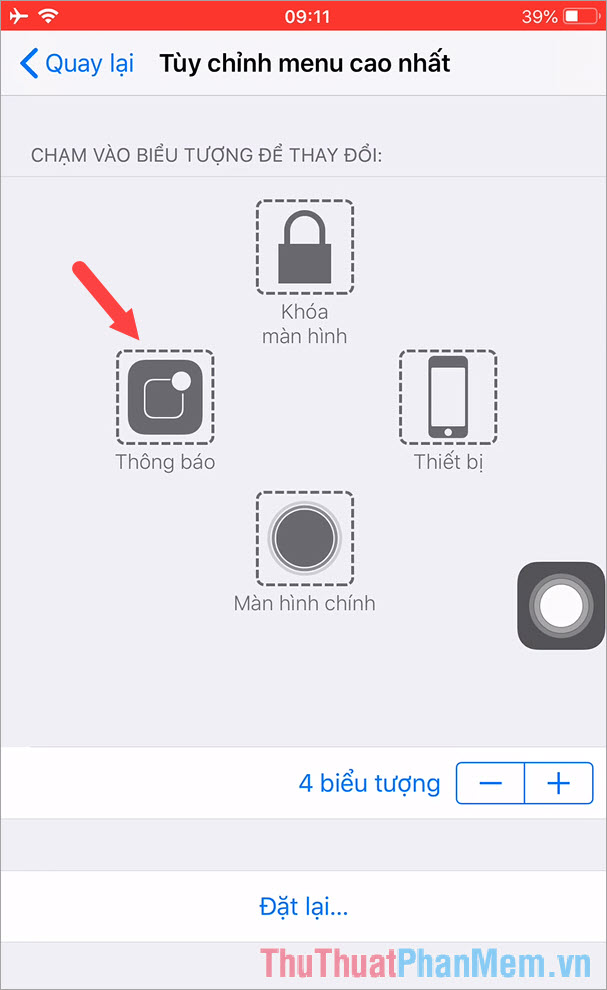
Step 5: Click the shortcut you want to change. Here I will change the shortcut Notification .
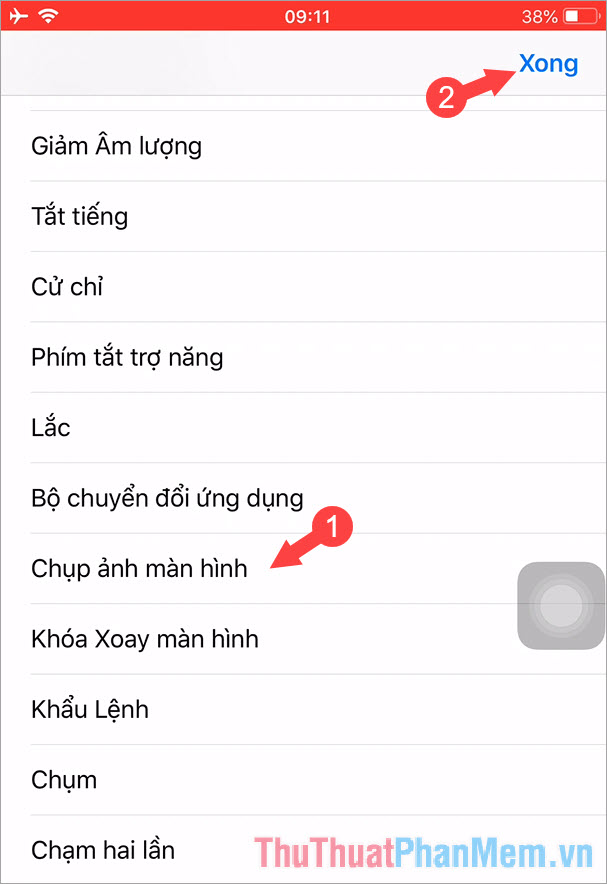
Step 6: You scroll down and select the screen capture , then click Done to save.
Step 7: You can test the function of taking screenshots by touching the AssistiveTouch icon on the screen and clicking Screen capture.
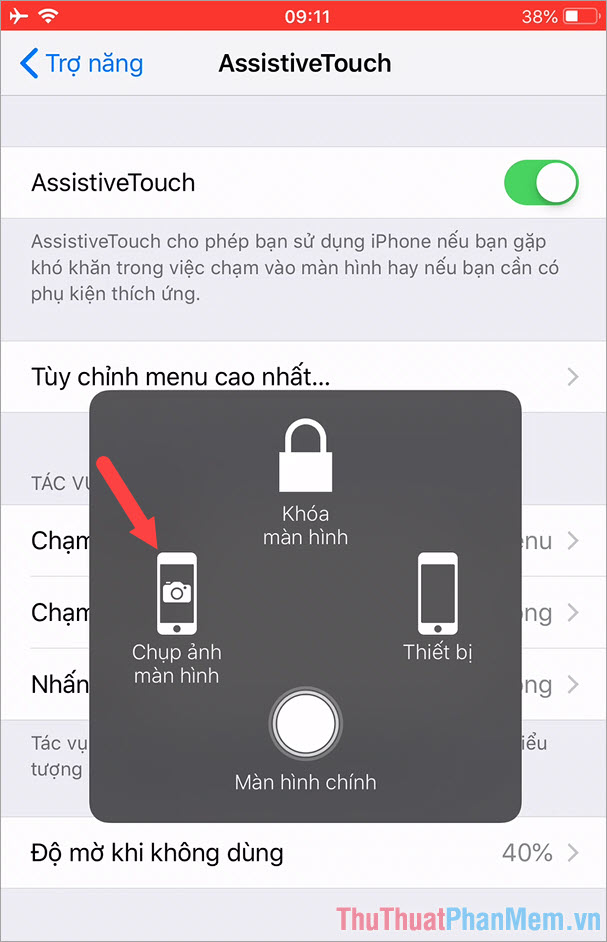
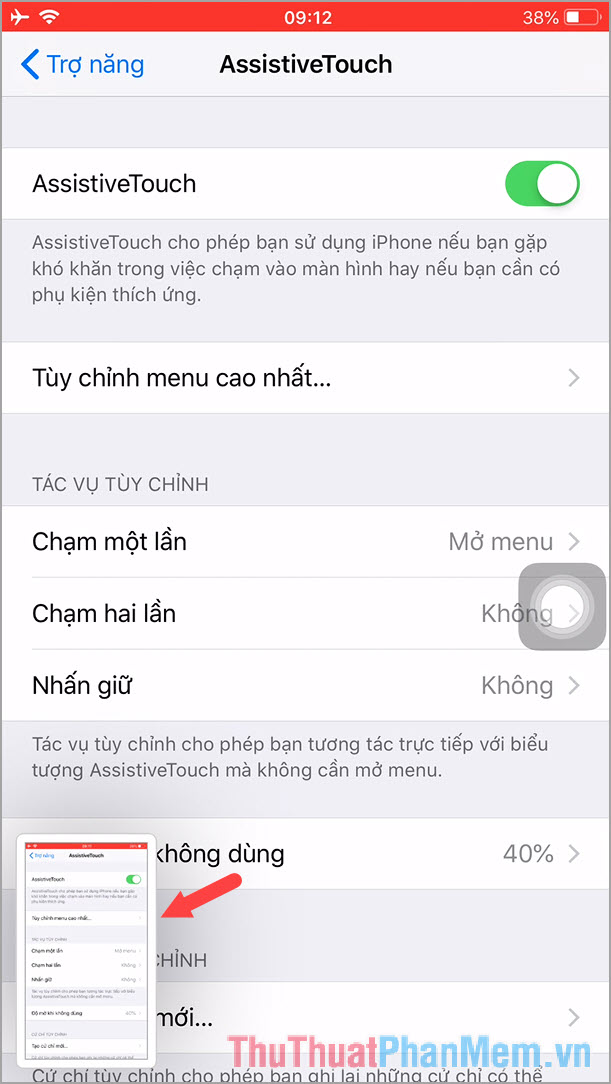
After having a 'cracked' sound with a thumbnail screenshot (iOS 11, 12) we have successfully taken the screenshot. The screenshot will automatically save to Photo Album.
With the two ways of taking iPhone screenshots shown in the article, you can save interesting moments that suddenly appear on the phone screen. I wish you relaxation, fun entertainment!
FAQ
What should I know about Take Screenshots of iPhone Phones?
Focus on the key features, requirements, limitations, and practical use cases explained in this guide.
How do I get the best results with Take Screenshots of iPhone Phones?
Follow the recommended steps, use current software or information, confirm compatibility, and review settings before major changes.
Are there any risks or limitations?
Potential limitations depend on compatibility, data quality, cost, privacy, support, and how the product or method is used.
Related Articles
 How to Take Screen Shots of Android Phones9 minutes read
 18 Tips for Screen Capture Tool on iOS 11 You Should Not Ignore10 minutes read
 14 Hidden iPhone and iPad Gems: Screenshots, Trackpad11 minutes read
 How to Edit iPhone Screenshots5 minutes read
 How to Take a Screenshot on a 4g Lg Android Phone5 minutes read
 7 Screenshots Hackers Like You to Save in Your Gallery7 minutes read
Reader Comments 0
Sign in with email or Google to join the discussion.