How to take photos with blurred backgrounds using an Android phone
Taking photos with blurred backgrounds, the photo mode is only available on smartphones with dual cameras, or with a suitable camera aperture to be able to take photos with blurred backgrounds. The bokeh mode is usually Portrait Camera mode, also known as portrait mode, available in the menu to select that camera mode.
And there are also many applications that support users in taking photos with blurred backgrounds when their phones do not have this mode available. Below TipsMake.com will guide you how to take photos with blurred backgrounds on Android devices.
How to take photos with blurred backgrounds using an Android phone
Bokeh is pronounced BOH-lay – derived from the Japanese term 'boke', denoting blur or fog. Often used to describe background blur in portrait photography, bokeh creates sharp focus on the subject, while subtly blurring the background. This technique makes the background less distracting, often isolating the subject of the photo and drawing attention to it.
To achieve the bokeh effect with a DSLR camera, photographers must apply three essential factors: Aperture, focal length and distance from the photographer to the subject.
On the other hand, bokeh on smartphones involves leveraging computational photography techniques due to the inherent limitations of small lenses and sensors. Many modern smartphones have dual cameras or multiple cameras that work in parallel to simulate a shallow depth of field. These phones use software algorithms to analyze the scene and identify the subject, then strategically blur the background, creating a simulated blur effect. Some smartphone models use Machine Learning technology to fine-tune the separation between subject and background.
Use the Camera app on your smartphone
Many Android phones come with 'Portrait Mode' embedded into the Camera app, allowing you to take photos with a blurred effect.
If you have a smartphone from one of the major brands, such as Google or Samsung, then you will have this option. This tutorial will show you how to take bokeh photos with your Pixel phone.
Open the Camera app on your phone and switch to Portrait at the bottom. Frame your object in the center of the composition and tap it to indicate it should be the focus. Follow the instructions that appear on the screen, if any, such as moving closer to the subject or finding an environment with better lighting.
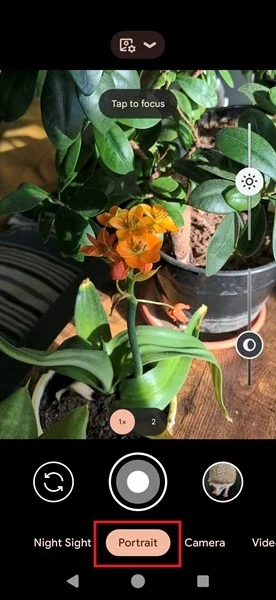
Once you've carefully composed your shot, press the large shutter button located at the bottom of the camera to take the photo. You will be able to see results immediately.
It's worth noting that some phones allow you to use Portrait Mode to take selfies with a bokeh effect. However, not all models have that option. If that's not the case with your phone, you should know that you can take selfies using your phone's main camera. This requires a little skill but is not difficult to do.
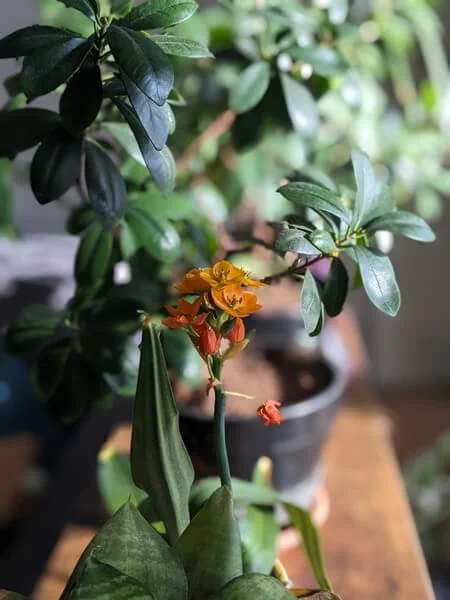
Note: On some devices, a blur effect is also available when recording video. For example, on Pixel 7 (and later) phones, Google offers Cinematic Blur, which adds a blurred background behind your subject.
How to apply bokeh to existing Android photos
If you have an old photo that could look better by adding a blur effect, you can add the effect later. You can do that using the Google Photos app, which comes pre-installed on most Android phones.
Google Photos can automatically upload any photos you take with your phone's camera to the app if you enable this option. If not, you can manually upload the image to apply the bokeh effect.
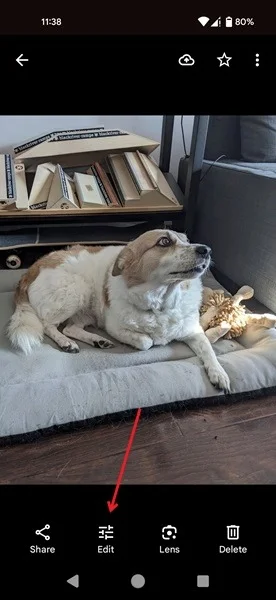
Once you open the photo, tap Edit at the bottom.
Swipe your finger right on the options menu until you find Tools.
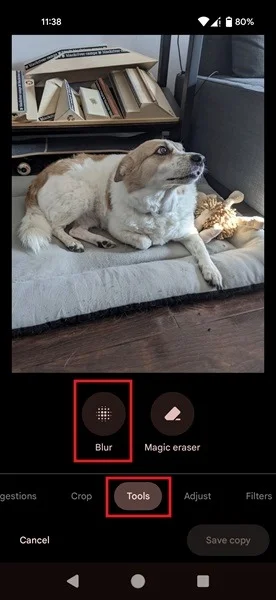
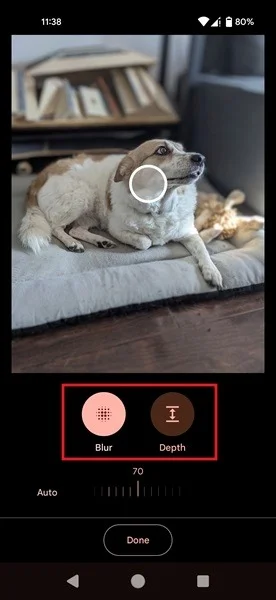
Select Blur. Click where you want the image to focus, then set the desired Blur or Depth level.
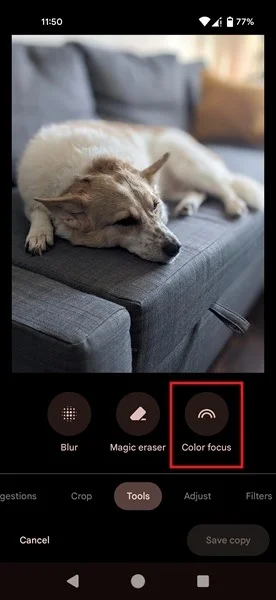
Additionally, you can reverse the blur effect applied to a photo using the Color Focus option (shown only for Portrait Mode photos).
How to apply bokeh using a third-party app
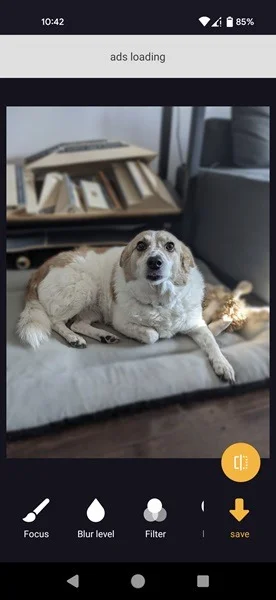
If you don't have Google Photos on your phone or want to use another app, there are many options in the Play Store. For example, you can download Auto Blur: Blur Background, which will automatically blur the background in your photos.
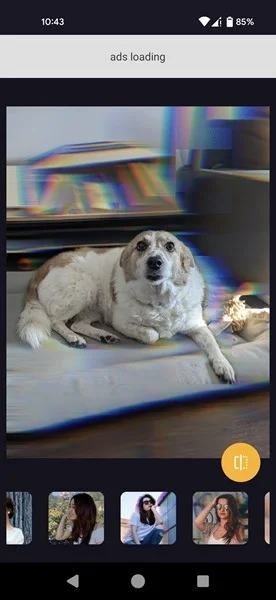
There are also many blur effects to choose from to help give your photos an even more striking look.
The app allows you to change the focus of the image as well as adjust the blur level.
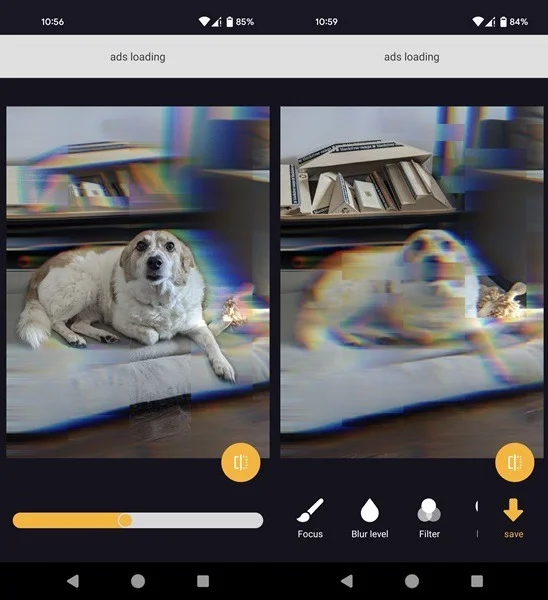
The results aren't always super accurate, but for regular photos it's more than enough.
There are many other apps that can help you add blur to your photos, including Snapseed or PhotoDirector. Try these tools if you have time!