Table of Contents
This updated guide examines How to Take a Screenshot in Linux and organizes the essential facts, background, and practical takeaways in clear American English.
Method 1of 4:
Using Gnome Screenshot
ThePrtScnkey does not work as a shortcut in all Linux distributions, but it works in most distributions with GNOME and GNOME-based desktop environments, such as Ubuntu and Linux Mint. If this section doesn't work, try one of the following methods.
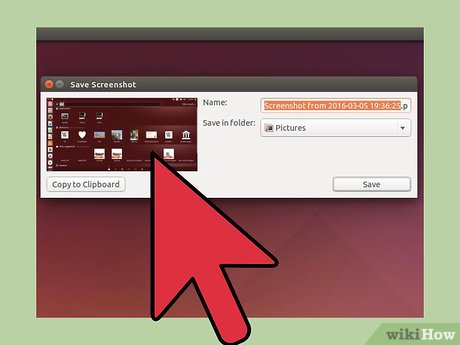 Press. PrtScn to take a full-screen screenshot. The screenshot will show everything in your display. You will be prompted to select where you would like to save the screenshot file.
- The Print Screen key is located at the top of the keyboard, usually betweenF12andScrLk. It may be labeled "Print Screen", "PrtScn", "PrntScrn", or something else similar.
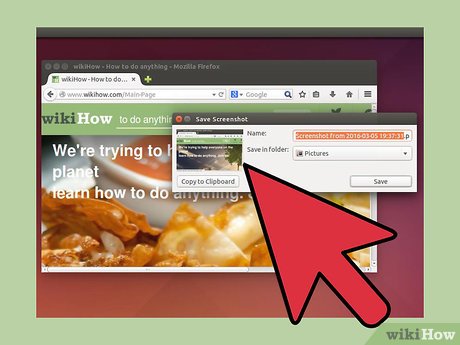 Press. Alt+PrtScn to take a screenshot of a window. This shortcut will create a screenshot of your active window. The file will be created in your Pictures folder.
 Press. ⇧Shift+PrtScn to select what you capture. You'll be able to click and drag a selection box to determine what is captured in the screenshot. A file with the image you captured will be created in your Pictures folder.
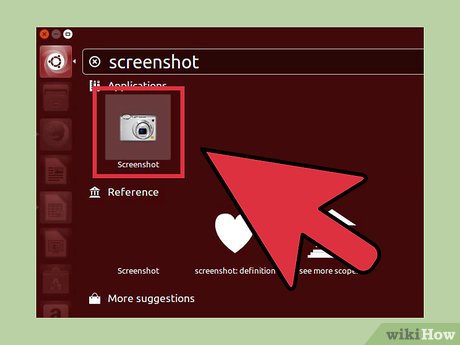 Open the Screenshot utility. The Gnome Screenshot utility allows you to perform some additional screenshot functions, such as adding a delay. You can find the Screenshot utility in the Accessories folder of your Applications menu.
 Select your screenshot type. You can choose from any of the options outlined above.
 Add a delay. If your screenshot is time-dependent, you can use the Screenshot utility to add a delay before the screenshot is captured. This will allow you to make sure the right content is on the screen.
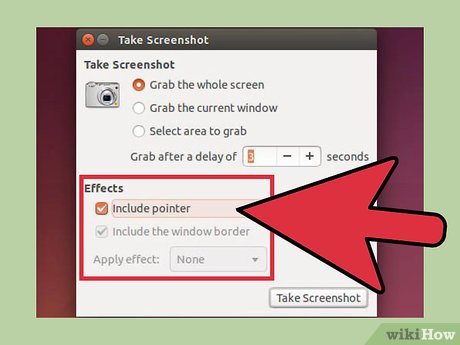 Select your effects. You can choose to include your mouse pointer in the screenshot, as well as whether or not you want to add a border to the screenshot.
Method 2of 4:
Using GIMP
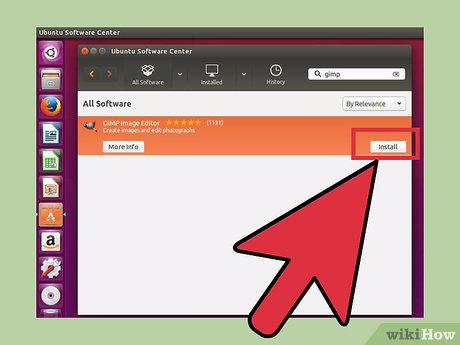 Install GIMP. GIMP is a free image editor that comes installed on some Linux distributions. If you don't have it installed, you can get it for free using your distribution's package manager or Software Center. Open the Software Center, search for "gimp", and then install the "GIMP Image Editor".
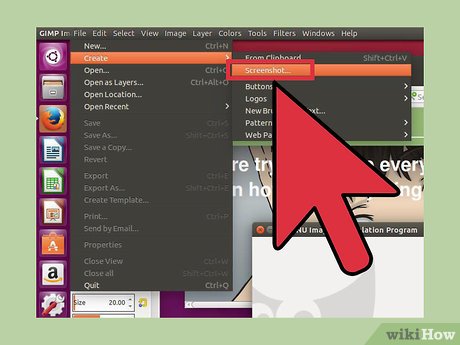 Click the "File" menu and select "Create" → "Screenshot". The screenshot creation tool will open. This tool is very similar to the Gnome Screenshot utility.
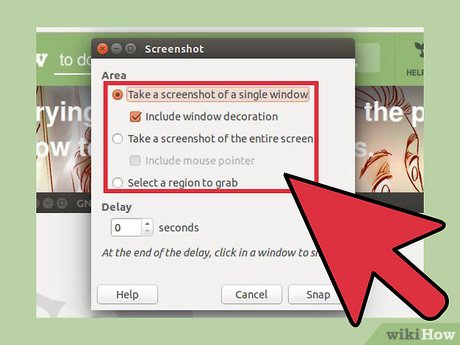 Select the type of screenshot you want to take. You can choose to take three different types of screenshots: single window, full-screen, or custom selection. If you choose the single window option, you'll be able to click the window that you want to take a screenshot of.
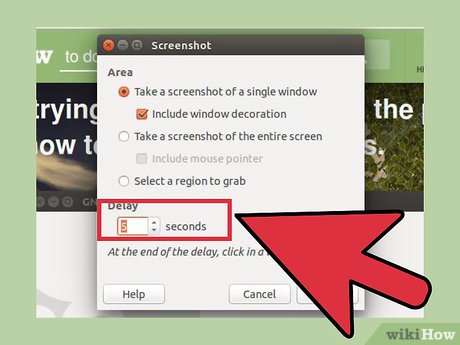 Add a delay. You can add a delay before the screenshot is taken so that you can arrange everything exactly how you want it. If you have single window or custom screenshots selected, you'll choose your screenshot target after the delay timer runs out.
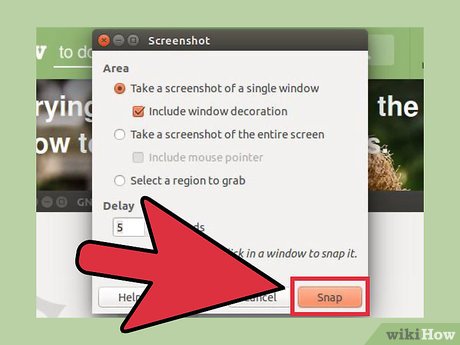 Click "Snap" to take the screenshot. Depending on your settings, the screenshot may be taken immediately. When you're finished, the screenshot will open in the GIMP editing window.
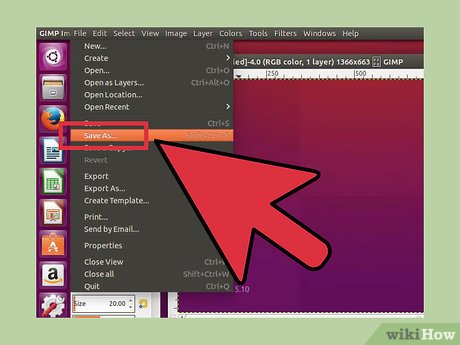 Save the screenshot. If you don't want to make any edits to the screenshot, you can save it to your hard drive. Click the "File" menu and select "Export". Give the screenshot a name and choose where you would like to save it. Click the "Export" button once you are satisfied.
Method 3of 4:
Using ImageMagick
 Open the Terminal. ImageMagick is a command-line utility that can capture screenshots for you. Many distributions come with ImageMagick already installed, but you can install it for free from your distribution's package manager if you don't have it.
- To open the Terminal quickly in Ubuntu and many other distributions, pressCtrl+Alt+T.
 Install ImageMagick. On Debian-based distributions such as Ubuntu, typesudo apt-get install imagemagickand press↵Enter. You will be prompted for your administrator password. If ImageMagick hasn't been installed, it will begin downloading and installing. If it is already installed, you will be informed.
 Take a screenshot of the entire screen. Typeimport -window root Pictures/fileName.pngand press↵Enter. ReplacefileNamewith the name you want to give the screenshot.
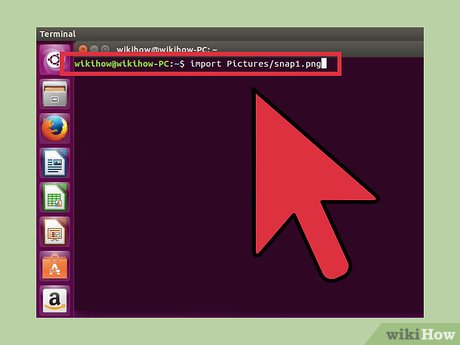 Take a screenshot of a specific window. Typeimport Pictures/fileName.pngand press↵Enter. ReplacefileNamewith the name you want to give the screenshot. The cursor will turn into a crosshair, and you can click the window that you want to capture.
 Add a delay to the screenshot. Typeimport -window root -pause#Pictures/fileName.pngand press↵Enter. Replace#with the amount of seconds that you want to wait before the screenshot is taken. After waiting the set amount of time, the screenshot will be taken and you will be returned to the terminal prompt.
Method 4of 4:
Using Shutter
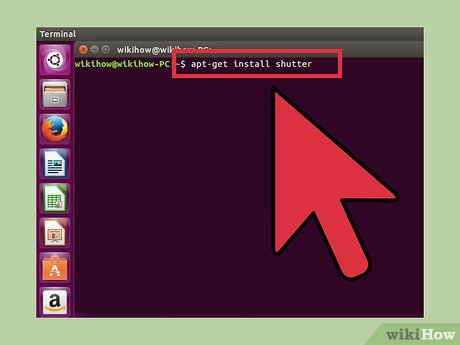 Install Shutter. This is a popular screenshot program that contains some advanced upload and editing capabilities. If you take and share screenshots often, you may want to give this program a try.
- You can find Shutter through most distribution's package managers. Simply search for "Shutter" and install the program.[1]
- To install Shutter from the Terminal on Debian-based distributions, typesudo add-apt-repository ppa:shutter/ppaand press↵Enter. Update your repositories by typingsudo apt-get update, and then install Shutter by typingsudo apt-get install shutter.
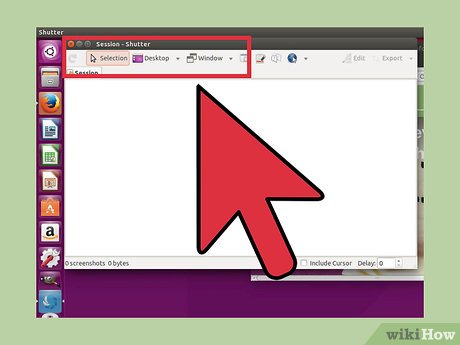 Select the type of screenshot you want to take. Along the top of the Shutter window, you'll see the three options that you can pick from: "Selection", "Desktop" and "Window". Click the button to select the type of screenshot you want to take.
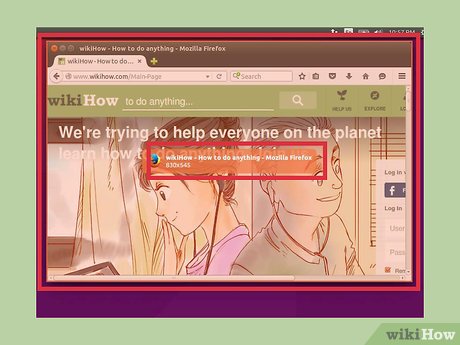 Take your screenshot. If you selected "Desktop", your screenshot will be taken automatically. If you selected "Selection", the screen will dim and you can click and drag to create a selection box. Everything inside of the box will be captured. If you selected "Window", you can click the window that you want to take a screenshot of.
- The screenshot will be saved automatically to your Pictures folder.
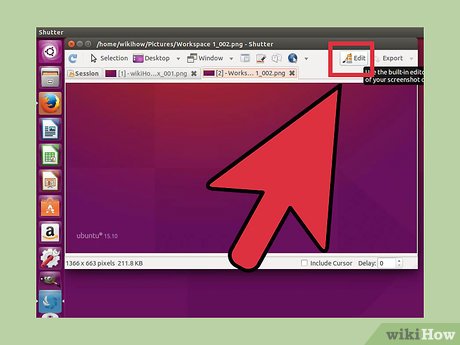 Edit the screenshot. After taking the screenshot, a preview will appear in the Shutter window. Click the "Edit" button to open the Shutter editor. You can use the editor to highlight things on the screenshot or make notations. Click "Save" when you are finished.
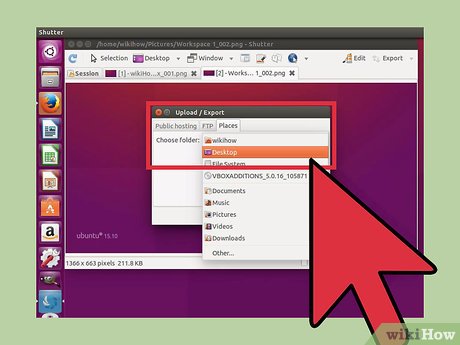 Export the screenshot. You can send the screenshot to an image upload service, or add an FTP server to upload it to. Click the "Export" button to open the Export menu.
- In the "Public hosting" tab, you can choose to upload the screenshot to your Dropbox account or a variety of online image hosting websites. You'll be asked for your account credentials when you select one.
- In the "FTP" tab, you can enter in the connection information for your FTP server, which is useful if you post screenshots on a blog or website.
- In the "Places" tab, you can move the screenshot to another location on your computer or network.
FAQ
What is How to Take a Screenshot in Linux about?
It provides a structured overview of screenshot, explains the main context, and highlights practical takeaways for readers.
Why does this topic matter?
Understanding the main concepts helps readers evaluate the issue, avoid common mistakes, and make better-informed decisions.
How should readers use this information?
Use the guidance as a practical starting point, confirm details that may have changed, and follow current product, safety, or security recommendations.
Related Articles
 How to Take a Screenshot of the Login Screen in Linux7 minutes read
 Instructions for Taking Screenshots of Linux Computers19 minutes read
 5 Best Neofetch Alternatives for Linux Screen Capture5 minutes read
 How to Take a Screenshot on Windows 118 minutes read
 How to Take a Screenshot?: Step-by-Step Guide18 minutes read
 How to Creating Screenshot Shortcuts Using ChatGPT3 minutes read
Reader Comments 0
Sign in with email or Google to join the discussion.