How to switch between Touch Mode and Mouse Mode in Outlook
TipsMake.com will show you how to switch between Touch Mode (touch mode) and Mouse Mode (mouse use mode) in the Outlook app on Windows 10.
Table of Contents
If you're using the Outlook app on a Windows 10 touch screen device, this post will help you. TipsMake.com will show you how to switch between Touch Mode (touch mode) and Mouse Mode (mouse mode) in the Outlook app on Windows 10, so that you do not need to install any add-on. in Outlook.
Difference between Touch Mode and Mouse Mode
While there is no significant difference in features, you can see some minor changes from the user interface aspect. When using the Outlook application on a regular Windows 10 computer with a dedicated mouse and keyboard, you may not need to worry about the gaps between options. But if you're using a touch screen device with a detachable keyboard, you may often encounter problems due to this spacing.
The first difference between Touch Mode and Mouse Mode lies here. You can see a difference in the distance between the two options. The second difference is the size of each option. Almost all options in Touch Mode appear larger than in Mouse Mode.
Touch Mode includes a new menu bar on the right side of the screen, showing standard email options like Delete, Respond, Mark as Read, Move , etc.
Before starting with this tutorial, you should know that if you turn on Touch Mode in Outlook, it will also be applied to other Microsoft Office 365 programs.
Switch between Touch Mode and Mouse Mode in Outlook
To switch between Touch Mode and Mouse Mode in Outlook, follow these steps-
1. Open the Outlook application on the PC.
2. Click Customize Quick Access Toolbar .
3. Select Touch / Mouse Mode.
4. Click the Touch / Mouse Mode icon on the toolbar.
5. Select Touch from the list.
To learn about these steps in detail, continue reading below.
First, open the Outlook application on your computer and click the Customize Quick Access Toolbar icon , displayed on the toolbar itself. Then choose Touch / Mouse Mode from the list.
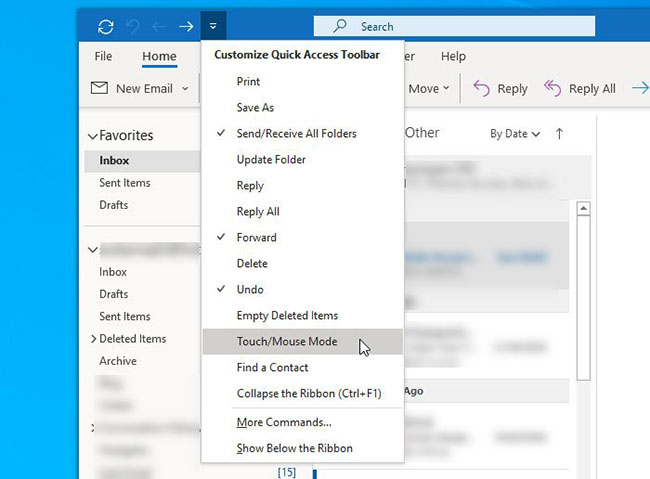 Select Touch / Mouse Mode from the list
This will activate a new icon in the toolbar, called Touch / Mouse Mode. You need to click on this icon and choose a mode as required.
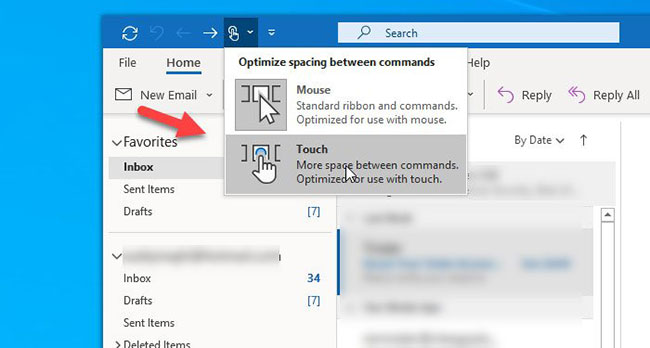 Select a mode as required
Changes will be applied immediately. As mentioned earlier, you can find a new menu bar, which looks like this.
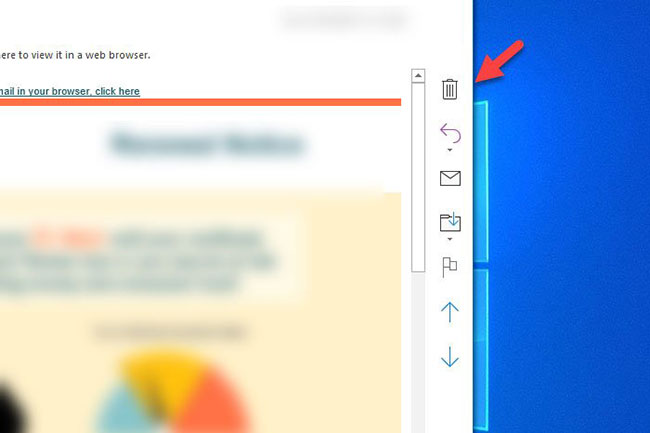 New menu after switching to Touch Mode
All operations are completed! In case you want to revert the change, follow the last 3 steps.
Was this article helpful?
Your feedback helps us improve.
Related Articles
 How to change the mode using mouse or touch on Outlook2 minutes read
 How to switch between old Outlook and new Outlook2 minutes read
 How to switch left to right mouse on Windows 111 minutes read
 Outlook.com's night mode is coming soon2 minutes read
 Top keyboard for the best TV, integrated touch mouse9 minutes read
 Outlook starts updating the dark interface (Dark mode) to users and this is how to activate it2 minutes read
Reader Comments 0
Sign in with email or Google to join the discussion.