How to split strings in Excel
In Excel when working with character strings, there are many cases where it is necessary to split a string to use the data, but the amount of data needs to be separated quite large, if merely manually doing it takes a lot of time and effort. strength. The following article shows you how to split strings in Excel.
Some functions to use when splitting a string:
- Left: The function takes the substring to the left of the original string
- Right: The function takes the substring to the right of the original string
- Mid: The function takes the substring in the middle of the original string
Syntax:
- LEFT (text, [num_char])
- RIGHT (text, [num_char])
- MID (text, start_num, num_char)
Inside:
+ text: The original string containing the string to be cut
+ num_char: number of characters to cut.
+ start_num: position to start retrieving the substring.
There are several ways to separate a string:
- Use the function to cut left, right, and mid strings combined with the replacement feature in Excel.
- Use the function left, right, mid,…. Combine a number of search functions to determine position in Excel.
In 2 examples below give detailed instructions to you how to split strings in Excel many practical applications today.
Example 1: Separate a first and last name field into 3 separate fields: first, middle, and middle names
Step 1: Copy the entire column data and first name to the first column :
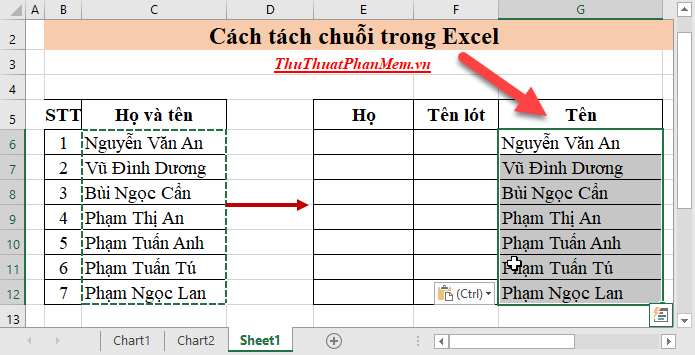
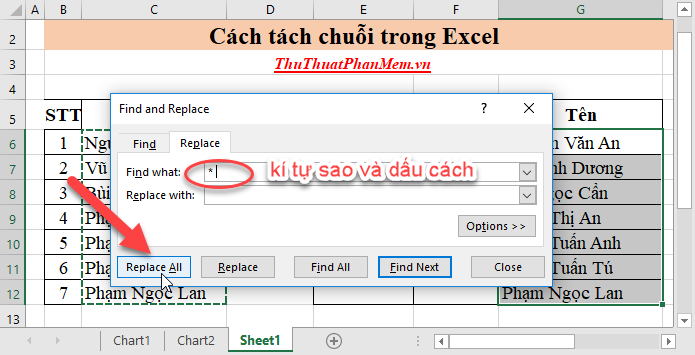
Step 2: Highlight all the data in the Name column -> press Ctrl + H to enter the following content:
- Find what section: enter the characters '*' and spaces.
- Section Replace with: Leave blank
Click Replace all to replace all characters before the space with white space:
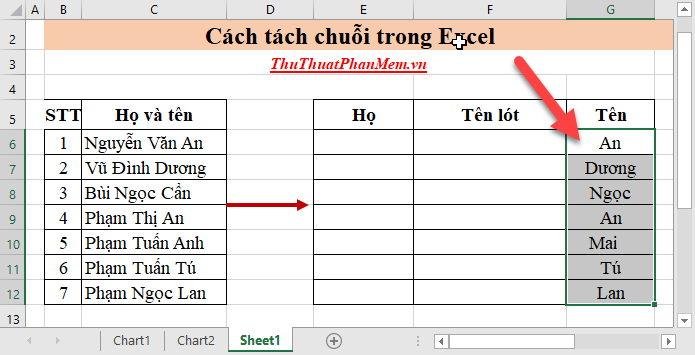
Step 3: A dialog box appears has been replaced, click OK:

Result obtained from the first and last name column:
Step 4: Get the first and last values from the first and last name column by entering the formula: = LEFT (C6, LEN (C6) -LEN (G6) -1)
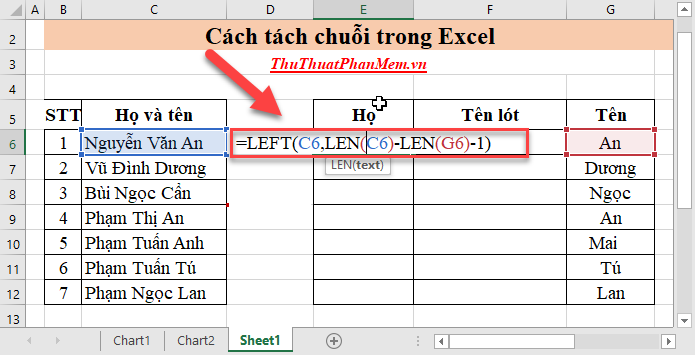
Pressing Enter results:
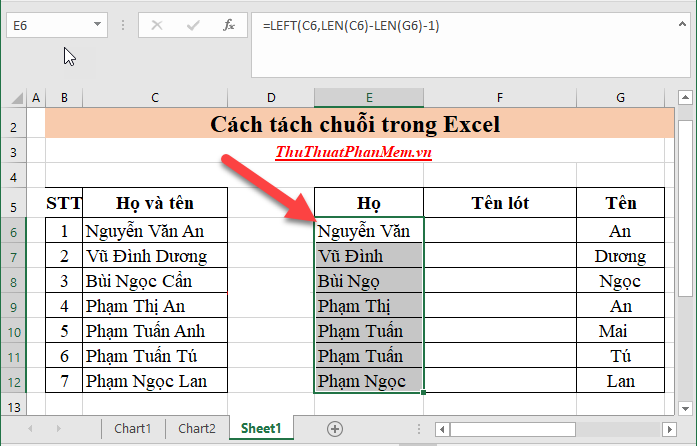
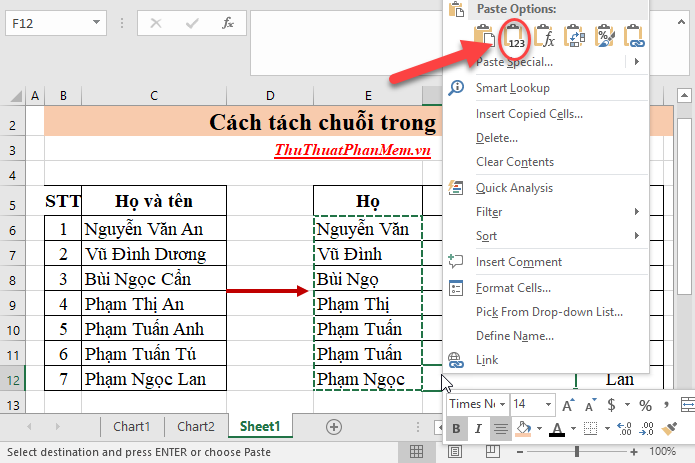
Step 5: Copy the entire column they just got pasted into the middle name column, note that in the process of pasting into the column name, then right-click and choose paste according to the value type as shown:
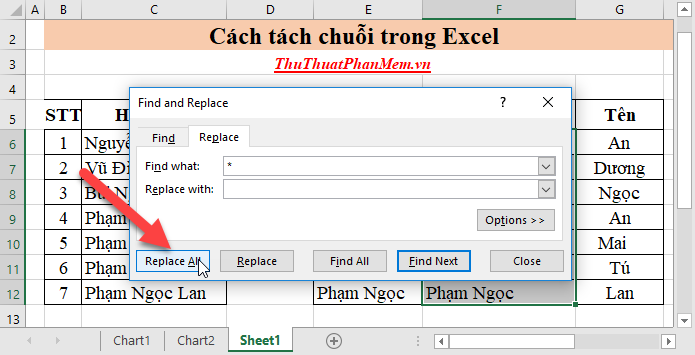
Step 6: Do the same as the column name to get the middle name value by using replace feature in Excel:
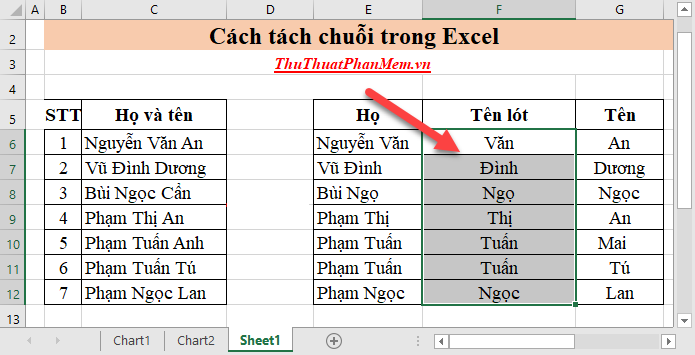
Result of the middle name from the last column:
Step 7: Get the value for the last column.
- Create 1 column next to the Last column in the cell to get the value they enter the formula: = LEFT (E6, LEN (E6) -LEN (G6) -1)
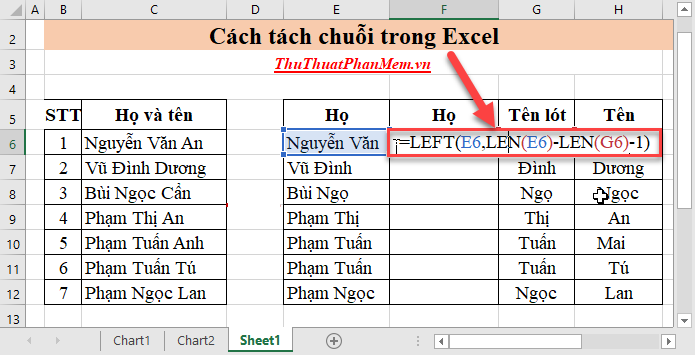
Press Enter -> copy the formula for the remaining values to result:

Step 8: Copy and paste the column value of the last column again by the value -> delete the last outermost column (note if not copying and pasting the value type for the Last column column when deleting the extra column). error)

As a result, you have separated 3 surname, middle name and first name from the first and last column column. This is a quick and easy way to save time and effort when separating your first and last name:
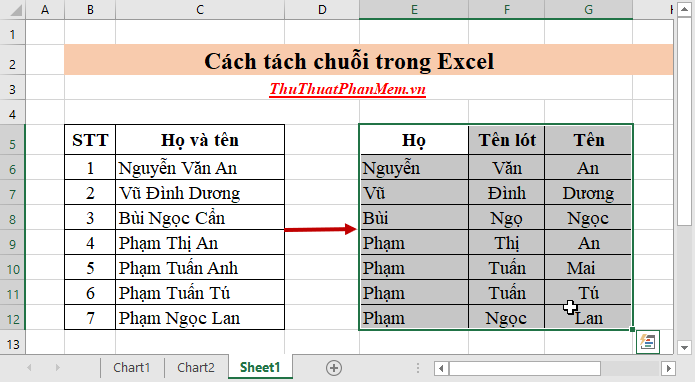
Example 2: From the value when importing materials to split the string of characters into 2 parts of product name and origin.
- In this article, when importing materials, including the name of supplies and origin separated by dashes. To perform a split sequence use the Left and Right functions. However, because each item has a different name and length, it is not known in advance the number of characters to be taken in the Left and Right functions:
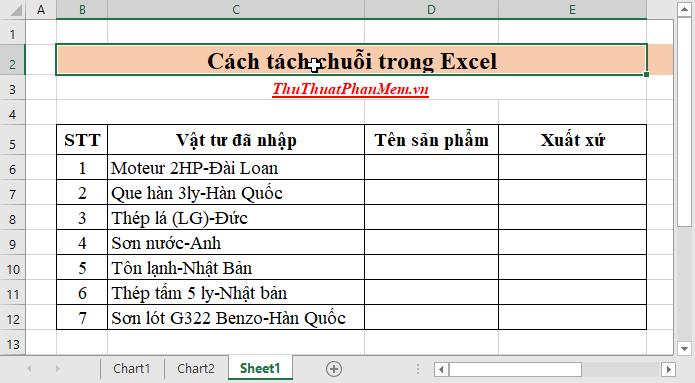
- Because in all input values including supplies name and origin are separated by dashes based on dashes to determine the number of characters to be taken for the Left and Right functions by using the Find function.
How to separate the product name and product origin follow these steps:
Step 1: In the cell to get the product name enter the formula: = LEFT (C6, FIND ('-', C6) -1)
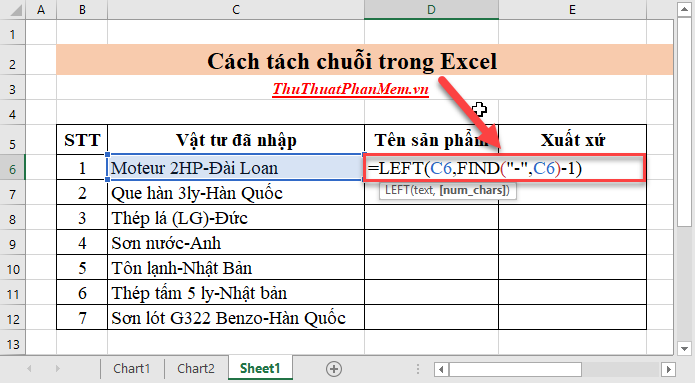
Step 2: Press Enter to get the product name from the imported supplies:
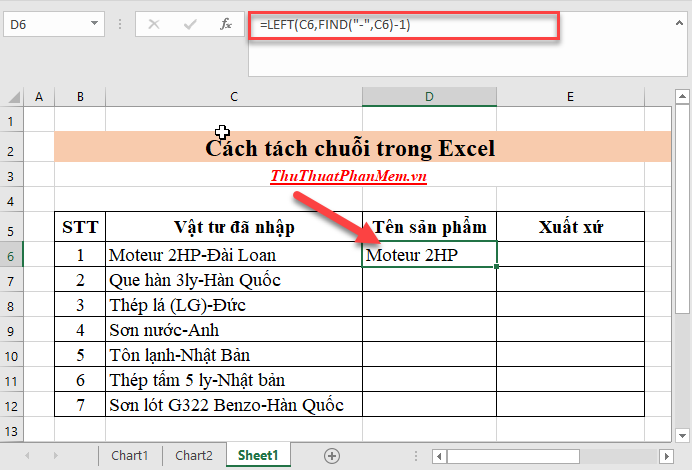
Step 3: Copy the formula for the remaining values:
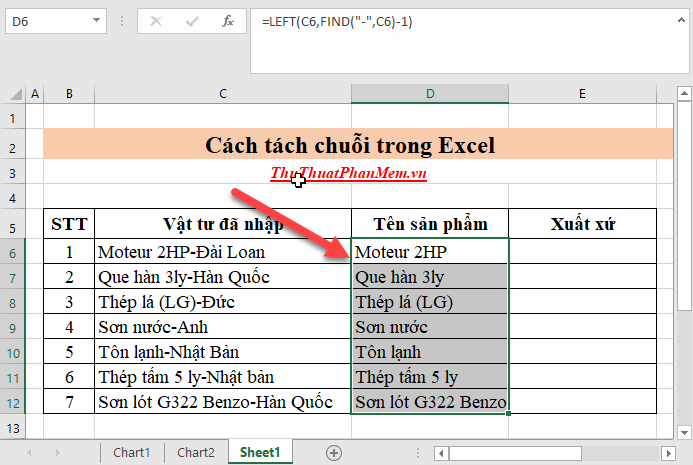
Step 4: In the box you need to get the origin of the input material: = RIGHT (C6, LEN (C6) -FIND ('-', C6))
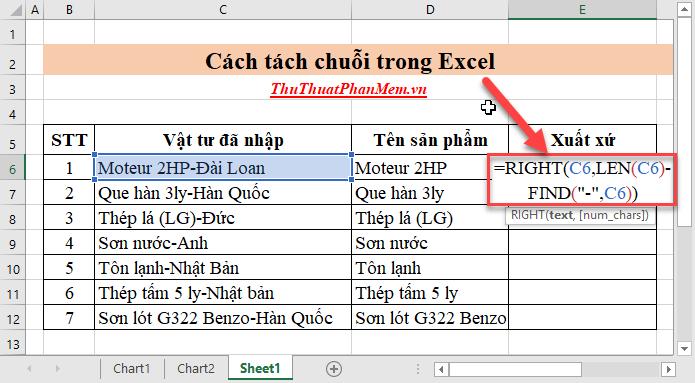
Step 5: Press Enter -> copy the formula for the remaining values to result:
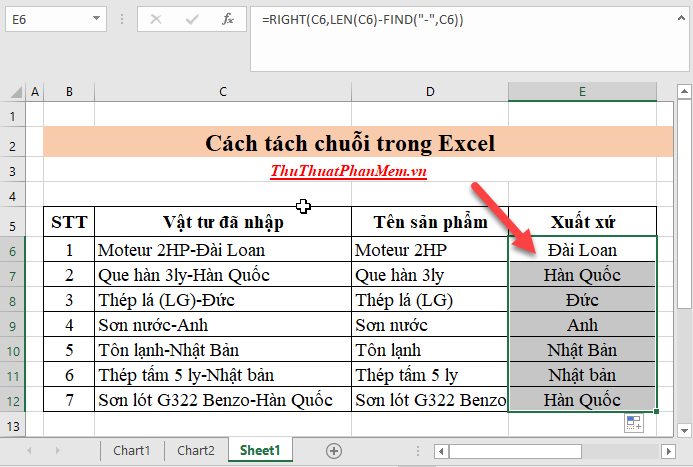
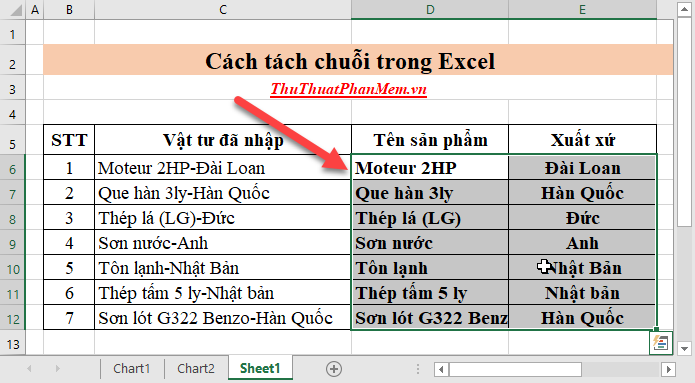
So, with simple steps, you can separate the product name and origin from the imported supplies code:
The above is a detailed guide on how to split strings in Excel based on specific examples. Good luck!