How to smooth skin in Photoshop
If you edit a lot of portraits in Photoshop, you may occasionally need to remove blemishes or smooth facial skin.
Table of Contents
The key to successful photo retouching is maintaining a natural look, and you can only do that by keeping your skin's original texture as intact as possible. This article will explain how to smooth skin in Photoshop in the most natural way.
How to smooth skin in Photoshop
To smooth skin in Photoshop, there are 3 popular methods. The first two ways are quite simple and involve using the Blur tool or applying a Blur filter to edit the face in Photoshop. However, both of these methods cannot preserve the original texture of the leather.
A third, more advanced method is to apply a High Pass Filter , which helps retain the skin's texture while adding smoothness to the skin. Although it may seem a bit complicated at first, it's really easy once you get the hang of it.
Use advanced skin retouching techniques quickly
Here's a step-by-step guide on how to smooth skin in Photoshop without blurring important details on your subject's face.
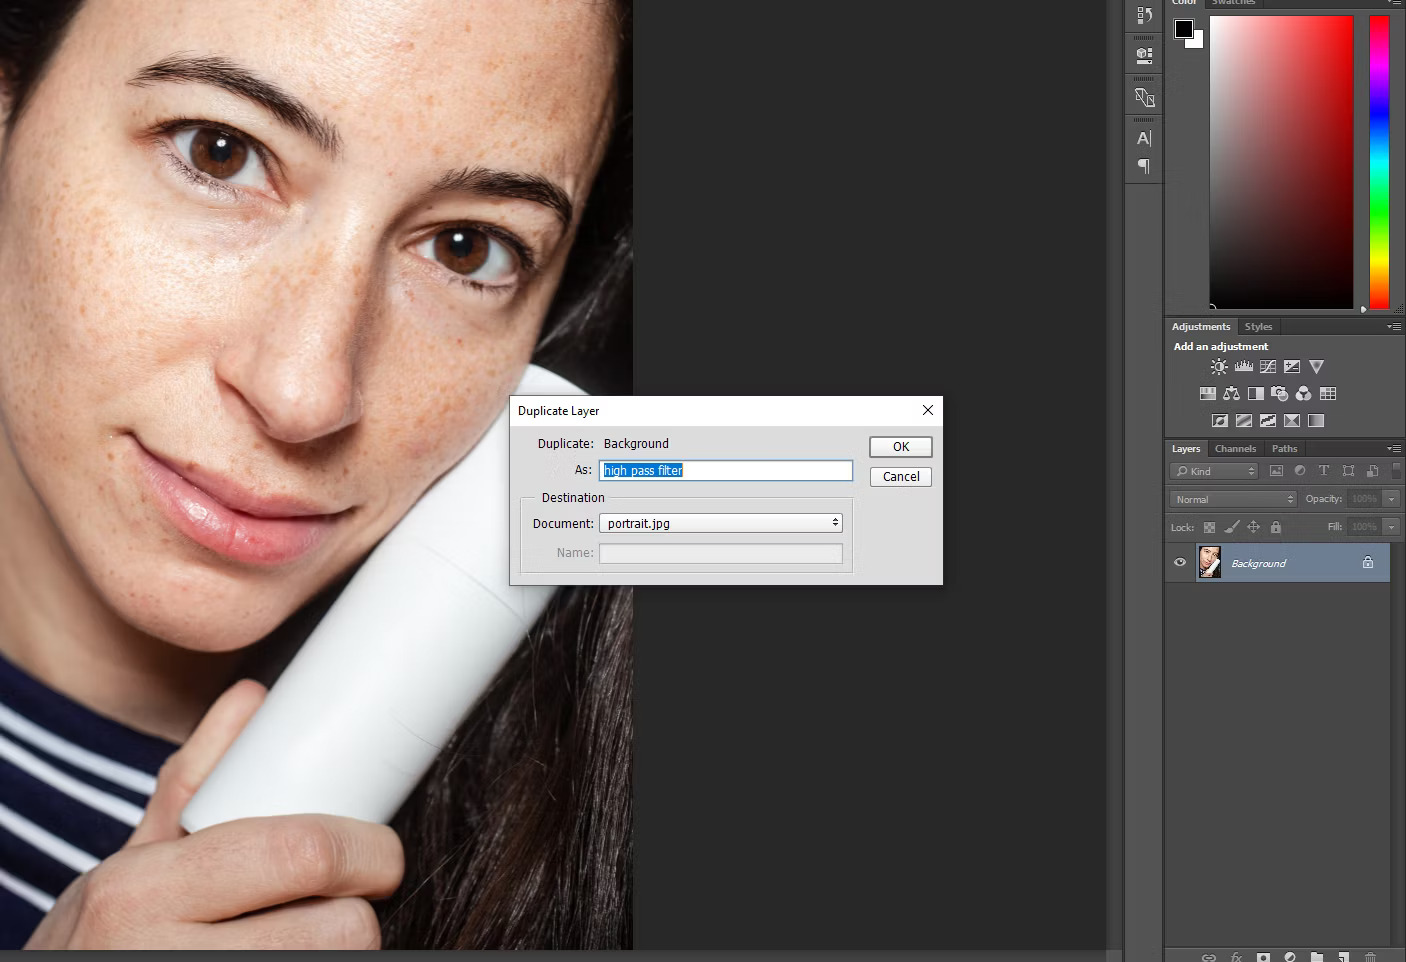
1. Create a Duplicate Layer
Start by right-clicking on the Background layer and choosing Duplicate from the drop-down menu to create a duplicate layer. The duplicate layer should be renamed to avoid any confusion.
2. Invert the image
Next, go to Image > Adjustment and click Invert to invert the entire image. You can also use the keyboard shortcut Ctrl + I for Windows and Cmd + I for Mac.
3. Change the Blend options
Once done, open the Blending Options dialog box by right-clicking on the duplicate layer. Change the Blend Mode to Vivid Light . If you're proficient in Photoshop editing, you can also change the blend mode directly from the layer panel's drop-down menu.
4. Apply High Pass Filter
Go to the menu bar, then choose Filter > Other > High Pass Filter to apply it to the flat surfaces of the image. High Pass Filter helps you find detail and can often be used to sharpen slightly blurry images. Now let's go ahead and choose a radius.
While regular portraits work best with a 24 pixel radius, a 15 - 20 pixel radius works best for low resolution pages like the one shown below.
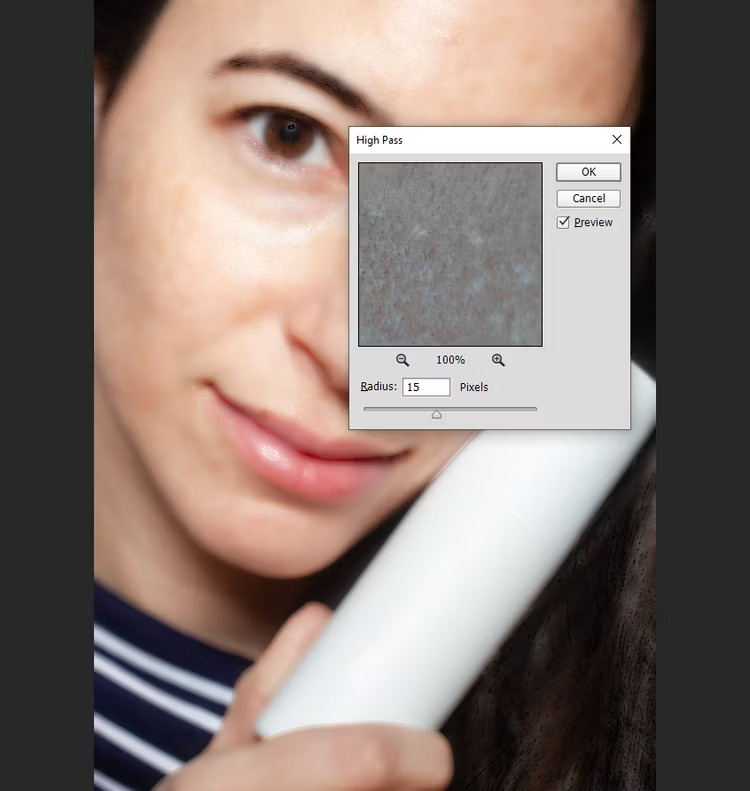
After applying the filter, the image will turn gray and the edges of the person's face will be contoured.
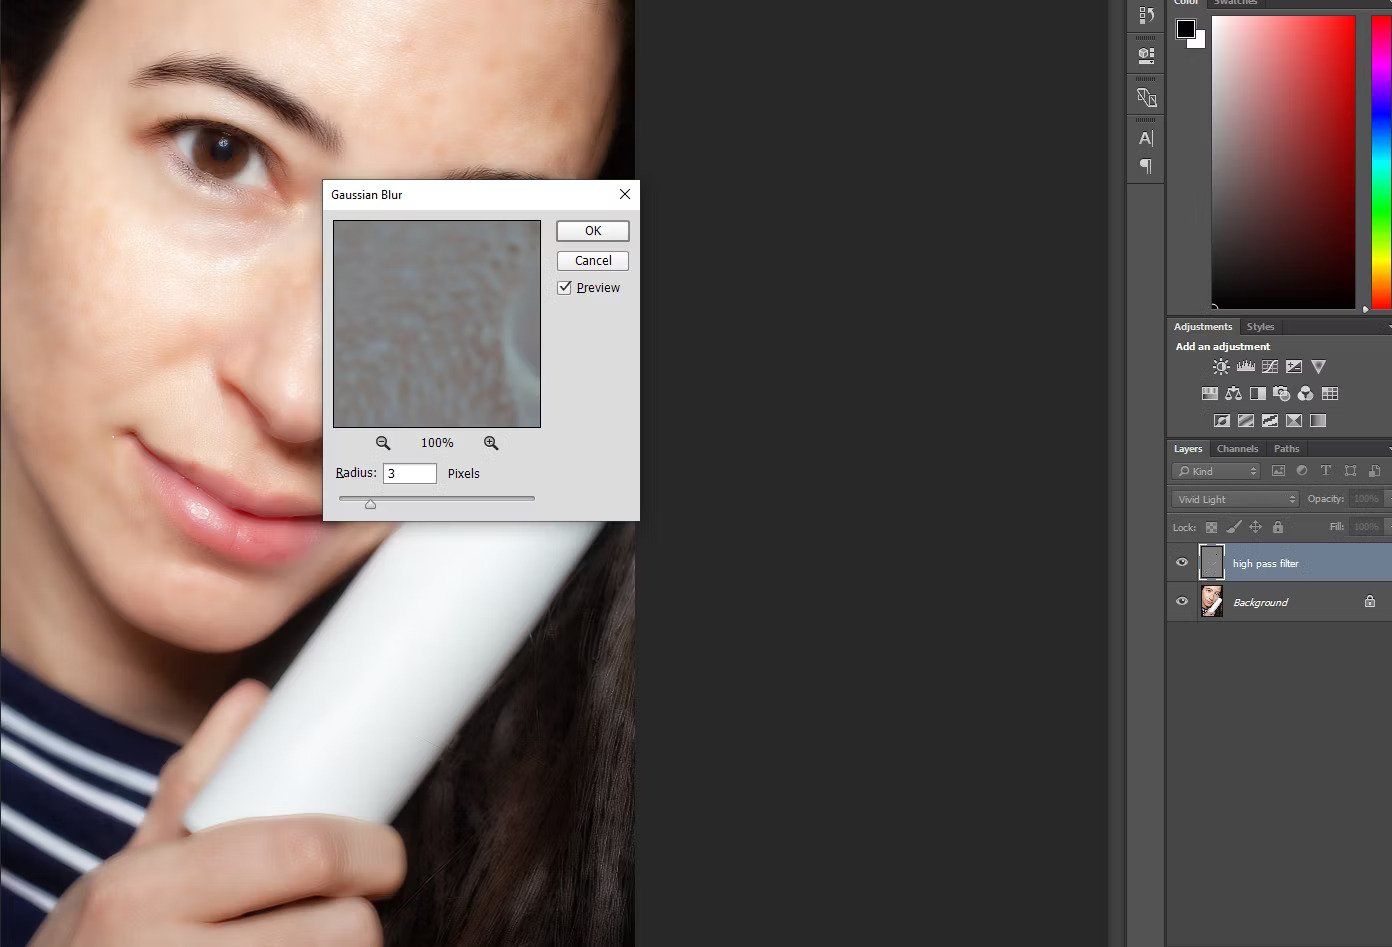
5. Add Gaussian Blur
The Blur tool can accurately be called a smoothing tool, as all skin smoothing options use the Blur filter. However, for the High Pass Filter method, we apply Gaussian Blur by going to Filter > Blur > Gaussian Blur .
Here, the radius must be selected again. This time, choose a radius value of 3 to 4 pixels for best results and click OK . It is recommended to zoom in on the image while trying out the radius value, choosing the value that best suits the image.
To retouch faces in Photoshop, some experts choose 1/3 of the radius value they chose for the High Pass Filter. In other words, if the radius value of the High Pass Filter is 24, choose 8 as the radius value of the Gaussian Blur.
Now that you have applied the Gaussian Blur filter, you will notice that it has been applied to the entire image and not just to the skin. It covers eyes, hair and even clothes. That doesn't seem right, right?
6. Add a Layer Mask to limit skin opacity
To limit the opacity to just the skin and apply it properly, press and hold Alt (Windows) or Option (Mac) and click the Add the Layer Mask icon . This creates a layer mask effect that smooths out the view where needed. A black layer thumbnail appears next to the duplicate layer.
7. Select Skin Brush Photoshop
Next, select the Skin Brush tool from the toolbar and make sure the brush color is set to white. If it is not set to white, you can press D on your keyboard to reset to the default color. You can change the brush line according to your preferences. If you're good at Photoshop, you should continue at speed 100 for faster results.
8. Draw on the face area
Before you start drawing, take a quick look and make sure the Blend Mode is set to Normal , the Opacity is 100% , and the Flow % is set to your chosen value. It's best to use a soft-edged brush to paint on the face.
Press Shift key + left bracket to make the brush softer and Shift key + right bracket to make the brush harder. You can also change the brush size from the keyboard using the left and right bracket keys.
As you start, you'll notice that the smoothing effect will only appear on the areas you draw on.
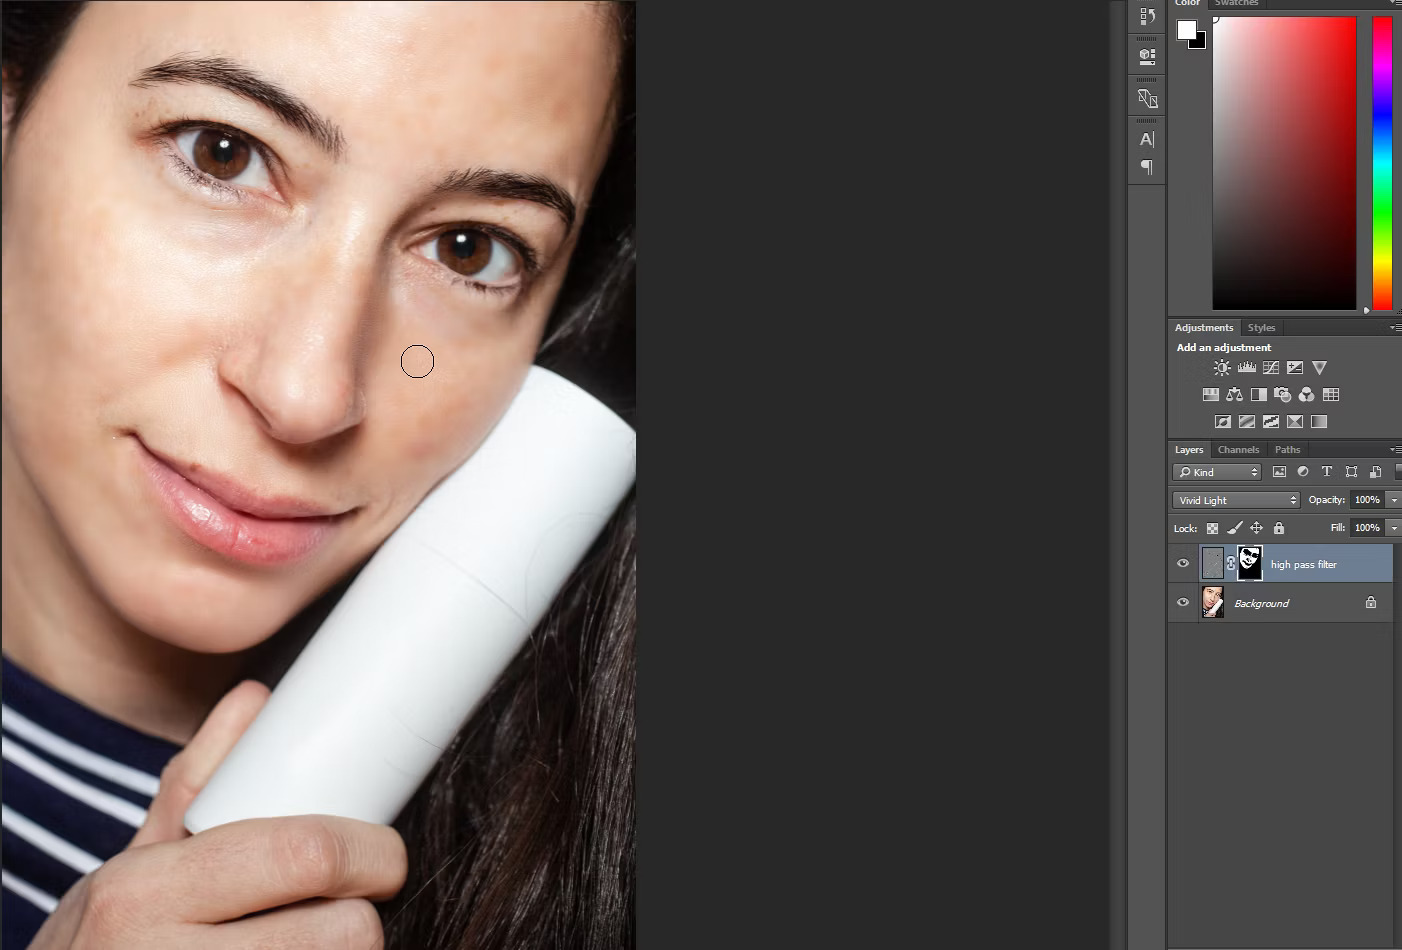
Areas such as the subject's eyes, lips, and points below the nostrils should be omitted for a more natural appearance. Remember to only paint on areas that need softening and avoid bright areas.
Was this article helpful?
Your feedback helps us improve.
Related Articles
 How to smooth skin with Photoshop3 minutes read
 Adjusting skin tone to be smooth and white in PhotoCat is extremely easy.2 minutes read
 5 steps and 1 'hot' morning habit to help you have smooth, bright skin5 minutes read
 7 kinds of fruit juices help you to have bright and smooth white skin4 minutes read
 Easy Photoshop Skin Beautification Tutorial for Beginners4 minutes read
 Things to do before bed to help your skin become firmer and smoother3 minutes read
Reader Comments 0
Sign in with email or Google to join the discussion.