Easy Photoshop Skin Beautification Tutorial for Beginners
Skin retouching in Photoshop is an important technique to make your photos more perfect. If you are new to this software, just follow these steps and you will easily beautify your skin professionally.
Table of Contents
Beautifying skin in Photoshop not only helps remove blemishes but also keeps the natural look of the photo. This article will show you how to use the Healing Brush Tool and the Median filter to get smooth skin in just a few minutes.
Important tools
- Healing Brush Tool: Removes blemishes and dark spots on the skin.
- Lasso Tool: Circles the area that needs editing.
- Median Filter: Smooths the skin while retaining natural details.
Photoshop skin beautification tutorial
- To ensure effective editing, you should download the latest version of Photoshop or Photoshop CS6 .
- You can use the free trial version if you do not have the software.
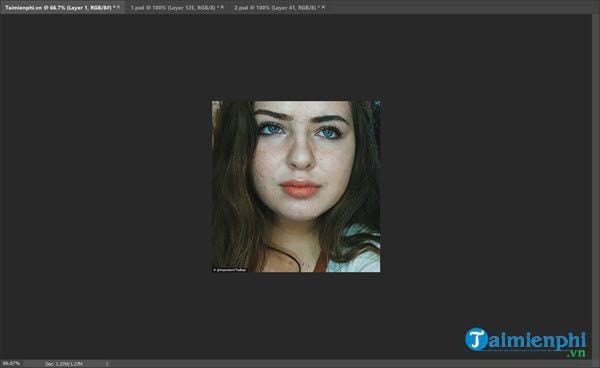
Step 1: Open the original photo you want to edit in Photoshop.
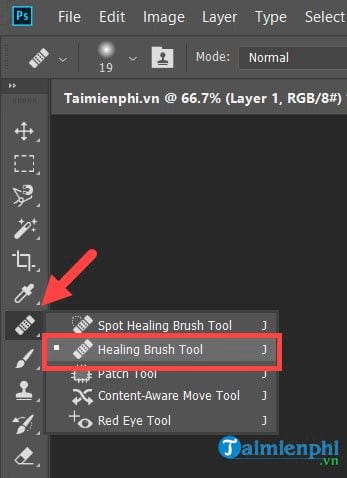
Step 2: Use the Healing Brush Tool and just click on this tool as shown below or use the shortcut key J .
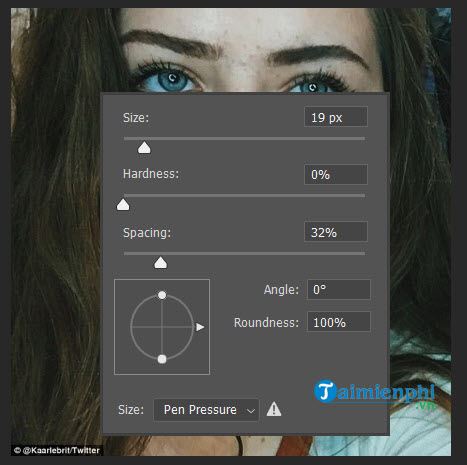
Step 3: Right click on the image and set the size. Hardness to 0% and Spacing should be set to 25 - 35%.
Step 4: First, hold Alt and click on the brightest and most beautiful skin area in the photo. You can also take the skin of the models to make it beautiful and let the Healing Brush Tool diagnose it.
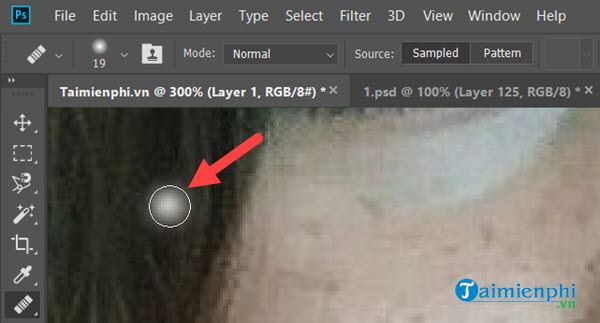
Step 5: Then enlarge the photo, dot on each dark spot, black spot, acne on the girl's face. Note that dot, do not drag or smear.
Step 6: The result after using the Healing Brush Tool to beautify the skin in Photoshop is as below. However, our work is not over yet.

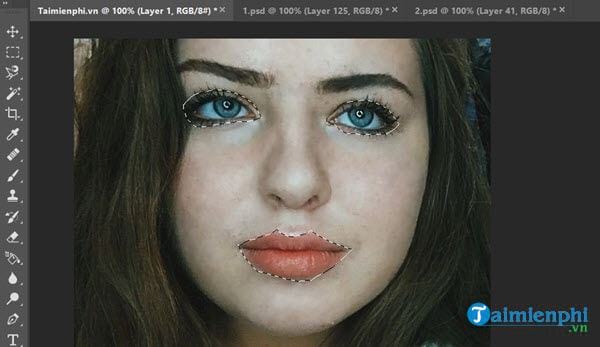
Step 7: Next step we will need to cover some areas so that the skin beautification is not affected, here you choose the Polygonal Lasso Tool or Magnetic Lasso Tool to perform.

Step 8: Circle the eyes and mouth area, remember to hold Shift if you want to circle other areas.
>> After selecting the area, press Ctrl + Shift + I to reverse.
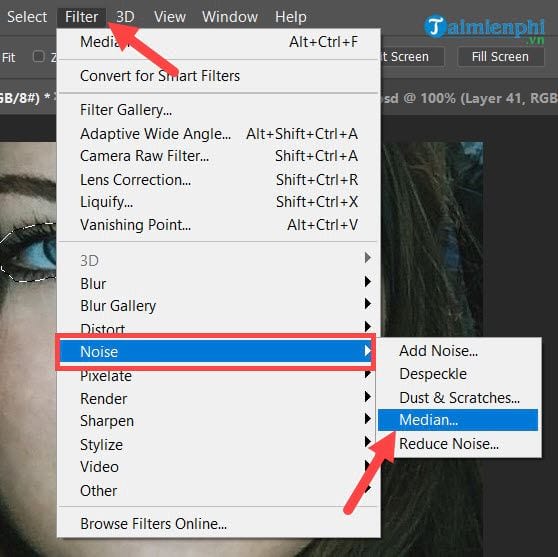
Step 9: Now go to Filter > Noise > Median.
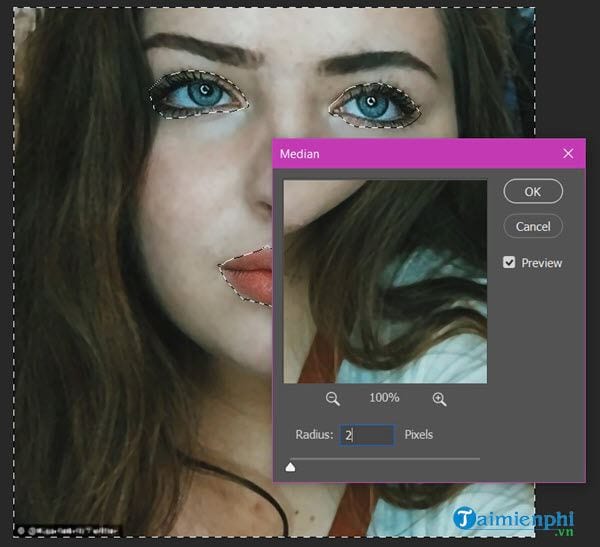
Step 10: Here adjust the value to 2 or whatever your choice is, as long as you see the skin looks better than before.
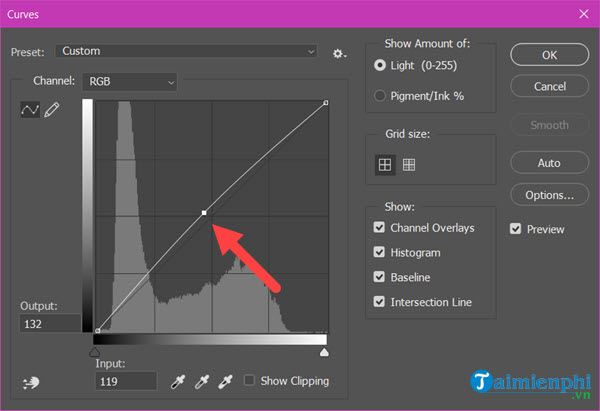
Step 11: Press Ctrl + D to deselect and press Ctrl + M again and push the color up a bit to brighten everything.
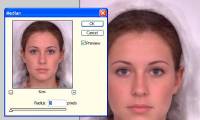
The final result will be as below, readers can compare the photos before and after beautifying the skin with Photoshop. So Tam has a much more beautiful skin than before.

With the Healing Brush Tool and the Median filter, smoothing skin in Photoshop is easier than ever. To work faster, learn Photoshop shortcuts , which will save you time and improve your photo editing efficiency.
Was this article helpful?
Your feedback helps us improve.
Related Articles
 How to use Photoshop CS5 - Part 1: Toolbox2 minutes read
 How to smooth skin with Photoshop3 minutes read
 How to use Photoshop from az for beginners6 minutes read
 The secret to skin beauty in Photoshop5 minutes read
 Instructions for using Photoshop CS5 to edit photos in full set4 minutes read
 How to use Photoshop CS5 - Part 2: Panels8 minutes read
Reader Comments 0
Sign in with email or Google to join the discussion.