How to set up Raspberry Pi as a web server
The Raspberry Pi line of barebone computers are compact devices that inspire creativity and are almost perfect if you want to create your own server at home.
Table of Contents
The Raspberry Pi series of barebone computers are compact devices that inspire creativity and are almost perfect if you want to create your own server at home to deliver websites to the Internet or host a suite of websites and services for your own use.
However, if you are not sure where to start with your single-board computer, read the following article, as you will learn how to prepare your Raspberry Pi as a versatile server that can handle anything you need.
Things Needed to Set Up a Raspberry Pi as a Server
To complete this project you will need the following:
- Raspberry Pi - preferably model 4B
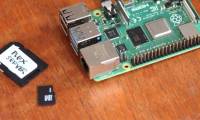
- SD card or SSD
- Ethernet Cable
- Static IP address
- Domain Name - If you don't have one yet, here are some helpful tips for choosing a domain name .
- Another PC
How to install Raspberry Pi OS for server
There are many distributions available for the Raspberry Pi, including Ubuntu, Manjaro, Apertis, and RetroPi. When setting up the Pi to serve content to the Internet, we recommend using Raspberry Pi OS Lite (64-bit), which is a port of Debian Bullseye, but without a desktop or anything else unnecessary. You don't need a desktop since you won't be using a display.
First, plug your SD card into your desktop or laptop. If you're using a USB SSD, plug it in now. Now, download and install the Raspberry Pi Imager tool, then open it from your desktop or command line.
Imager will ask you to select your operating system and storage. Click Choose OS > Raspberry Pi OS (other) > Raspberry Pi OS Lite (64-bit) .
When you click Choose storage , you will see a list of all the storage devices attached to your PC. Select the drive where you want to install the operating system and you will return to the main Imager screen.

Click the gear in the bottom right corner of the screen to open the configuration menu. Now you will set the options needed to connect to the Pi via SSH.
Check the Enable SSH, Set username and password , and Set locale settings boxes . Fill in your preferred username and password, set the language for the timezone, and set the keyboard layout (although you won't be using a keyboard attached directly to the Pi).
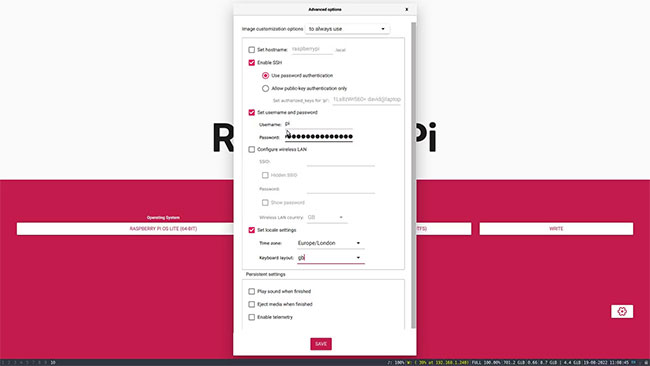
Click Save and then Write. The Raspberry Pi OS will now be written to the storage medium of your choice - this may take a while.
Power up the Raspberry Pi and find it on the local network
Insert the SD card into the Raspberry Pi's card slot, or if using a USB storage device, plug the card into one of the available USB ports . Connect the Raspberry Pi to a power source and an Ethernet cable to your router.
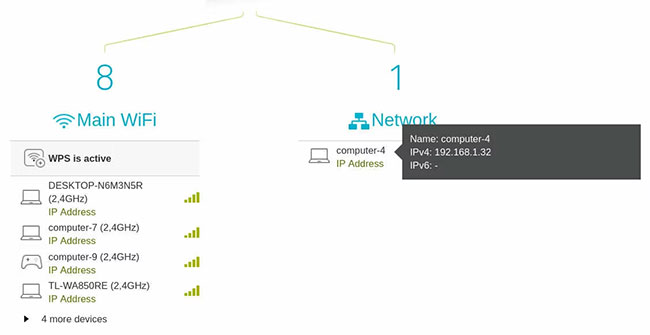
To connect to your Raspberry Pi, you will need to know its IP address. Open a browser on a machine on the same local network and navigate to your router's admin page. You can usually do this by typing 192.168.1.1 into your browser's address bar. Check your router's manual for details if this doesn't work.
The router admin page will show devices connected via WiFi separately from those connected via Ethernet. The Raspberry Pi's IP address should be displayed nearby. If not, hovering over the IP address label will reveal the address - write it down.
One of the advantages of using a wired connection to your router instead of a WiFi connection is that the local IP address will not change. You can turn off your Raspberry Pi, restart your router, and then go on vacation for a week. When you come back, it will still have the same IP address .
Connect to Raspberry Pi via SSH
Now that you know your Raspberry Pi's local IP address, you can connect to it via Secure Shell (SSH) using PuTTY on Windows and macOS or via a terminal on Linux.
ssh user@local.pi.ip.addressOn the first connection, you will get a warning that "The authenticity of the host can't be established" and asked if you want to continue connecting. Type yes and press Return.

You are now logged into your Raspberry Pi and have full control over the system.
Port forwarding to expose Raspberry Pi to the Internet
If you want your Raspberry Pi to become a web server, you need to make sure you can access it from the Internet.
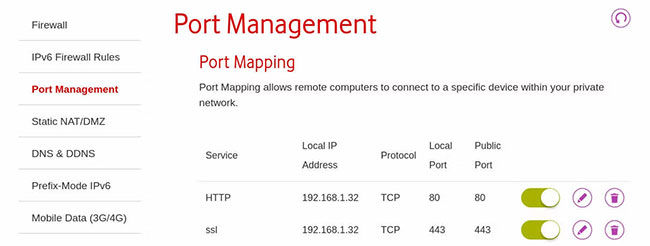
Open your router's admin page and look for a section titled Port Forwarding, Port Mapping , or Port Management , then create two new entries.
The first is for HTTP traffic (unsecured). Set both the local and public ports to 80 and the local IP address to the IP address of the Raspberry Pi.
The second is for HTTPS (secure) traffic. Set both the local and public ports to 443, and keep the local IP address as the IP address of the Raspberry Pi.
Server software required for Raspberry Pi
Your Raspberry Pi needs to be able to handle any server-related software you care to deploy, and to do so, you will first need to install some necessary software.
The software tools you'll need to install to ensure everything runs smoothly in the future include:
- Apache: A web server and reverse proxy.
- MariaDB: A MySQL database.
- PHP: A web-oriented scripting language.
- Docker: An open source container platform.
- Docker-compile: A tool to simplify the management of Docker containers.
- Certbot: Handles the retrieval and installation of SSL keys and certificates from Let's Encrypt.
First, update and upgrade the packages:
sudo apt update sudo apt upgradeInstall Apache by typing the following:
sudo apt install apache2Now, start and enable Apache with the following command:
sudo systemctl start apache2 sudo systemctl enable apache2Go to the public IP address in your browser and you should see the default Apache settings page:

This means that requests to the router on port 80 are being successfully forwarded to the Raspberry Pi and Apache is running as intended.
Install PHP by typing the code below:
sudo apt install phpNext, install MariaDB using the command line below:
sudo apt install mariadb-serverNow, enter the following:
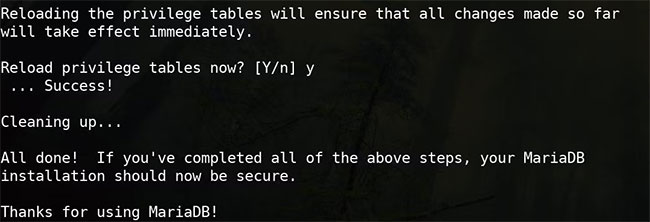
sudo mysql_secure_installationPress Return when prompted for the root password and select No when asked if you want to "switch to unix_socket authentication".
Again, select No when prompted to "change root password" and whether to "remove anonymous users".
Also, select Yes to "disallow remote root login" and yes to "delete the test database and access to it".
Now, reload the privilege tables when prompted and the security installation should complete with a success message.
You should be able to access MariaDB with the following command:
sudo mariadbNow, install Docker by typing the following:
sudo apt install docker.ioStart and enable docker:
sudo systemctl start docker sudo systemctl enable dockerInstall software-properties-common , update, then add the repository for Docker-compile
sudo apt install software-properties-common sudo apt update sudo add-apt-repository ppa:certbot/certbotNow install Certbot:
sudo apt-get install python3-certbot-apacheCongratulations! You've installed all the prerequisite software to allow your Raspberry Pi to securely display almost any type of content, regardless of the deployment method. Plus, you can conveniently access it from the Internet.
You can host anything from a simple static website to a WordPress site, streaming media server, or online Office suite. So take some time to think about what websites and services you want to run from your Raspberry Pi.
Was this article helpful?
Your feedback helps us improve.
Related Articles
 7 great ideas using Raspberry Pi as a server6 minutes read
 How to make a Raspberry Pi a web server7 minutes read
 How to turn a Raspberry Pi into an IRC server7 minutes read
 5 game servers that can run on Raspberry Pi5 minutes read
 How to create a Plex Server on Raspberry Pi 45 minutes read
 26 amazing applications of the Raspberry Pi mini-computer.22 minutes read
Reader Comments 0
Sign in with email or Google to join the discussion.