How to set up Home VPN Server with Raspberry Pi
Did you know that with Raspberry Pi and a free afternoon, you can also build your own VPN? The method is very simple.
Table of Contents
VPN or virtual private network, allows you to send and receive data over public networks as if you were on your own network. This is useful if you connect to public WiFi for example. Using VPN means everyone else in the cafe will not be able to block your data.
There are many companies that allow you to use their VPN service for a fee. Did you know that with Raspberry Pi and a free afternoon, you can also build your own VPN? The method is very simple. Find out more with TipsMake.com via the following article!
Why build your own VPN?
One of the main reasons for building your own VPN is to avoid paying monthly fees for most VPN services. You should also not worry about putting important data in their hands. You can almost always rely on your own hardware rather than others.
Another benefit when building your own VPN is that you actually connect to your own network remotely. This means that not only is the browser more private, but you can connect to files and devices on the home network (assuming you grant them network access).
Things to prepare to start
To get started, of course you'll need a Raspberry Pi, run the Raspbian operating system and connect it to the network, wired or wireless.

The article will use the PiVPN.io project, which helps set up the Raspberry Pi into an amazingly simple VPN. PiVPN recommends that you use static IP to make connecting to the network easy, but not all ISPs provide this IP. If there is no static IP (which some ISPs provide with additional fees), you can use a service like No-IP, which can simulate this IP for you.
Install PiVPN
For this tutorial, suppose that you have installed Raspberry Pi and run Raspbian. The PiVPN website recommends image Lite but the standard Raspbian image also works well.
When your Raspberry Pi is set up, installing the PiVPN setup script is easy. If you want to preview, visit:
https://raw.githubusercontent.com/pivpn/pivpn/master/auto_install/install.sh
If not, run the following command:
curl -L https://install.pivpn.io | bash
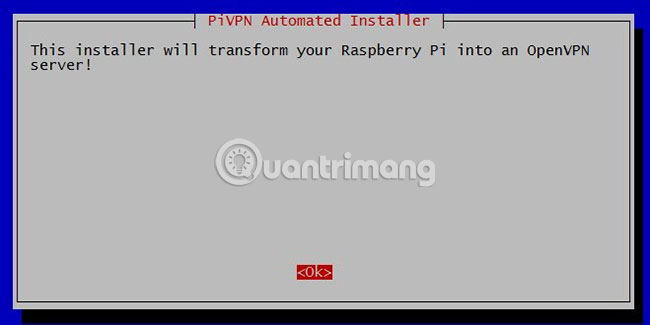
After running the script, you will see a series of prompts. For the most part, the options will be fine by default, but it doesn't take much to read all the screens you see.
When the script has collected the necessary information from you, it will return to the command line. This may take from 40 minutes to several hours, so be prepared to wait for a while.
The script will notify you when it is finished and will ask if you want to reboot. This is not really necessary, but if you do a reboot it will be fine.

PiVPN management
Once PiVPN is installed, you can use the pivpn command to configure and manage it. One of the basic parts of the function is adding clients.
Use the pivpn add command to add the client. You will be prompted to choose a name and a passphrase. Make sure this is something you must remember. If you need to create a client certificate for the router or something else that is not password protected, use pivpn add nopass .
Other commands include pivpn list to list all clients and pivpn revoke to revoke client certificates. If you are not sure what can be run, running pivpn will give you a list of available commands.
Obviously, it's important to keep your data private and secure. This is especially important when it comes to IoT devices. People tend to forget these things, so setting them up to ensure their safety from the beginning is paramount.
If you have never thought about this problem, you may not be aware of the potential security risks that IoT devices may cause. For a few examples, take a look at TipsMake.com's list of popular IoT security threats .
Hope you are succesful.
Was this article helpful?
Your feedback helps us improve.
Related Articles
 How to set up Raspberry Pi as a web server9 minutes read
 7 great ideas using Raspberry Pi as a server6 minutes read
 How to make a Raspberry Pi a web server7 minutes read
 How to turn a Raspberry Pi into an IRC server7 minutes read
 5 game servers that can run on Raspberry Pi5 minutes read
 How to create a Plex Server on Raspberry Pi 45 minutes read
Reader Comments 0
Sign in with email or Google to join the discussion.