How to set up media server at home with Jellyfin on Ubuntu
Jellyfin is a media server to stream and organize images, videos, and audio files. Unlike other solutions on the market, Jellyfin is completely free, does not have any premium features or advanced upgrade packages and gives users full control of their media. Any device with a modern web browser can access and stream from Jellyfin. Jellyfin has apps for Android, Android TV and Amazon Fire TV.
Here's how you can set up your own media server with Jellyfin.
Instructions for setting up media server with Jellyfin on Ubuntu
- Before start
- Install Jellyfin
- Use the setup wizard
- Add library
- Add users
- Install the Jellyfin plugin
Before start
You will need a 64 bit device running Ubuntu version 18.04 desktop or server. This could be anything from an old laptop lying somewhere in the house to a high-end dual socket server, but make sure you have enough storage for all your media files. For better performance, use a wired network connection instead of WiFi.
You will also need to set a static IP address on your Ubuntu machine.
Install Jellyfin
Start by updating the Ubuntu system:
sudo apt update && sudo apt -y upgrade Install curl (HTTP client) and apt-transport-https, enable HTTPS support for APT:
sudo apt install -y curl apt-transport-https Activate Ubuntu repository:
sudo add-apt-repository universe Add Jellyfin software repository:
echo "deb [arch=$( dpkg --print-architecture )] https://repo.jellyfin.org/ubuntu $( lsb_release -c -s ) main" | sudo tee /etc/apt/sources.list.d/jellyfin.list The GPG signing key is used to ensure that the downloaded files are not tampered with. Add the signing key Jellyfin:
curl https://repo.jellyfin.org/ubuntu/jellyfin_team.gpg.key | sudo apt-key add - Update package list:
sudo apt update Install Jellyfin:
sudo apt install -y jellyfin If you want Jellyfin to start automatically when booting, run:
sudo systemctl enable jellyfin.service Start Jellyfin:
sudo systemctl start jellyfin.service Use the setup wizard
Browse to http:/// IP_ADDRESS: 8096 , where 'IP_ADDRESS' is the static address you have configured.
Choose a default language and click Next.

Enter the username and password to create the admin account, then click Next.

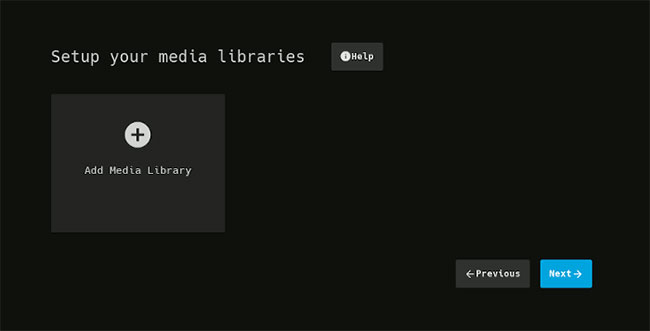
You can add the following libraries, so skip this step now by clicking Next.
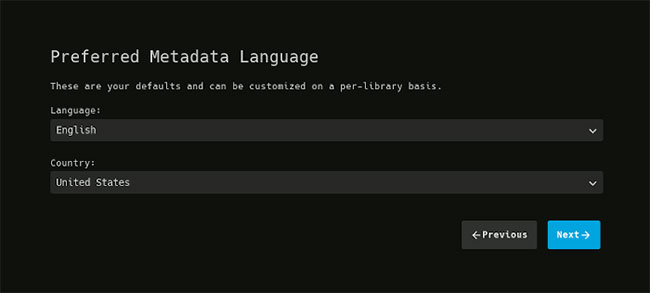
The metadata includes a variety of information and data, such as rating by age, overview, poster, etc. Select a language and country, then click Next.
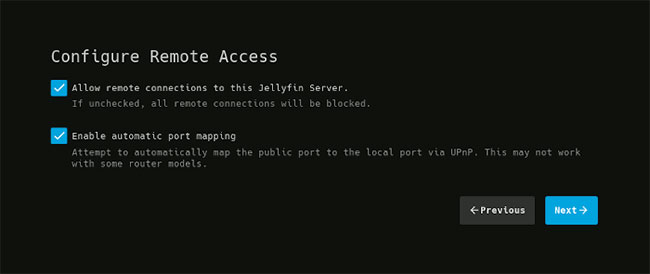
If you plan to stream from Jellyfin outside of the house, turn on these options. If not, uncheck them. Click Next and Finish to exit the setup wizard.
Add library
Jellyfin uses custom libraries to organize media files. To create the first library, log into Jellyfin at http:/// IP_ADDRESS: 8096 / and open the admin panel by clicking on the top right icon. On the left sidebar, under Server, click Libraries and then press 'Add Media Library' .
Select a content type and name the library, then click the plus sign to add a folder.
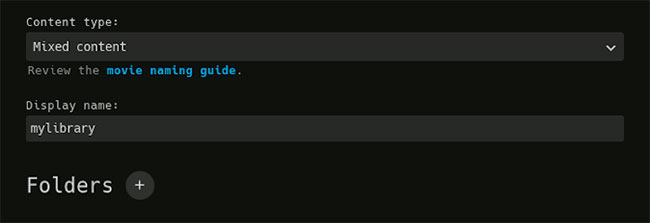
Enter the full path to the directory where you will store the files for this library and then click OK. Repeat this process for other directories, if any. You do not have to change other library settings, because the default option works well in most cases.
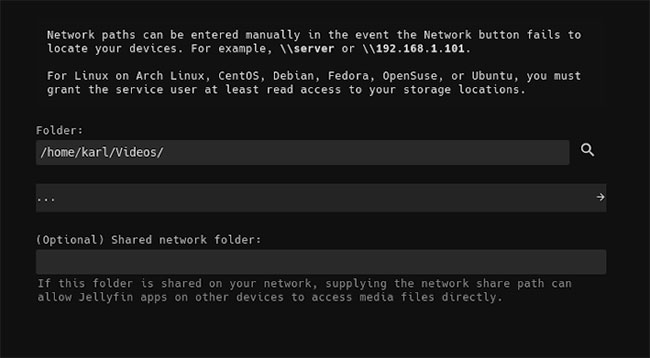
When you want to add new media, just add it to one of your selected folders. Jellyfin regularly scans these folders and updates libraries.
Add users
The default user account created by the setup wizard has admin access and therefore should not be shared. Instead, you can create other Jellyfin accounts for family members, friends, etc.
From the admin panel, under Server, click Users and then the plus sign to add user accounts.

Enter a username and password. If you do not want this user to have access to all your libraries, leave the 'Enable access to all libraries' checkbox checked. Click Save to create an account.
Install the Jellyfin plugin
To add functionality, you can install plugins, such as the popular OpenSubtitle plugin that automatically loads subtitles.
From the admin panel, in the Advanced section, click Plugin and then the Catalog tab.

Click the plugin you want to install.

If you want a specific version, select it. If not, select the latest version and click Install . When you see the message 'The plugin has been successfully installed' , restart Jellyfin from the main page of the admin panel by clicking Restart .

After restarting Jellyfin, the plugin is ready to use.
Now you have a media server to stream.
Hope you are succesful.