How to Reformat Android Phone
This wikiHow teaches you how to erase all data on your Android device and restore it to factory settings. Reformatting will delete all your files, including your pictures, documents, and videos, so we recommend that you make a backup first.
Table of Contents
Back up data and movies/photos on the device
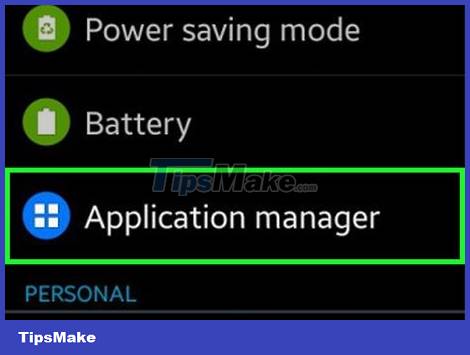
Click the image button ⋮⋮⋮ to open the Applications Manager application manager.
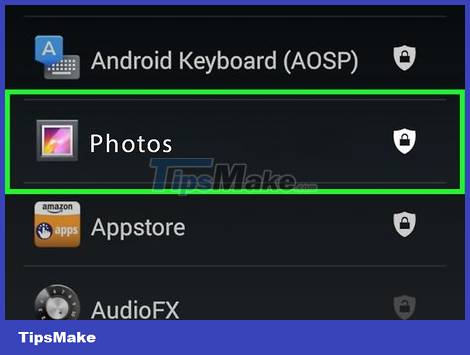
Scroll down and tap Photos with the multicolored pinwheel icon.
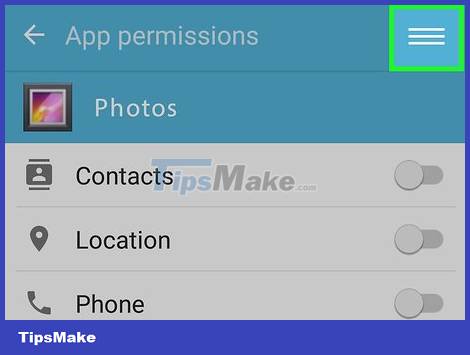
Tap the ≡ -shaped button in the upper-left corner of the screen.
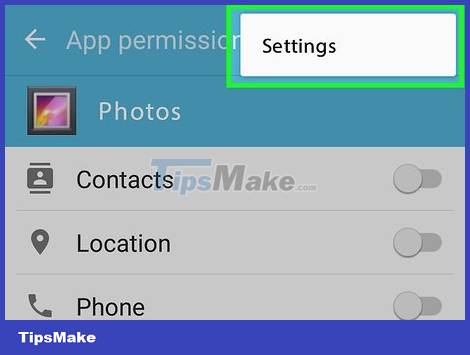
Tap the Settings option in the middle of the menu.

Tap the Back up & sync action at the top of the menu.

Swipe the "Back up & sync" button to the "On" position. The slider will turn blue.

Press the Home button.
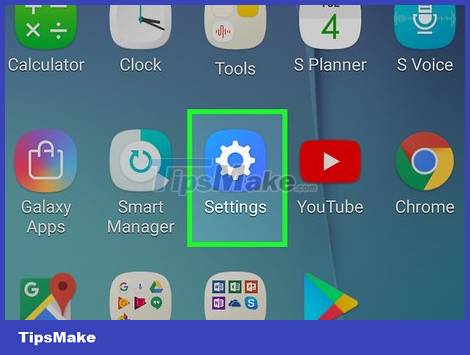
Open your device's Settings. Apps usually have a gear icon (⚙️) or a frame containing multiple sliders.

Scroll down and tap Accounts located in the "Personal" section of the menu.
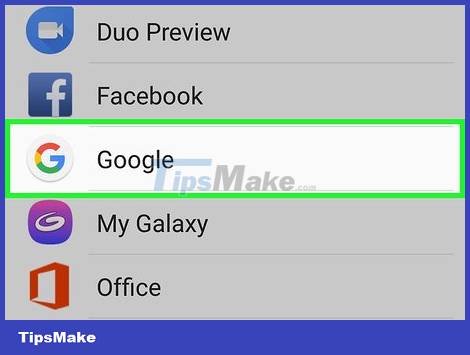
Tap the Google entry . The list of accounts is listed in alphabetical order.
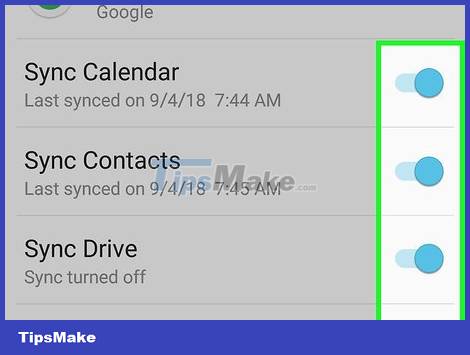
Swipe the slider to the "On" position. Slide the buttons next to the data you want to back up to the "On" position. The switch will turn blue.
Turn on Drive to sync photos.
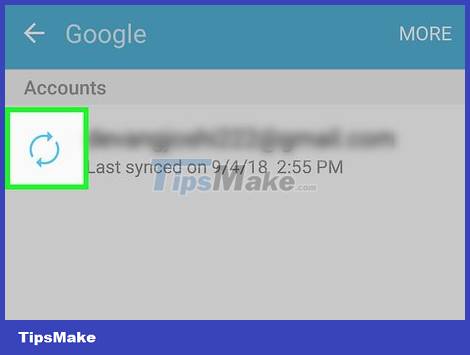
Tap the button next to the buttons you just swiped to the "On" position. Click each button in the menu to start syncing instantly.
You can reload apps that were previously installed when you sign in to your Google account on the reformatted device.
Was this article helpful?
Your feedback helps us improve.
Related Articles
 How to Reformat Windows 75 minutes read
 Instructions for finding the Android phone model (line) you own4 minutes read
 6 Smart Ways to Use Your Old Android Phone6 minutes read
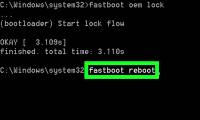 How to Lock Bootloader on Android3 minutes read
 How to reformat an external hard drive does not cause data loss8 minutes read
 Check Android phone configuration5 minutes read
Reader Comments 0
Sign in with email or Google to join the discussion.