How to Rearrange Pages in Word
TipsMake today will show you how to rearrange the page order in Microsoft Word documents. Although Word does not support a simple way, you can still rearrange the order by giving a title to each page, or cutting content from one page to another. Other than Microsoft PowerPoint, there is no formal way to organize pages on Microsoft Word.
Use title

Open the document. Double-click the Word document that you want to rearrange to open the file in Microsoft Word.
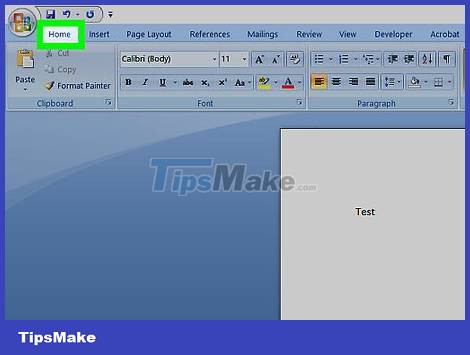
Click the Home tab . The tab is in the blue ribbon at the top of the Word window.
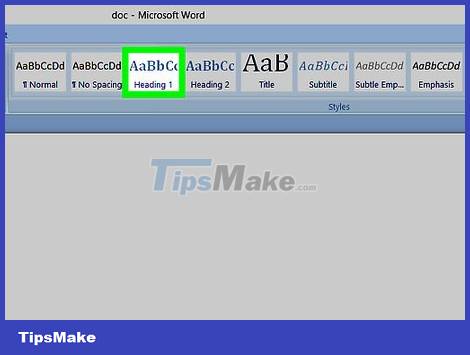
Add a title to the top of each page. To add a title to your page, type a title (such as "Page 1") at the top of the page, then press ↵ Enter, then click Heading 1 in the "Styles" section of the toolbar.
On Mac, you may need to click the Styles drop-down to the right of the toolbar.
Depending on the format of the document, you may need to scroll on the "Styles" menu to find the Heading 1 option.
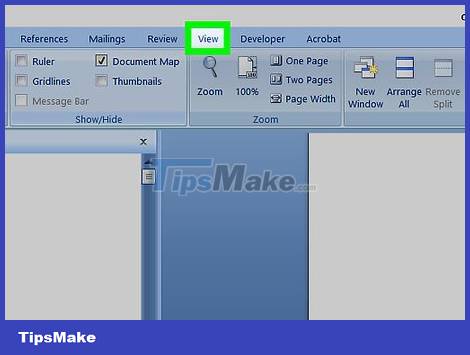
Click the View tab . This option is a few tabs to the right from the Home tab.

Check the "Navigation pane" box. This pane is located in the "Show" section of the toolbar. Once you check it, a "Navigation" window will pop up on the left side of the Word window.

Click Headings . This tag is at the top of the "Navigation" box. A list of all headings in the Microsoft Word document will appear.
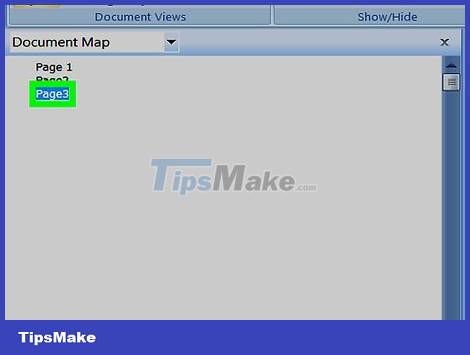
Reorder the list of titles. Click and drag a title in the "Navigation" frame up or down to the desired location and then release the mouse button. The pages on the Word document will change accordingly.
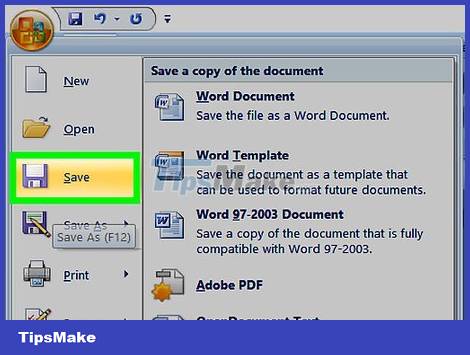
Save document. Press Ctrl+S (Windows) or ⌘ Command+S (Mac).
Use cut and paste operations

Open the document. Double-click the Word document that you want to rearrange to open the file in Microsoft Word.

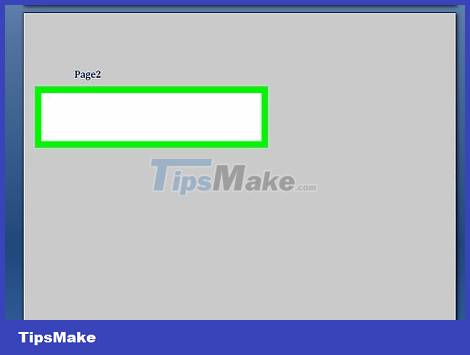
Find the page you want to move. Scroll down until you find the page you need to move up or down.

Select the text on the page. Click in front of the first word on the page and drag the mouse pointer to the last word on the page. When you release the mouse, all text on the page will be highlighted.

Trim the text on the page. Press Ctrl+X (Windows) or ⌘ Command+X (Mac) to execute. The "Cut" action copies the selected text and deletes it from the document, so don't worry when the text on the document disappears.

Find where to place the text. Scroll up or down until you find the page where you wanted to place the clipped page before.
Click on the top of the selected page. The mouse pointer will be at the position where you want to insert the cropped page.
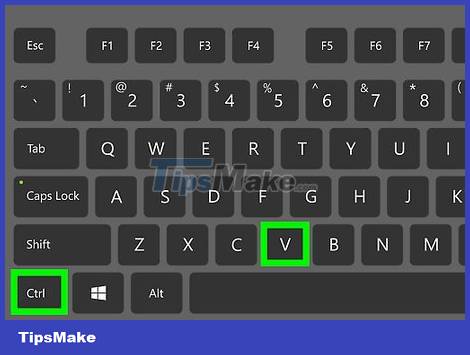
Add the trimmed text back in. Press Ctrl+V (Windows) or ⌘ Command+V (Mac), then press ↵ Enter. The trimmed text will appear, the first word of the trimmed page will start at the position where the mouse pointer is located.

Save document. Press Ctrl+S (Windows) or ⌘ Command+S (Mac).
You can repeat this process with multiple pages on a Word document.
- How to add pages in Word
- MS Word - Lesson 14: Create Web Pages
- How to Convert Pages to Word
- How to count Word pages without opening a file
- How to style pages symmetrically on Word
- The most detailed guide on how to number pages, skipping the first page and starting from any page in Word.
- How to view multiple pages in Word at the same time
- Number pages in Word 2013, insert page numbers automatically
- These are some free software options that can replace Microsoft Word.
- Copy and move text in MS Word with F2 key
- Use Comments Tool in MS Excel
- Change the Section Break in Word 2007 and 2010
- Create Master Document in Word 2010 from many Word files
- 10 great tools of Microsoft Word
- Learn about Section in Microsoft Word 2010
- Explore * .docx file in Windows 7
- 3 Ways to open DOC files without Word
- Use the Microsoft Word Replace feature to invert the words in the column


-
 The most detailed guide on how to number pages, skipping the first page and starting from any page in Word.
-
How to rotate any page horizontally in Word
-
7 ways to number pages in Word that you need to know.
-
How to create templates in Notion and share them with others.
-
How to number pages starting from any page in Word
-
How to quickly number pages in Word 2010, 2013, 2016, and 2019
 The most detailed guide on how to number pages, skipping the first page and starting from any page in Word.
 How to rotate any page horizontally in Word
 7 ways to number pages in Word that you need to know.
 How to create templates in Notion and share them with others.
 How to number pages starting from any page in Word
 How to quickly number pages in Word 2010, 2013, 2016, and 2019
-
Application
-
Web Email
-
Website - Blog
-
Web browser
-
Support Download - Upload
-
Software conversion
-
Social Network
-
Simulator software
-
Online payment
-
Office information
-
Music Software
-
Map and Positioning
-
Installation - Uninstall
-
Graphic design
-
Free - Discount
-
Email reader
-
Edit video
-
Edit photo
-
Compress and Decompress
-
Chat, Text, Call
-
Archive - Share
-
-
System
-
Mac OS X
-
Hardware
-
Game
-
Tech info
-
Technology
-
Science
-
Life
-
Electric
-
Program
-
Mobile