How to quickly create borders in Word documents.
To enhance the aesthetics and professionalism of your documents, creating borders in Word is a simple yet effective solution. Using tools like Page Borders, Shapes, or Online Pictures, you can easily add borders to your text or cover pages.
Table of Contents
Adding borders helps text stand out and makes it easier to read. You can use Page Borders to border the entire page, Shapes to create custom frames, or Online Pictures to add artistic borders.
1. Use Page Borders
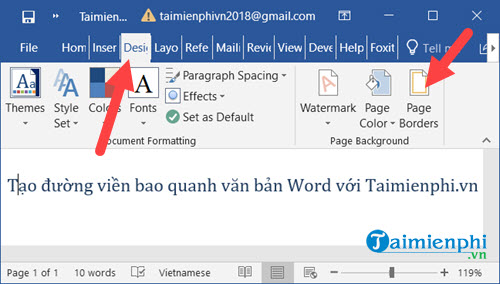
Step 1: Select Design -> Page Borders.
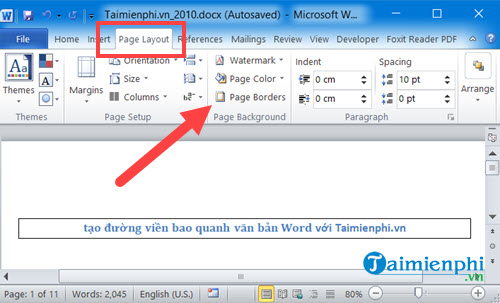
In Word 2010 and 2007, go to Page Layout -> Page Borders.
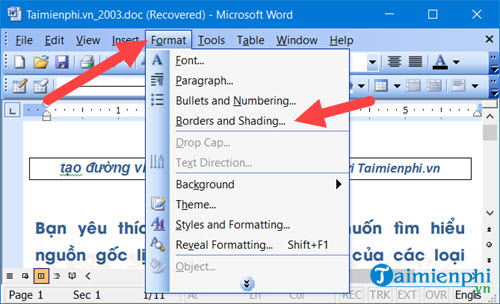
In Word 2003, click on Format -> Borders and Shading.
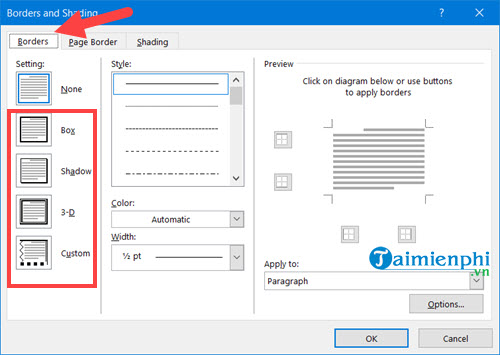
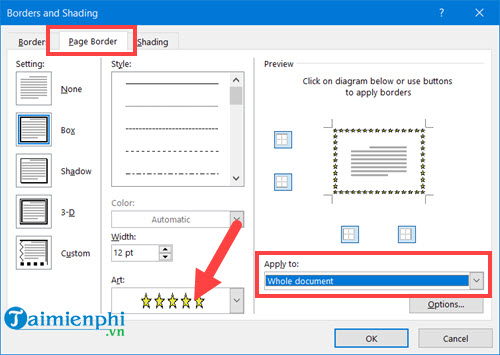
Step 2: Next, go to Borders or Page Borders
- Borders : Borders around specific sections of the document
- Page Border : Borders around the entire page in Word.
- Shading : Creates a background color style for the text within the border.
- Settings : Choose the border display style such as Box, Shadow, 3-D, or Custom.
- Style : Choose a border style such as solid line, dashed line, or other styles as desired.
- Color : Choose the color for the border around the text in Word.
- Width : Adjust the thickness of the border.
- Preview : See the outline and adjust it before applying.
- Apply to : This option applies to the current text or the entire Word file.
- For example: To create a border around specific text in a document, go to Borders , select the desired option, and click OK .

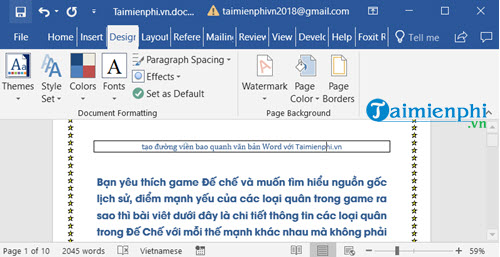
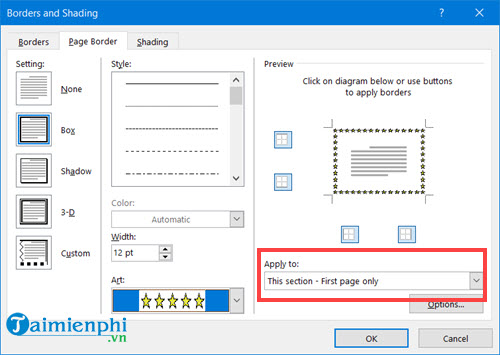
- For example: To create a border for a page, or the entire page in Word, go to Page Border , select the parameters and Art (border style), and click OK .
+ Apply to Whole document : Applies to all text in the file.
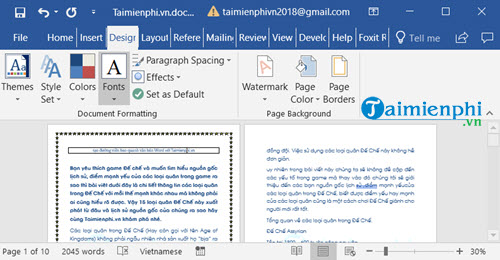
+ Apply to This section - First page only: Apply to the specific page, the designated Word document page.
==> Then you can see the comparison between one side with a border and the other side without a border in our image below.
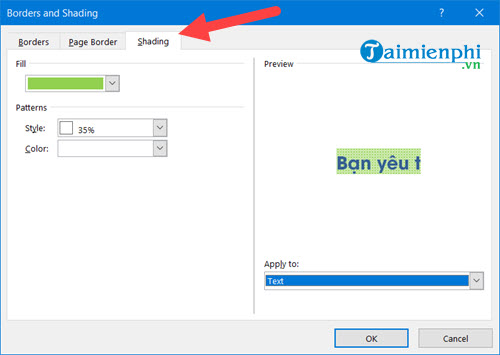
- The final section we want to discuss is Shading, which allows users to style the background color of text in a paragraph or the entire Word document with the following options:
+ Fill : Choose the background color for the paragraph or the entire document.
+ Style : Choose the display style for the background color using patterns.
+ Color : Choose the background color for the text using patterns.
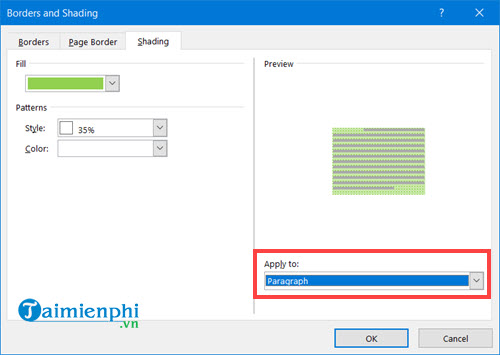
+ Apply to Text : Apply the color to all the text in the selected section.
+ Apply to Paragraph applies to all text in the Word document.
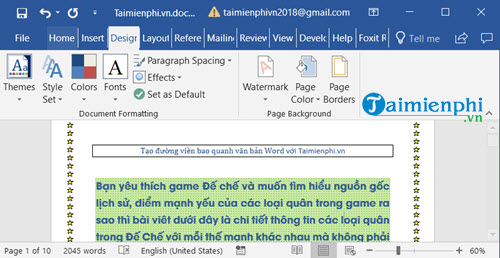
==> Results when using Shading.
Along with creating borders, adding dotted lines in Word is a useful skill that helps you format documents professionally. Dotted lines not only help divide content clearly but also make the document more visually appealing.
2. Using Shapes
2.1. For Word 2021, 2019, 2016, and 2013
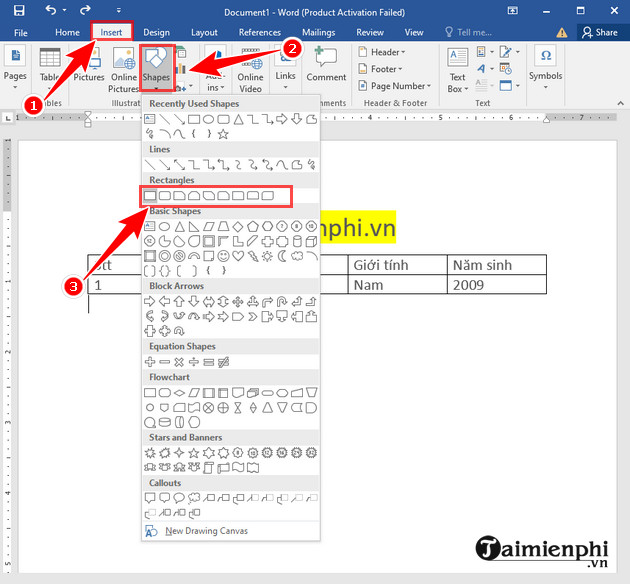
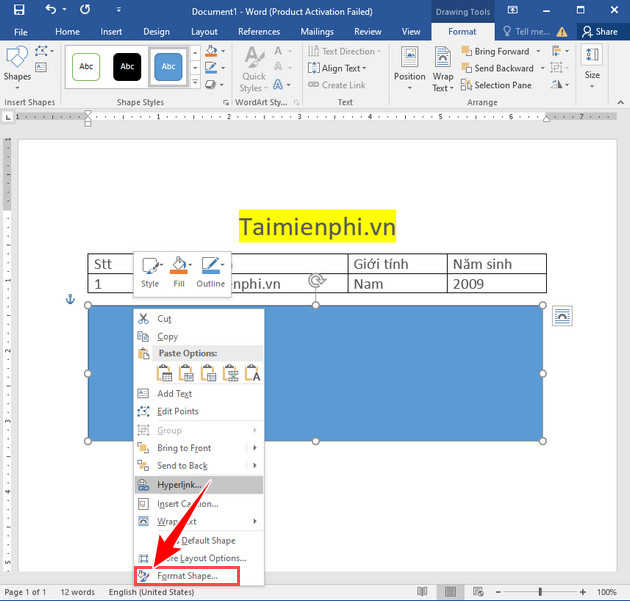
Step 1: Open the Word file where you want to create the frame => Select Insert => Select Shaper => Choose the icon you want .
Step 2: In the selected frame , right-click => Select Format Shape .
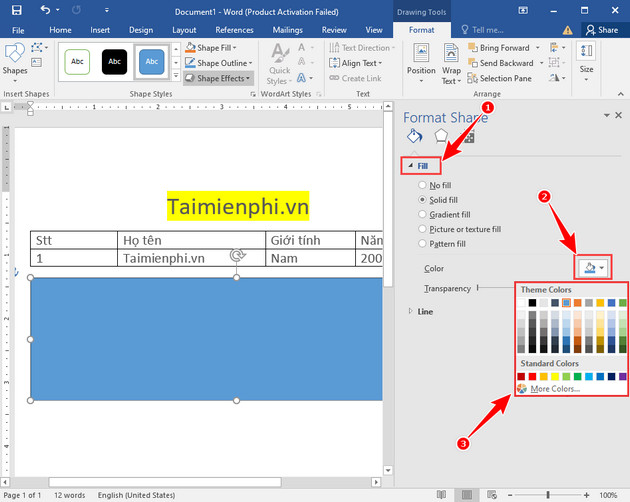
Step 3: To edit the background color in the frame, go to Fill => select Color => select the inverted triangle icon => Choose the color you want and you're done.
Step 4: To edit the border color, go to Line => under Color => select the inverted triangle icon => Choose your desired color and you're done.
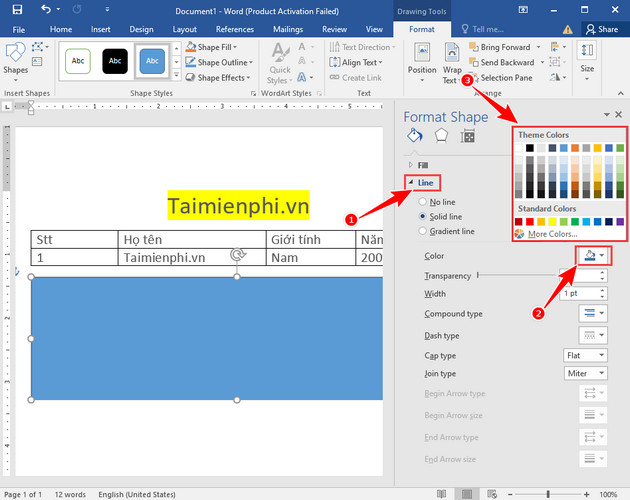
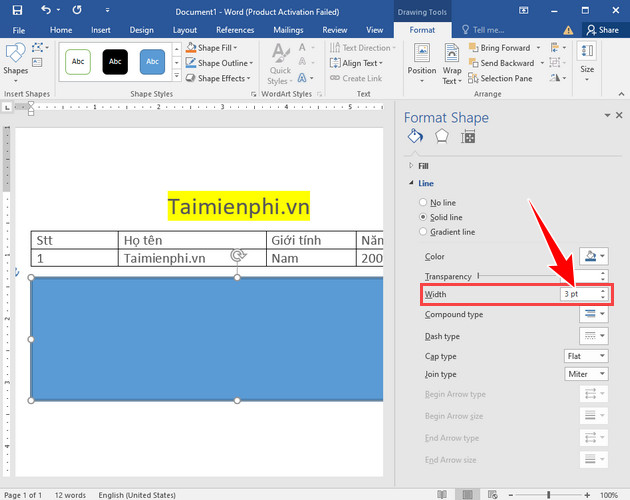
Step 5: In the Line section , you can choose the border for the frame by selecting Compound type .
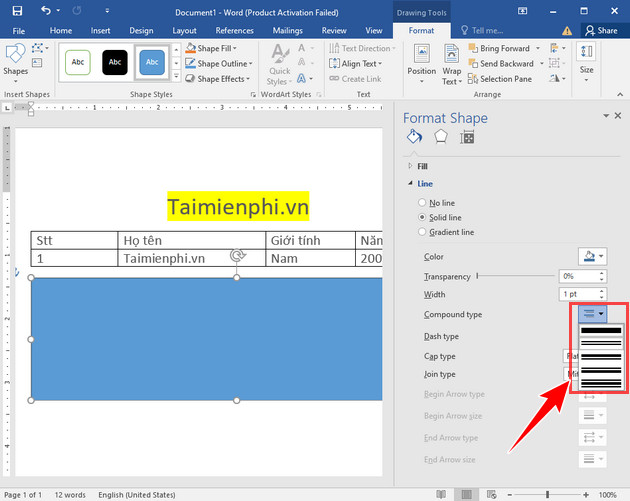
Step 6: You can choose the size for the border in the Width section .
2.2. For Word 2010 and 2007
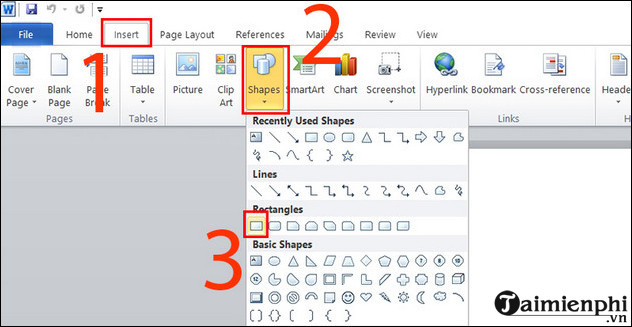
Step 1: Open the Word file, select Insert => Select Shapes => Choose the desired frame .
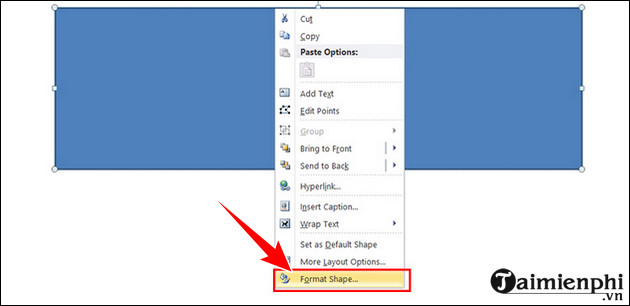
Step 2: Right- click on the frame => Select Format Shape .
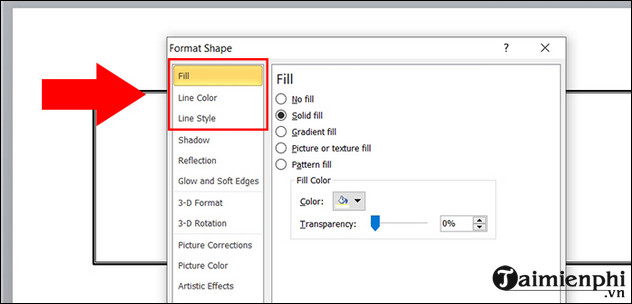
Step 3: You can adjust the border in the Fill, Line Color , and Line Style sections .
3. Using Online Pictures
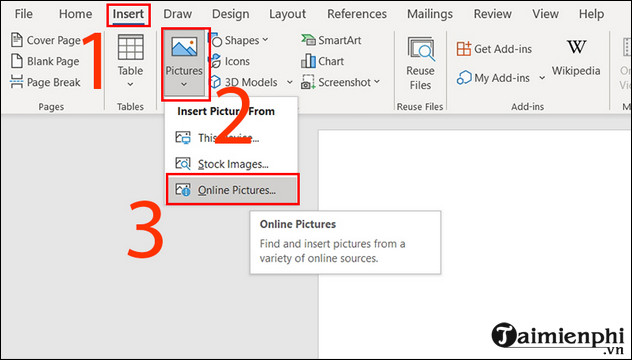
Step 1: Open the Word file, select Insert => Select Pictures => Select Online Pictures .
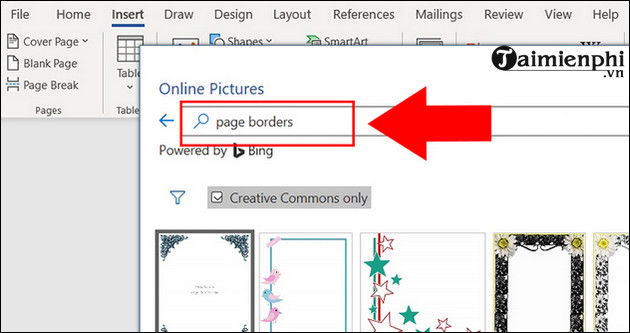
Step 2: Enter the frame name in the TipsMake article, type Page Borders => Then click OK to search.
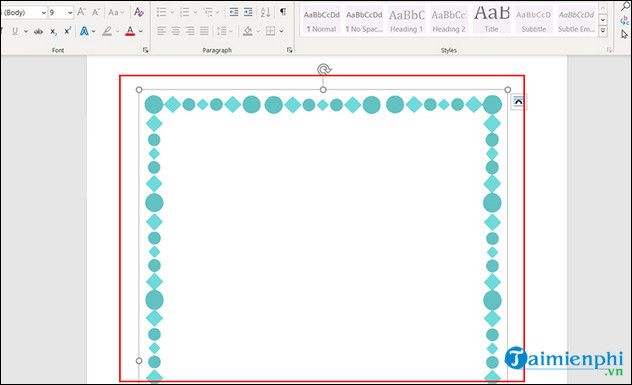
Step 3: Select the frame you want to install => Select Insert .

- Result:
Besides Word, you can also use Shapes or Online Pictures to create creative cover page borders. This makes documents like lesson plans, theses, and reports more professional and impressive. For more customization, you can adjust the color, thickness, and style of the border to your needs. Applying borders to cover pages in Word not only enhances aesthetics but also makes the document layout clearer and easier to read.
Was this article helpful?
Your feedback helps us improve.
Related Articles
 How to delete frames and borders in Word2 minutes read
 Create beautiful border borders in Word2 minutes read
 Create borders and fill the background for text in Word2 minutes read
 How to create a cover page in Word7 minutes read
 Format borders and should be for tables in Word2 minutes read
 Create borders for text pages in Word3 minutes read
Reader Comments 0
Sign in with email or Google to join the discussion.