A guide to creating footnotes in Word quickly and easily.
Footnotes in Word help create annotations at the bottom of a document, making it easier for readers to understand the content. This feature is especially useful when writing research papers, theses, or professional documents.
Table of Contents
The footnote function in Word helps create notes at the end of a page, supporting explanations of terminology or source citations. You can easily add, edit, or delete footnotes following the detailed instructions below.
Table of Contents:
1. In Word 2019, 2016, 2013
2. In Word 2010, 2007
3. How to create footnotes in a document
1. Creating Footnotes in Word 2019, 2016, and 2013
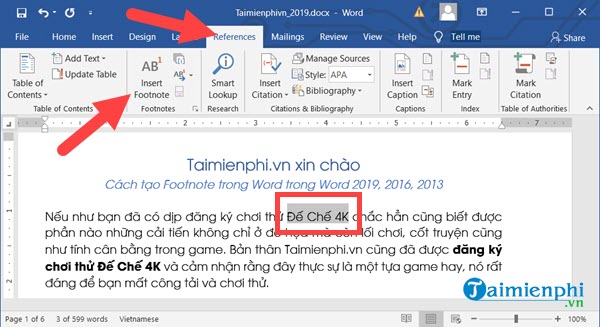
Step 1: Highlight the word or phrase you want to create a footnote for, then go to References > select Insert Footnote .
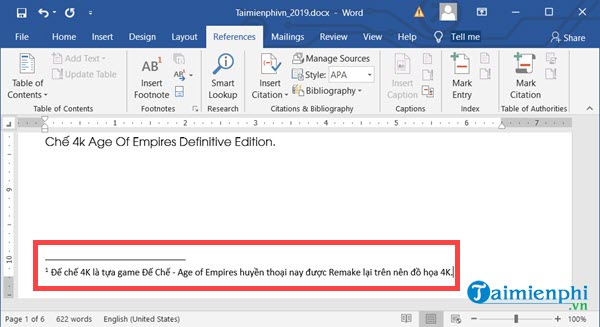
Step 2: Word will immediately take you to the bottom of the document (of that page), where you can write a footnote explaining the word you just created.
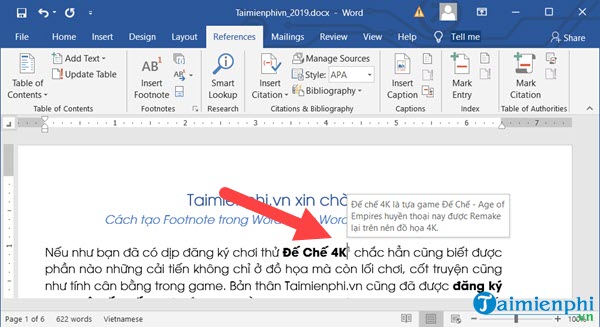
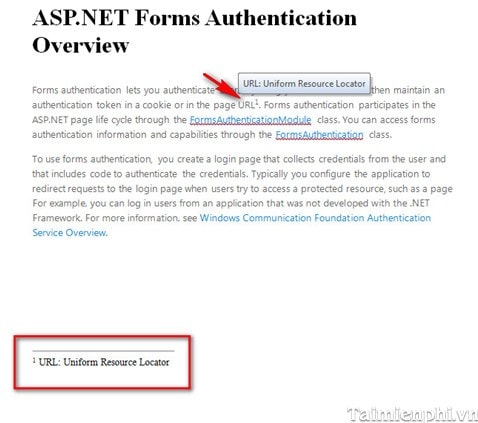
Step 3: Finally, go back to the word or phrase you just highlighted; you will see a small superscript above it. Hovering your mouse over it will display the explanation.
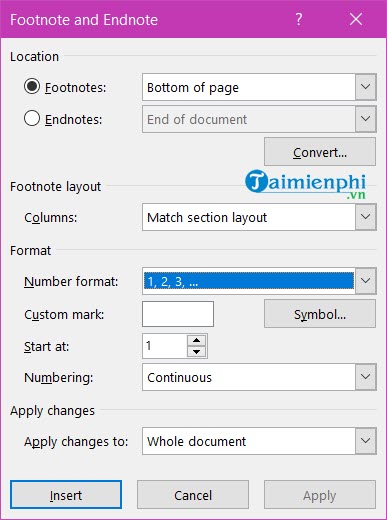
Additionally, you can further customize your footnote in the Footnote Settings with features such as:
* Location : The footnote's placement (at the end of each page or the end of the document).
* Footnote Layout : The footnote's display position within the document.
* Format : Footnote formatting including display style (numbering 1, 2, 3 / I, II, III / a, b, c). Whether to start from the beginning (from 1) or continue from the previous page.
* Apply changes : Changes to the entire document or a specific section.
2. Creating Footnotes in Word 2010, 2007
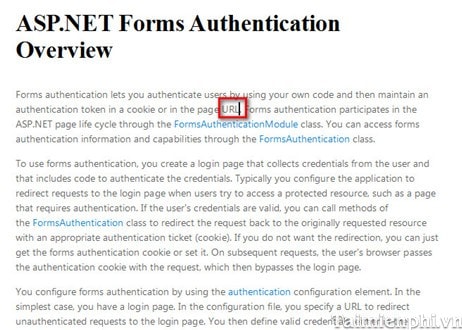
Step 1: Similar to the example we mentioned above, we have a piece of text here.

Step 2: On the text interface, highlight a word, for example, "register" > then select "References" > select "Insert Footnote" to insert a footnote in Word 2010, 2007.

Step 3: The system will automatically scroll you to the bottom of the text; here, the user only needs to enter the footnote.
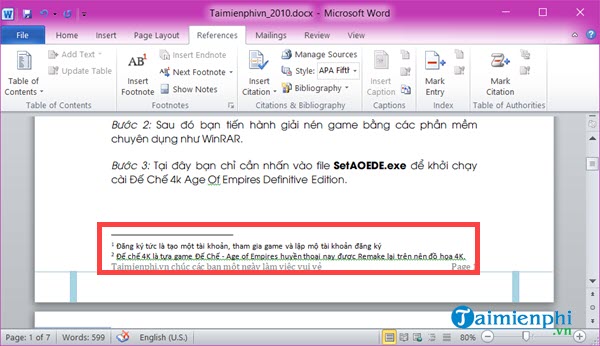
Step 4: Now scroll back up to the section you just highlighted. Here you will see the word "register" with a circumflex accent above it. Point to it and you will see the footnote we just entered below.

3. How to create footnotes in a document
Step 1 : In the Word document where you want to create a footnote, place the cursor at the location where you want to add the footnote.
Step 2 :
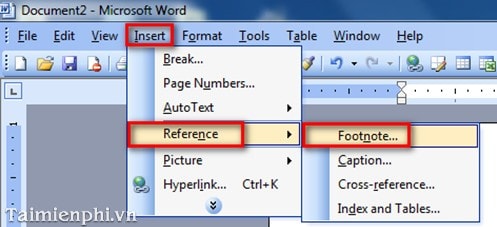
+ Word 2003 : Select Insert -> Reference -> Footnote
+ Word 2007 : Select the References tab --> click the arrow in the upper right corner --> A dialog box will appear.

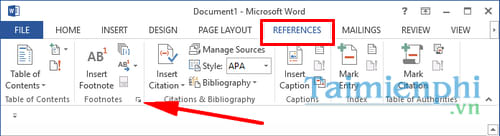
+ Word 2010, 2013, and 2016: Select the References tab --> click the arrow icon as shown below.
Step 3 : A dialog box will appear; set the optional parameters and click Insert to complete the process.
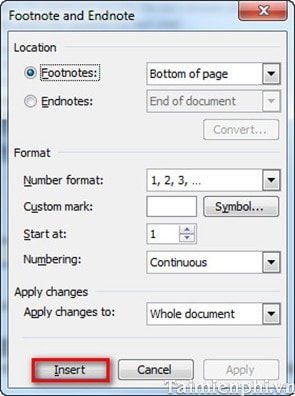
In there:
- In the Location tab :
+ Bottom of Pages: To appear at the bottom of the page.
- In the Format tab:
+ Number format: Choose the annotation style as 1, 2, 3. or a, b, c. (you can customize it)
+ Customer mask: Leave this blank if you want the annotation to be a number, or select Symbol to choose a character annotation.
+ Start at: Choose the starting number for the annotation .
+ Numbering: Includes Continuous (annotation continues from beginning to end), Restart at each page (annotation starts again on each new page), Restart at each selection (annotation continues from the beginning to the end of the selected text and starts again when you select a different section of text).
Step 4 : The cursor will automatically jump to the bottom of the page.
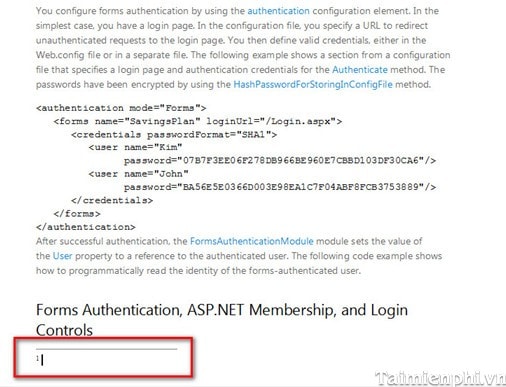
Step 5 : Write your annotation settings. The result will look like the image below.
Creating footnotes in Word 2010 and 2013 is similar to creating footnotes in Word 2007.
When using Word, creating footnotes helps to clarify the content of the text, making it easier for readers to grasp the information. You can customize the footnote formatting such as bolding, italics, or adding special characters, making the text more professional and easier to understand.
Was this article helpful?
Your feedback helps us improve.
Related Articles
 How to Add a Footnote to Microsoft Word7 minutes read
 How to Add Comments to Microsoft Word7 minutes read
 Instructions for inserting notes in the footer in Word4 minutes read
 How to convert Canva to Word quickly and easily.3 minutes read
 Guide to quickly creating a word puzzle game on Educaplay3 minutes read
 How to create name tags in Word3 minutes read
Reader Comments 0
Sign in with email or Google to join the discussion.