Table of Contents
This updated guide explains how to Permanently Display Windows 10 Version on Desktop through clear steps, practical examples, and important checks that help prevent common errors.
Of course, when troubleshooting a computer problem, determining which version of Windows 10 is running on your computer is a fairly simple matter to properly open the System Configuration screen. However, doing so many times can be frustrating, even for the most patient people.
With a simple tweak to the Windows 10 Registry file, users and system administrators can see exactly which operating system version is installed on a particular PC just by looking at the desktop.
This guide will show you how to adjust the Registry file to display the current version of Windows 10 on the desktop all the time.
Note Before Implementation
Editing the Windows Registry file is a serious job. A corrupted Windows Registry file can render your computer inoperable, require reinstalling the Windows 10 operating system, and may cause data loss. Back up the Registry file and create a Windows 10 restore point before you make any modifications.
Show Windows 10 Version on Desktop
The figure below shows the lower right corner of the typical Microsoft Windows 10 desktop - no version information is displayed. This tweak to the Registry file will change that.
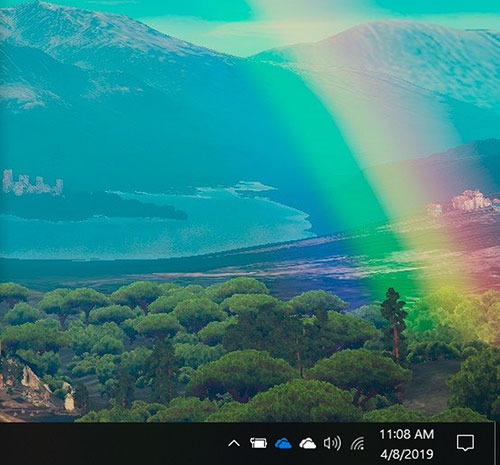 The typical Microsoft Windows 10 desktop has no version information displayed
As is the case with any Registry tweak, start by typing "regedit" into the Cortana search box on the Windows 10 screen. Click that item in the search results to open the Registry Editor (regedit. exe). ). Once the application is open, navigate to this key:
ComputerHKEY_CURRENT_USERControl PanelDesktop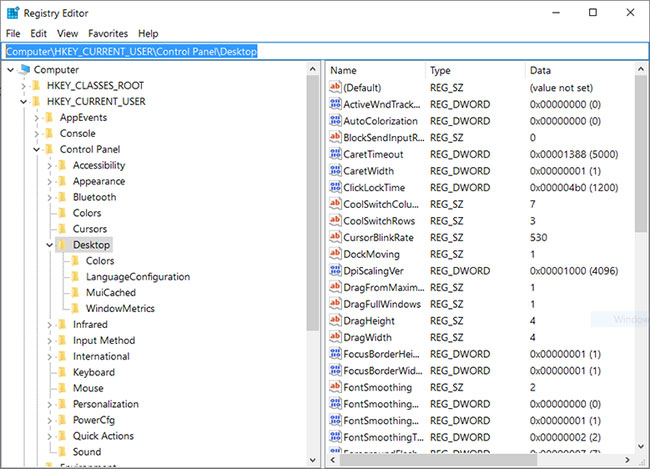 Navigate to the above key in Registry Editor
click the Desktop key and scroll down to the list of keys shown in the right window until you find an item labeled "PaintDesktopVersion".
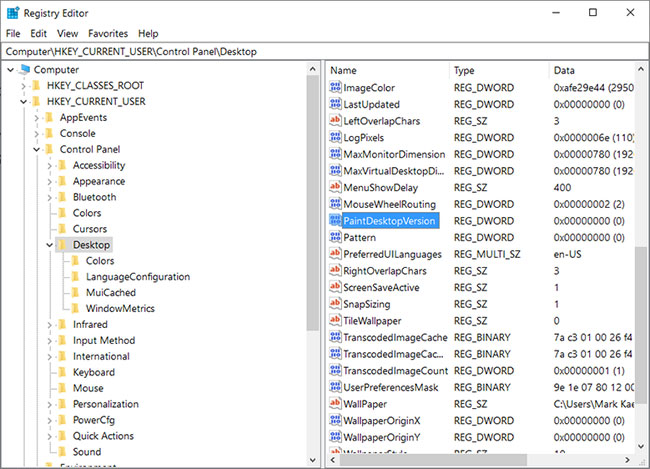 Find the item labeled "PaintDesktopVersion"
Double click the PaintDesktopVersion key and change the default value from "0" to "1". Click OK to complete the process.
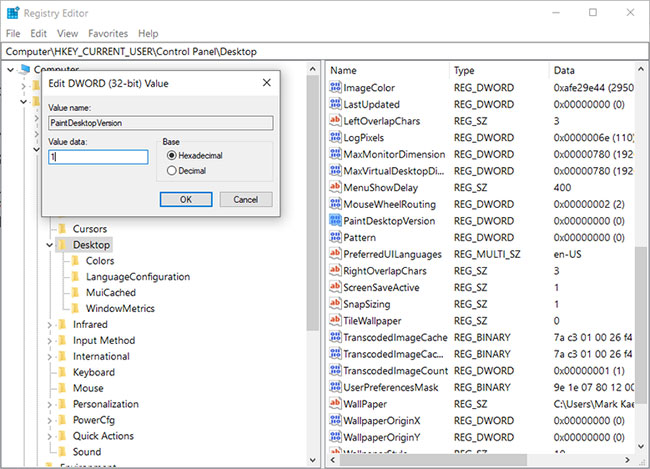 Double click the PaintDesktopVersion key and change the default value from "0" to "1"
click the File section of Registry Editor and exit the application. For the new installation to take full effect, you may need to restart your Windows 10 computer. From this point on, you will see the version information displayed in the lower right corner of the screen.
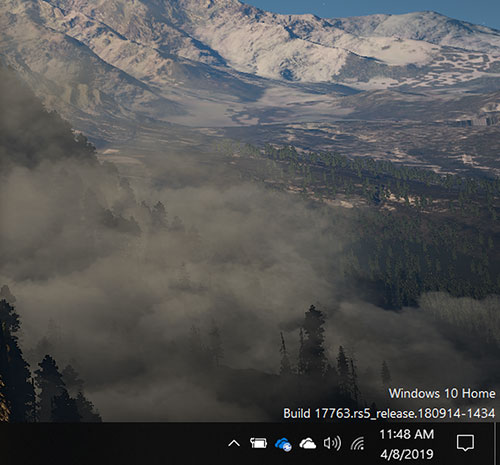 Version information is displayed in the lower right corner of the screen
To remove the display version from the Windows 10 desktop, change the PaintDesktopVersion key value to 0 .
FAQ
What is the easiest way to Permanently Display Windows 10 Version on Desktop?
Start with the requirements in this guide, then follow each step in order. Check the result after every major change so problems are easier to identify.
Can beginners follow these instructions?
Yes. The process is organized into practical steps, and you can repeat any step before moving forward.
What should I check if the method does not work?
Confirm your software or device version, permissions, settings, file format, and internet connection when the task depends on online services.
Related Articles
 5 Ways to 'Show Desktop' Super Fast for Windows2 minutes read
 How to Display My Computer (This PC) on the Windows 10 Desktop Screen2 minutes read
 How to Add Trash to Permanently Delete Files on Windows 10/118 minutes read
 How to Display CPU Temperature on the Desktop2 minutes read
 The Trick for Windows 8 to Boot Straight Into the Desktop3 minutes read
 4 Basic Difference Between Windows Server and Windows Desktop7 minutes read
Reader Comments 0
Sign in with email or Google to join the discussion.