How to Organize Your To-Do List in Apple Reminders
If you're only using Apple's Reminders app to add basic reminders, you're missing out on its full potential.
Table of Contents
While the app is known for its simplicity, you can also use Apple Reminders as a complete task organizer.
1. Create an Inbox list to record your to-dos
If you wear multiple hats, chances are you're often overwhelmed with tasks coming from all directions. This leads to procrastination and missed deadlines because you spend more time thinking about what needs to be done than actually doing it. To avoid this, use the Getting Things Done (GTD) method with the Reminders app.
The first step is to create an Inbox list in Reminders to record all of your to-dos. This is where you'll store all of your to-dos, including assignments, emails, errands, etc. This is a temporary storage area where you collect everything you need to do to clear your mind and prevent ideas from drifting away.
Here's how to create an Inbox list in the Reminders app on Mac:
- Open Reminders and double-click the default Reminders list under My Lists .
- Rename this list to Inbox , select Color > Icon , and then click OK .

While you can create a new list for this purpose, it's better to rename the existing default list where all your reminders will automatically go. This way, whenever you add a to-do and don't have time to sort it right away, it will go to the Inbox list by default.
2. Create separate lists to categorize to-dos
Now, you have a bunch of tasks in your Inbox list. You need to organize them into different lists depending on their nature. However, before you do that, create separate lists that cover all areas of your life, such as work, personal, family, school, travel, etc.
For example, all school-related assignments and tasks could be included in the School list , while the Work list could include reminders for work-related tasks, deadlines, and meetings. This will give you a clear overview of your responsibilities and commitments in each area.
Here's how to create a new list in the Reminders app on Mac:
- Open the Reminders app and tap Add List under My Lists .
- Enter the desired name, then select Color and Icon .
- Click OK to add the new list.
- Repeat this process for the remaining lists.
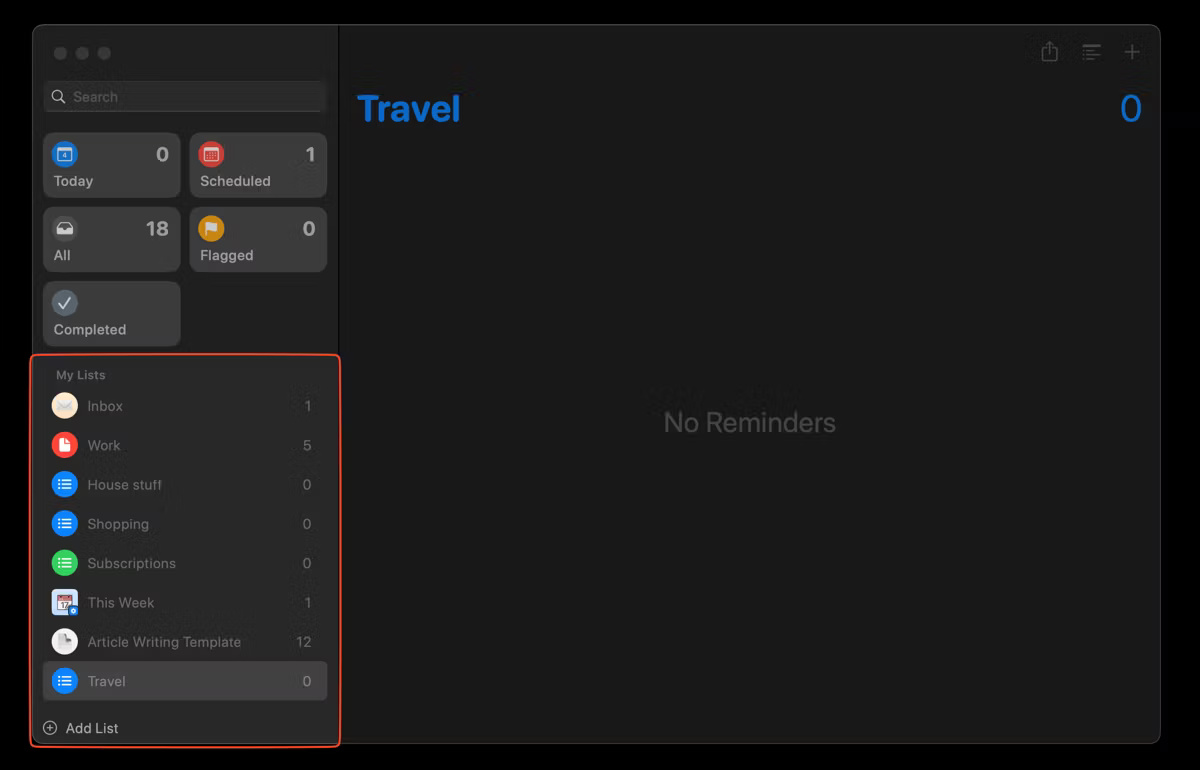
Once your new list (category) is created, it will be easier for you to organize your to-dos from your Inbox list when you have free time.
3. Create items for each project in the list
Some people have created multiple categories (lists) in the Reminders app, but often need to break them down into individual projects or items. In this case, a project can be a group of related sub-tasks that have a common goal or lead to a specific outcome.
For example, in the Work list , you might have a project (section) for Marketing Campaign for New Product Launch with some tasks like Create social media posts , Design promotional materials , Coordinate with the sales team , and Schedule meetings with potential clients .
Similarly, in the Health list , you might have a project (section) called Fitness Goals with sub-tasks like Go for a run , Do 50 push-ups , and Drink a glass of water .
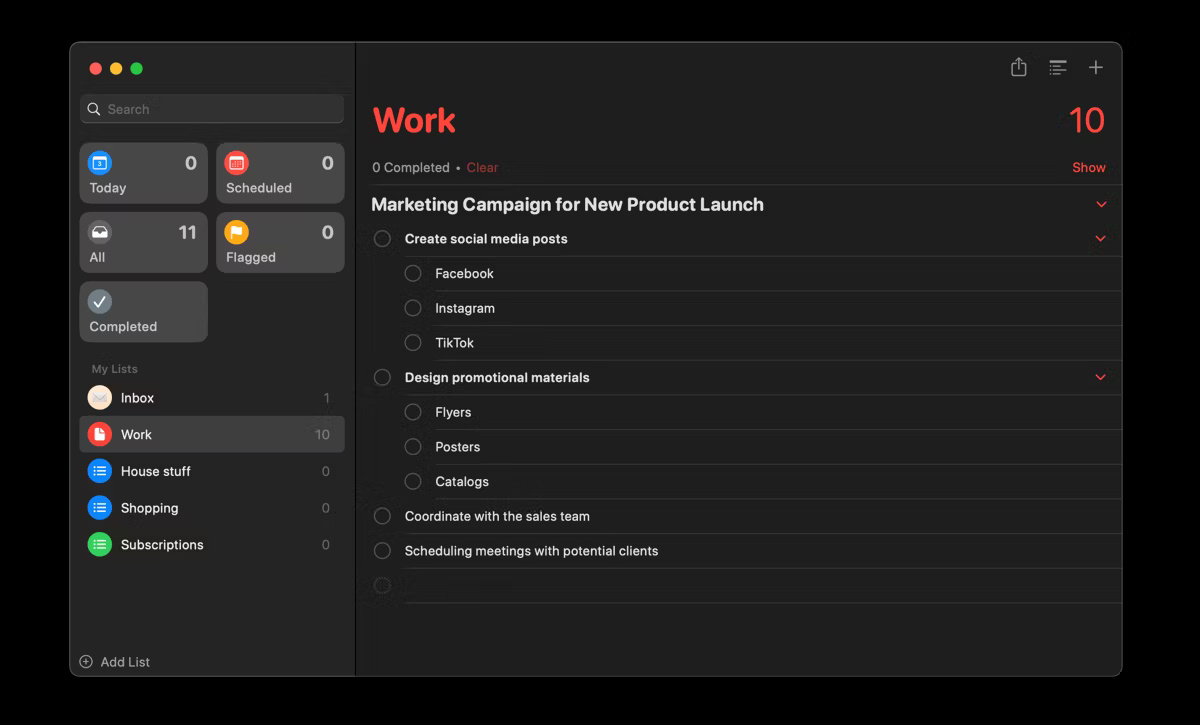
Here's how to create list sections in Reminders:
- Select the specific list you want to add a section to and click the Add a new section icon on the toolbar or go to File > New Section .
- Enter a section name and start adding tasks with due dates.
- You can also add subtasks below each task in a section. Simply indent a task by going to Edit > Indent Reminder .
After adding multiple sections to your list, the view can start to get a little cluttered. You can fix this by using the View as Columns feature . This will make each section appear as a separate column, allowing you to visualize your tasks in a Kanban-style view. Go to View > as Columns .

4. Prioritize tasks and create Smart Lists
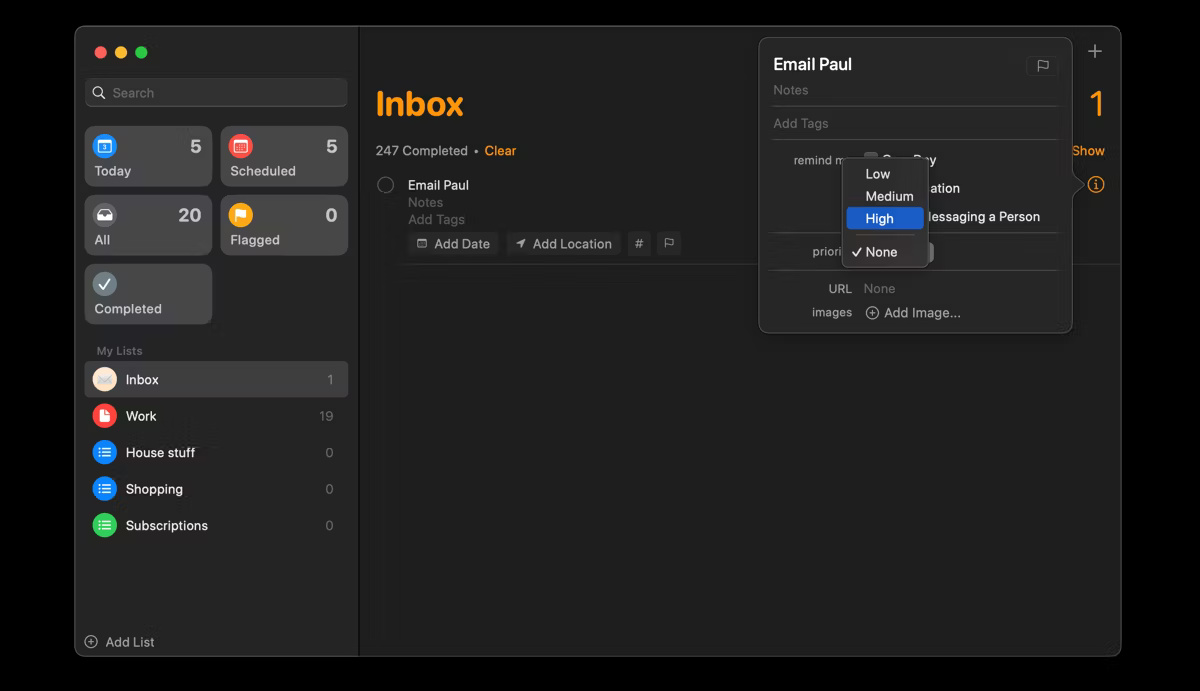
Not every task is equally important or urgent, which becomes more important when you have less time. This is why it is essential to prioritize tasks in the Reminders app after sorting them into their respective lists and sections.
To set a task priority, go to the reminder you want to prioritize, click the information icon, and select a priority from the Priority drop-down menu . You can also sort tasks by priority by going to View > Sort By > Priority .
Additionally, one of the best ways to get the most out of the Reminders app is to create Smart Lists. This handy feature lets you view all your tasks from different lists in one place based on specific criteria, including date, time, priority, location, and more.
Here's how to create Smart Lists in the Reminders app:
- Click the Add List button in the bottom left corner of the app.
- Enter a name for your Smart List, click the List Type drop-down menu , and select Smart List from the options.
- Select the criteria you want for your list. For example, select Date from the Tags drop-down menu if you want to see your weekly tasks.
- Next, select Relative Range from the next drop-down menu and enter the number of days you want to include. In this case, the number of days would be 7.
- Click OK once you have set all your criteria.

Was this article helpful?
Your feedback helps us improve.
Related Articles
 How to organize the list in the Reminders app on iPhone and iPad2 minutes read
 How to create and group Reminders lists on macOS4 minutes read
 Mac Reminders Doesn't Have Quick Entry: Here's the Workaround!8 minutes read
 How to turn any text into a reminder using Apple Intelligence2 minutes read
 How to create subtasks for Reminders on iOS and macOS5 minutes read
 How to access iCloud on Android7 minutes read
Reader Comments 0
Sign in with email or Google to join the discussion.