Table of Contents
This updated guide examines Click: How to Model Bullets in 3ds Max and organizes the essential facts, background, and practical takeaways in clear American English.
Part 1of 4:
Set up your Work
- Use a reference image. This is required for modelling. Go to the internet and download an image showing the schematic of a bullet with its case.
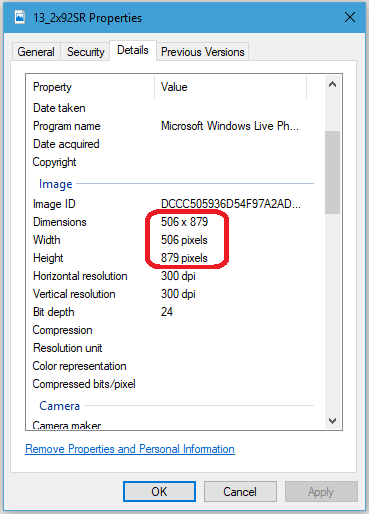 Check the dimensions of your reference image. Right click on the reference image. Then, click properties and go to the details tab.
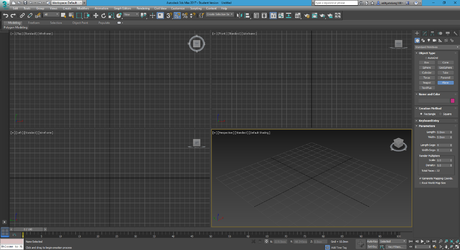 Start 3DS Max.
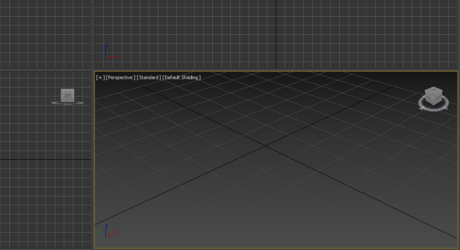 Change your view to Perspective for easy editing. Click on the bottom right window, then pressAlt+Won keyboard to maximize your perspective view..
 Change the unit setup in 3DS Max.
- Go to Customize > Units Setup.

- Change the Display Unit Scale to Metric and choose "millimeters" from drop down.

- Go to Customize > Units Setup.
- Create a plane. Go to the "Create" tab, then click on "plane" in standard primitives.

- Click and drag in the viewport, then center it in x, y & z axis.

- Right click on the up-down arrows in the x, y & z field to position the plane at zero.
- Click and drag in the viewport, then center it in x, y & z axis.
 Modify the length and width of your plane from the modify panel.
- Divide your reference image length and width pixel count by 10 (eg: 506 pixels will be 50.6mm) and change the length and width parameters of plane in mm. This will allow you to use the image without altering the aspect ratio of the picture.
 Open the compact material panel.
- Click rendering in toolbar.
- Click material editor and choose Compact material editor.

 Add your reference image to the plane.
- Click on the empty field near diffuse color.

- Click the "+" on General to open options in the Material/Map Browser.

- Double click on bitmap.
- Wait for material browser to open.
- Navigate to the folder and double click your reference image.

- Click on the empty field near diffuse color.
 Apply the image to your plane.
- Click on Assign material to selection.

- Click on Show shaded material in viewport.

- Interchange length and width of the plane, if the image gets stretched as shown above.
- Click on Assign material to selection.
- Align the plane to start modeling.
- Select rotate tool (keyboard shortcutR).
- Select angle snap to rotate in 5 degree increments for ease (keyboard shortcutA).
- Rotate 90 degrees on the z-axis.

- Rotate 90 degrees on y-axis.

- Select move tool (keyboard shortcutW), then move the plane back on its x-axis.

Part 2of 4:
Start modelling the Bullet Case
 Add a new cylinder for bullet casing.
- Go to the "Create" tab.
- Click on cylinder in standard primitives.

- Click and drag in the viewport.
- Center it on the x, y & z axis. Do not worry about its dimensions.
 Change view to aid your modeling.
- Click on the "Perspective" tab at top left of viewport.

- Select Left view in the drop down menu.
- Click on the "Perspective" tab at top left of viewport.
 Turn the cylinder transparent to allow us to see our image.
- Click on Edit in the toolbar.
- Click Object Properties and wait for window to open.

- Select the "See through" option in display properties and then click OK.

 Position your cylinder.
- Select "Move tool" from toolbar (keyboard shortcutW).

- Align the bottom of cylinder with the bottom of bullet in reference image.
- Align the cylinder center axis with the center axis of bullet in reference image.
- Select "Move tool" from toolbar (keyboard shortcutW).
 Change dimensions of cylinder roughly to size of bullet casing.
- Go to Modify panel.

- Match height and radius of the cylinder to the bullet casing of reference image.

- Go to Modify panel.
 Add Edit poly modifier.
- Click modifier list from the modifier panel.
- Select "Edit poly" from the drop down menu.

 Extrude the vertices to add more height.
- Click on vertex button from edit poly modifier.

- Click and drag to select all the top vertices of the cylinder.

- Click on the small button next to extrude.

- Extrude the vertices using setting box opened. Do twice since the bullet casing has two bends at the top.

- Click on vertex button from edit poly modifier.
- Create bullet case bottom notch.
- Select all the bottom vertices.
- Align the selected vertices to top part of the notch, on the z axis, as shown below with the reference image.

- Extrude again. Do it twice exactly to match the edges for the notch.

- Click on faces button in modifier panel.

- Then select the ring of faces (one up from bottom) as shown in the picture.
- Extrude the faces negatively. In this image below a value of -5mm is used.

- Select bottom most ring of faces.
- Scale them on xy axis by clicking on the select & uniform scale in toolbar (keyboard shortcutR).
- Hover mouse on xy plane of the pivot as shown in the figure. Then click and drag to scale.

- Extrude Top border to create thickness.
- Click the face select tool.
- Select, then delete the top face of cylinder.

- Click the border select tool.
- Select the topmost border.
- Extrude the border about -5mm.

Part 3of 4:
Model the Bullet
 Add a new cylinder for the bullet. This cylinder will be the actual bullet.
- Go to "Create" tab.
- Click on cylinder in standard primitives, then click and drag in the viewport.
- Adjust the dimensions of the second cylinder. Position it to the bullet in the reference image.
- Adjust the radius to be smaller than the first cylinder. Don't let it be too small to leave a visible gap in between the two cylinders.
- Add Edit Poly modifier to the cylinder.
- Go to Modify panel, then click on the modifier list.

- Select "Edit poly" from the drop down menu.

- Then repeat step 3 in Part 2 for see through.
- Go to Modify panel, then click on the modifier list.
- Model the shape of bullet. Add more loops at the top of the cylinder.
- Click on Modeling panel in toolbar.
- Click Edit>Swiftloop.

- Add as many as 4 cuts at the top half of the cylinder.

- Create a round dome shape.
- Click on vertices select tool.
- Select all the newly created vertices along with the top vertices.

- Scale the ring of vertices to smaller size on the xy axis.
- De-select the bottom most ring.
- Scale it down again on the xy axis.
- Repeat scaling two more times and de-select one ring of vertices from bottom every time you scale down to give it a crude, dome like shape.

- Model the bullet point.
- Click on face select tool.
- Select the top face of bullet.

- Delete the top face.
- Select all the top vertices.
- Do a negative extrude as much as possible with a very small gap.

- Click on the Weld tool in modifiers panel.
- Weld all these extruded top vertices.

- Select and pull the new welded vertice to the top using the move tool.

- Click modifier list from the modifier panel.
- Select and add "Turbosmooth" from the drop down menu. This will give the bullet a smooth look.

Part 4of 4:
Add Finishing Touches
 Remove the see-through option from both the cylinders.
- Add Loops to edges of the case.
- Click on Modeling panel in toolbar.
- Click Edit>Swiftloop.

- Add loop cuts at all the edges of the case notch and at the bottom.


- Smooth the case.
- Click on the modifier list from the modifier panel. Select and add "Turbosmooth" from the drop down menu.
FAQ
What is Click: How to Model Bullets in 3ds Max about?
It provides a structured overview of click, explains the main context, and highlights practical takeaways for readers.
Why does this topic matter?
Understanding the main concepts helps readers evaluate the issue, avoid common mistakes, and make better-informed decisions.
How should readers use this information?
Use the guidance as a practical starting point, confirm details that may have changed, and follow current product, safety, or security recommendations.
Related Articles
 Do Bullets Fire: Firing a Bullet Hit a Bullet3 minutes read
 What Horrible Thing Happens When the Body Is Hit by a Bullet3 minutes read
 Use Bullets in PowerPoint2 minutes read
 Don't Joke, Shooting Just Natural Can Kill Others2 minutes read
 Bullets, Numbering in Word5 minutes read
 Can Humans Avoid Bullets Flying Like in Action Movies3 minutes read
Reader Comments 0
Sign in with email or Google to join the discussion.