How to merge two photos side by side on iPhone
Need to put two photos side by side on your iPhone to create a collage or take a before/after shot? You might think you need to install a third-party app or turn on your computer, but there's a simpler way..
Need to put two photos side by side on your iPhone to create a collage or take a before/after shot? You might think you need to install a third-party app or turn on your computer, but there's an easier way. Read on to learn how to do it right from your iPhone, no extra app required.
Use the Shortcuts app to stitch photos
You can create a workflow that allows you to automatically stitch photos on your iPhone using the Shortcuts app, which comes pre-installed on your device. If for some reason you can't find the app on your phone, you can download it from the App Store.
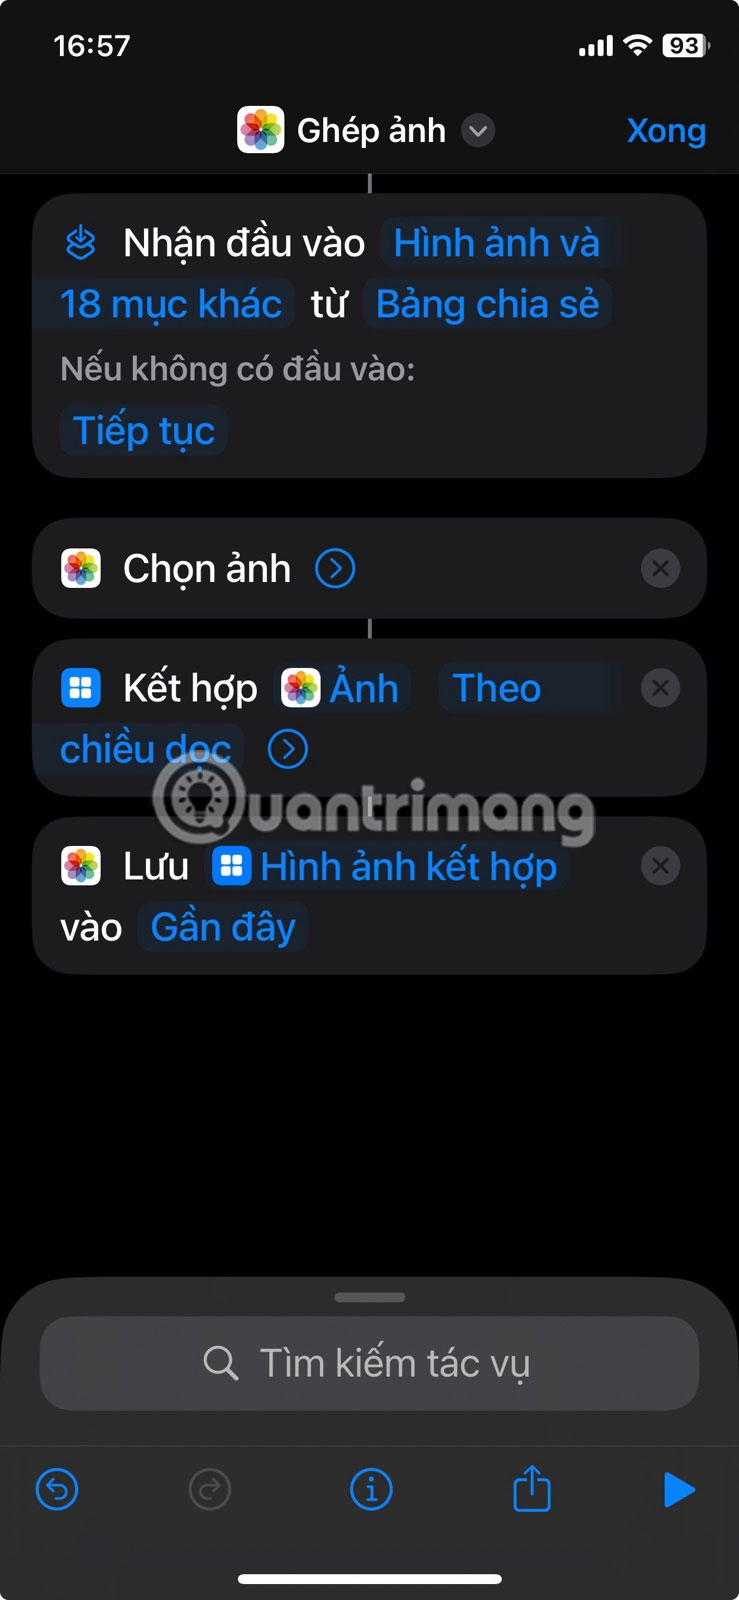
Open the Shortcuts app on your device. To create a new shortcut, tap the + button in the upper-right corner.
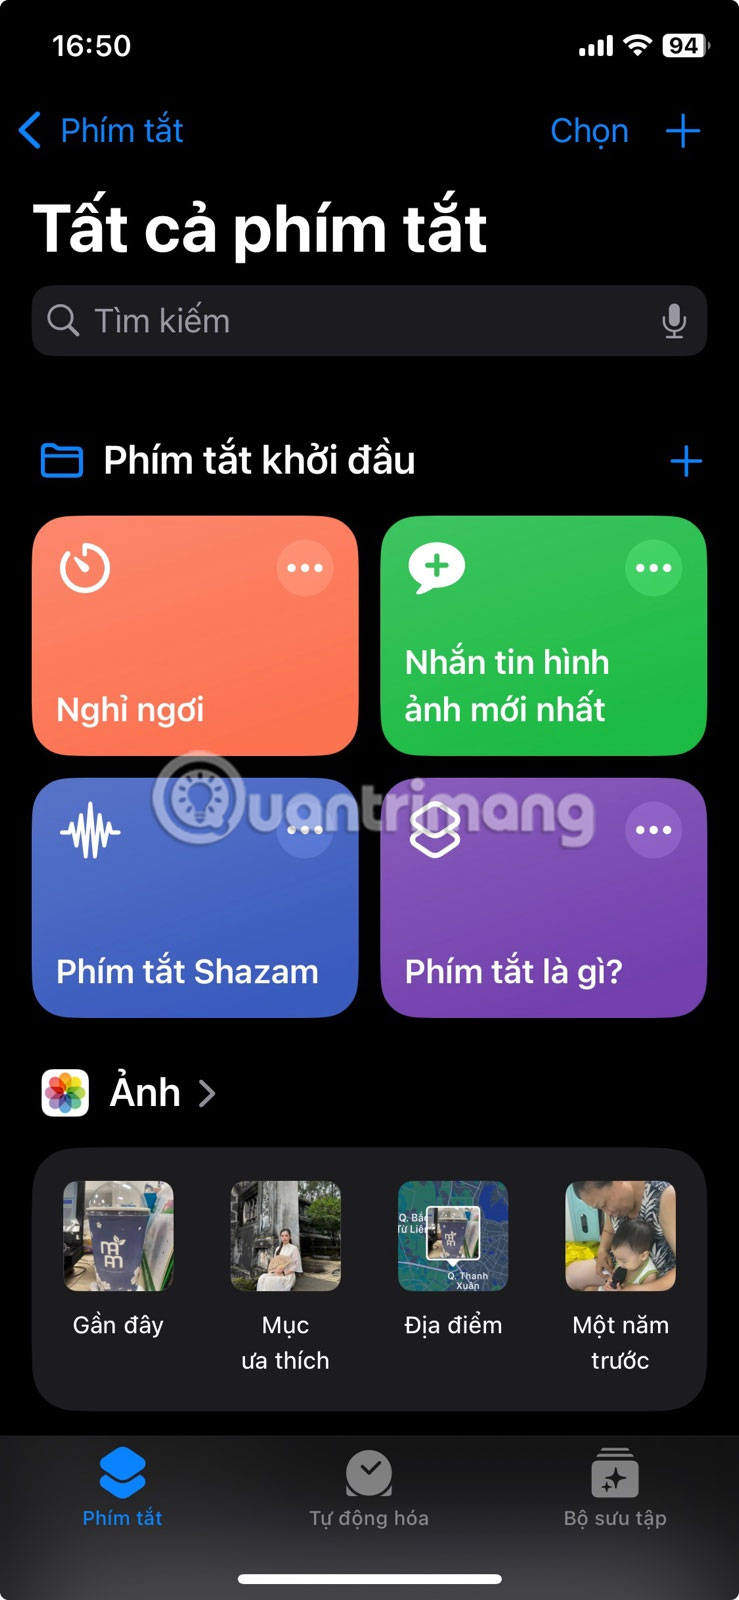
Give your shortcut a name. Now, tap the Search Action field below.

Search for Select Photo and tap to add it to your shortcut.
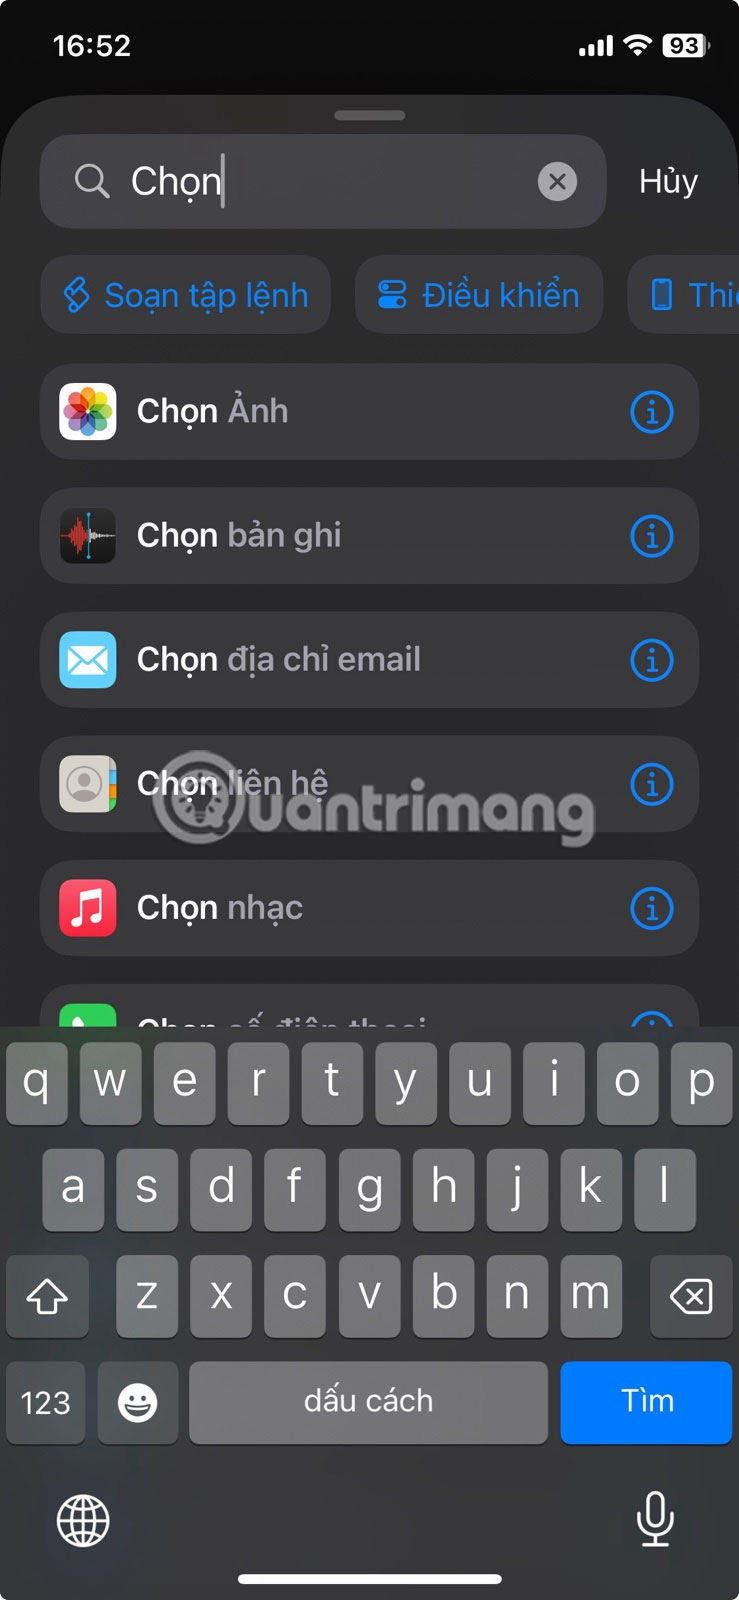
Click the small arrow next to Select Photos and turn on the toggle for Select Multiple Items in the drop-down menu.
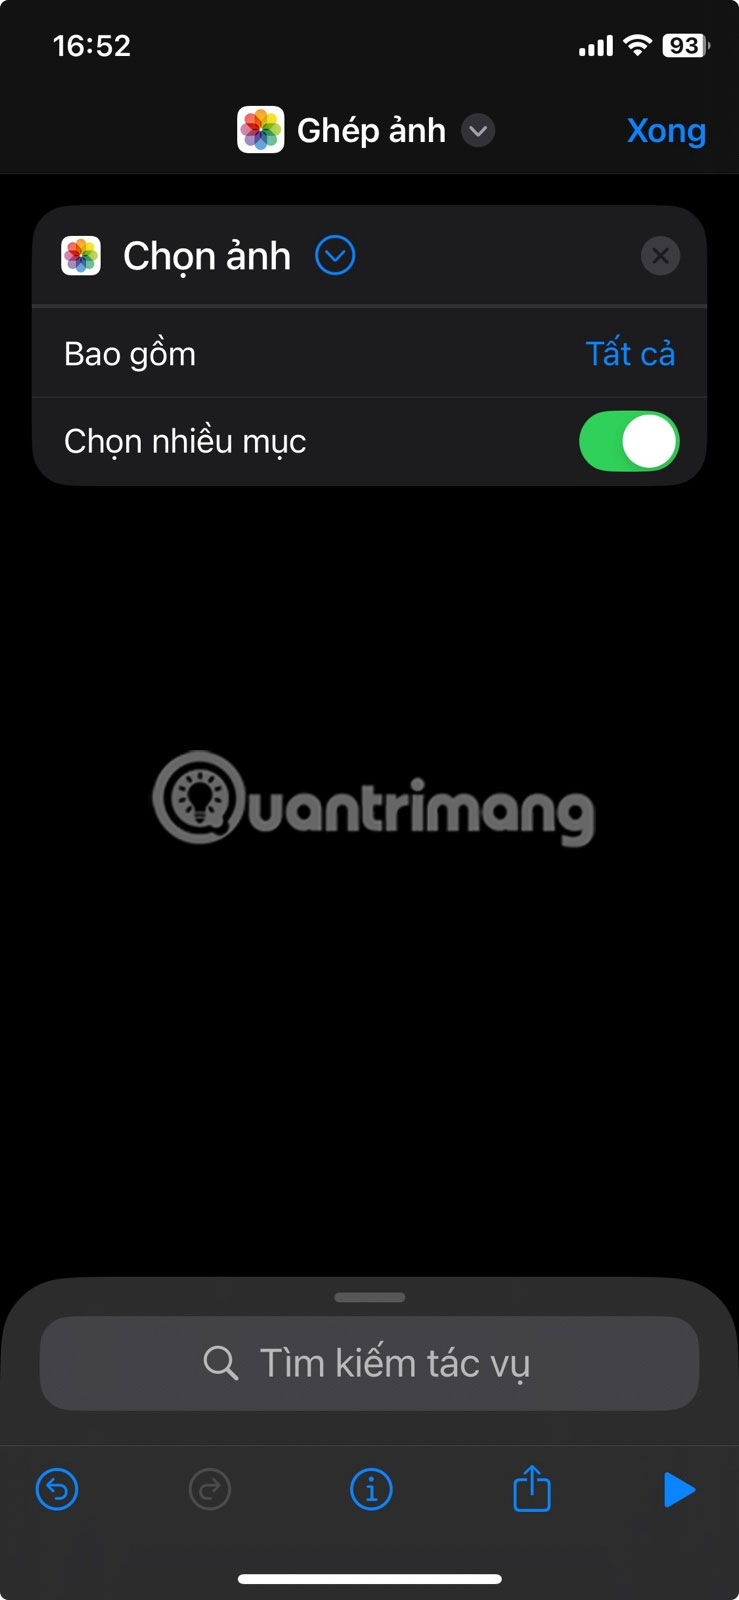
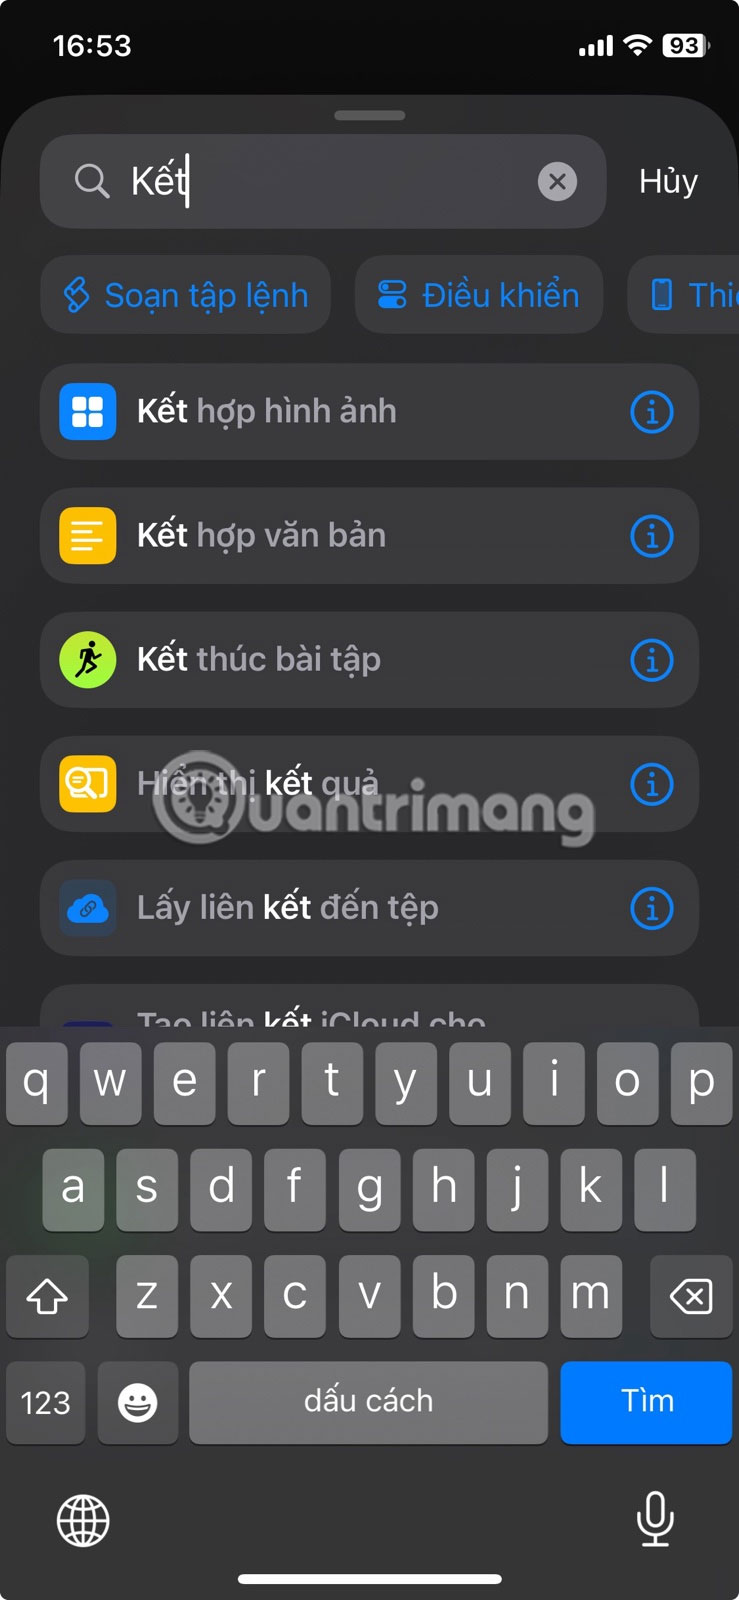
Next, use the search bar again to search for 'images'. Select Combine Images from the options (you will need to scroll down a bit).
By default, the action is set to combine photos horizontally. You can change that by tapping Horizontal and switching to Vertical . Or to In Grid , to create a full collage.

Finally, look for the action to Save Photo . Leave the action as is, because by default the resulting image will be saved to the Photos app.
Once this last option is added, tap the small 'i' button at the bottom. Turn on In Share Sheet . Alternatively, if you want easier access to this shortcut, you can select Add to Home Screen . Tap Done .
Again, press Done to finally save the shortcut.
Put two photos side by side from the Photos app
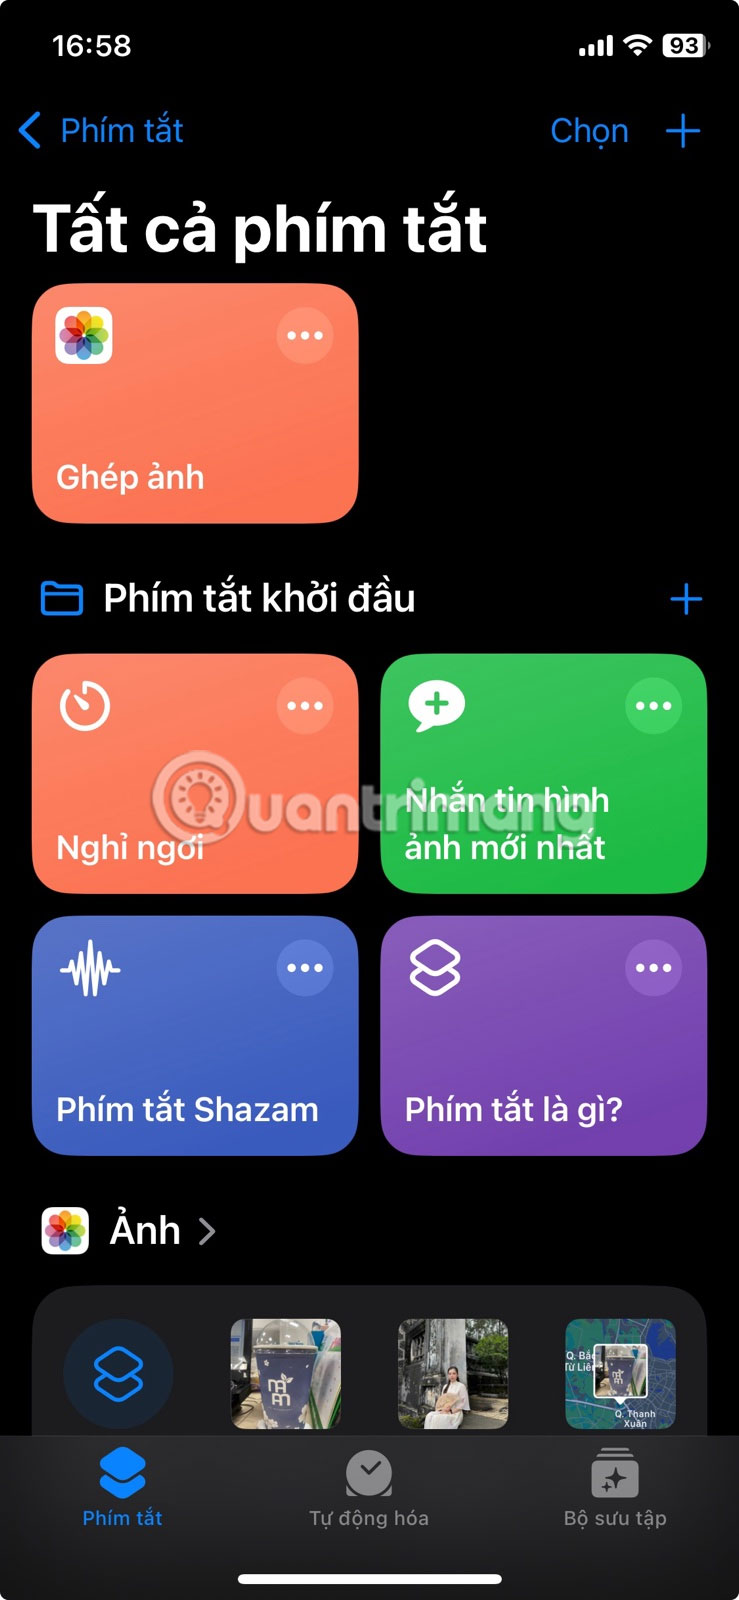
Go back to the main Shortcuts app screen. You'll see your shortcut at the top. Tap it (just be careful not to tap the three dots, which will take you back to the shortcut editing screen).
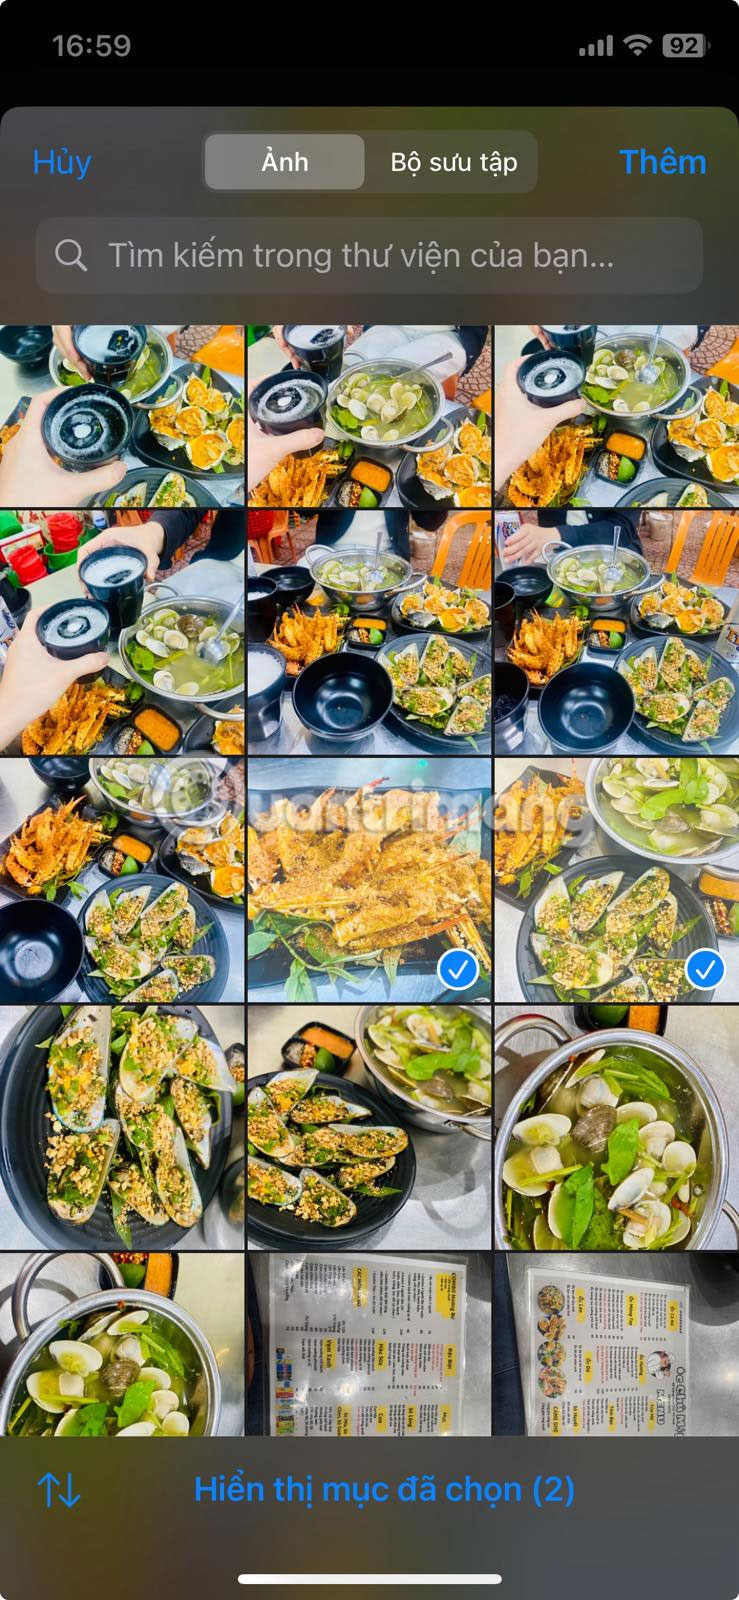
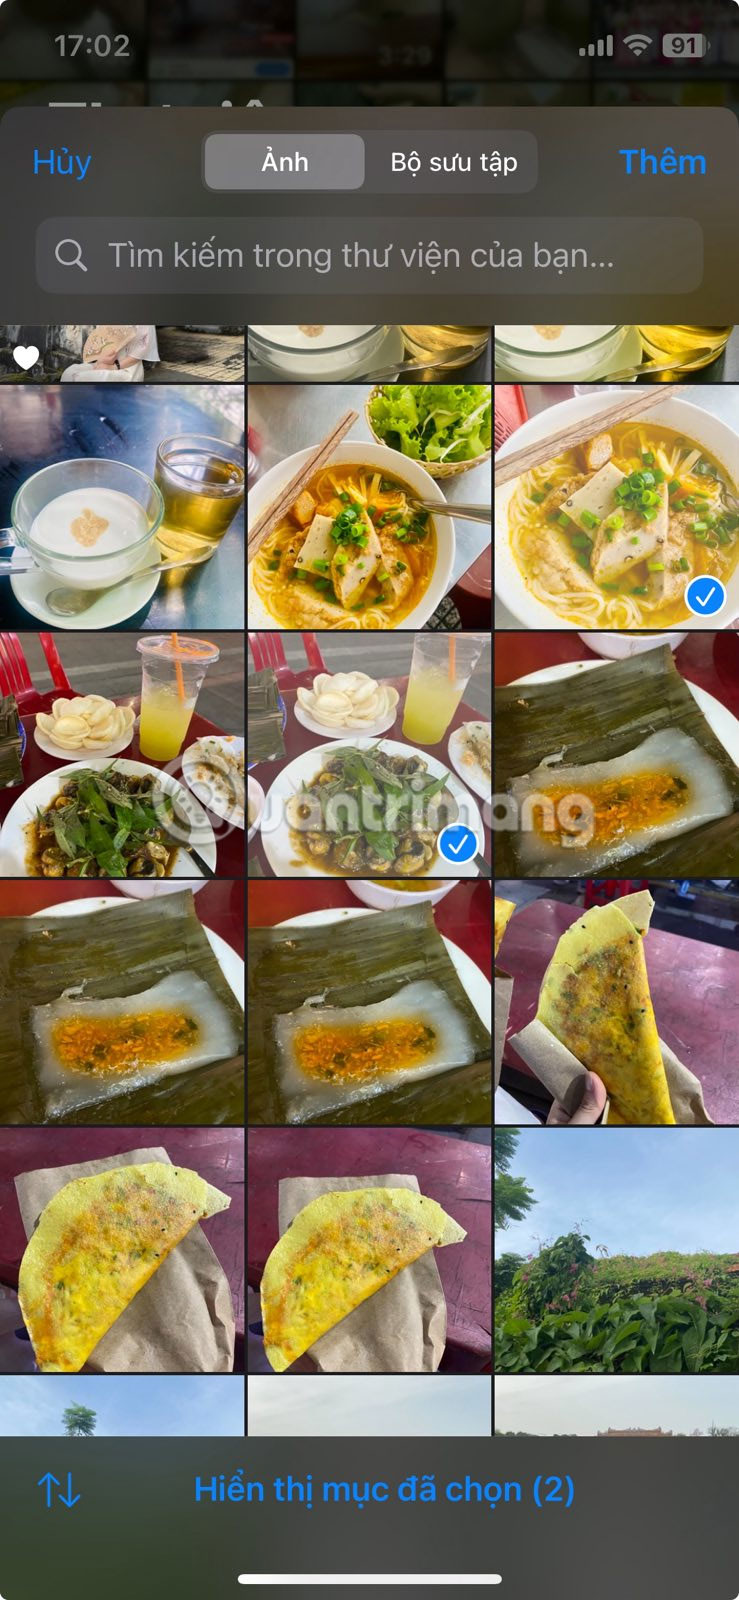
Select the images you want to merge horizontally in the order you want them to appear. Then, tap Add .
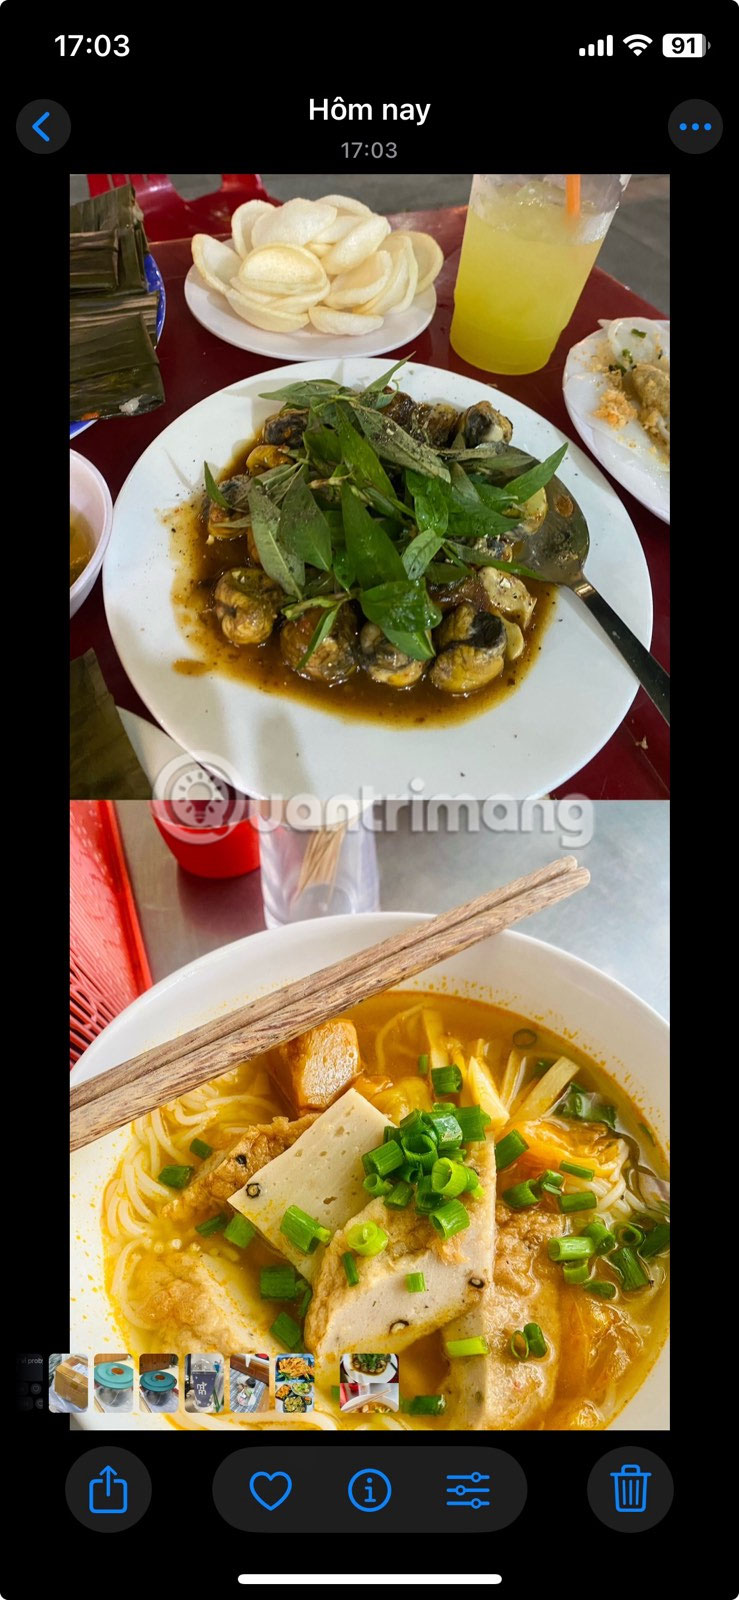
Wait a second while the Shortcuts app performs its action. Then, open the Photos app. You'll see the results waiting for you there. Now, you can easily share them with others from here.

Tip : Use images that are the same size and orientation, otherwise they will appear next to each other at different sizes.
Alternatively, you can do it directly from the Photos app. Go to the app and select an image (any image at this point). Then tap the Share button .
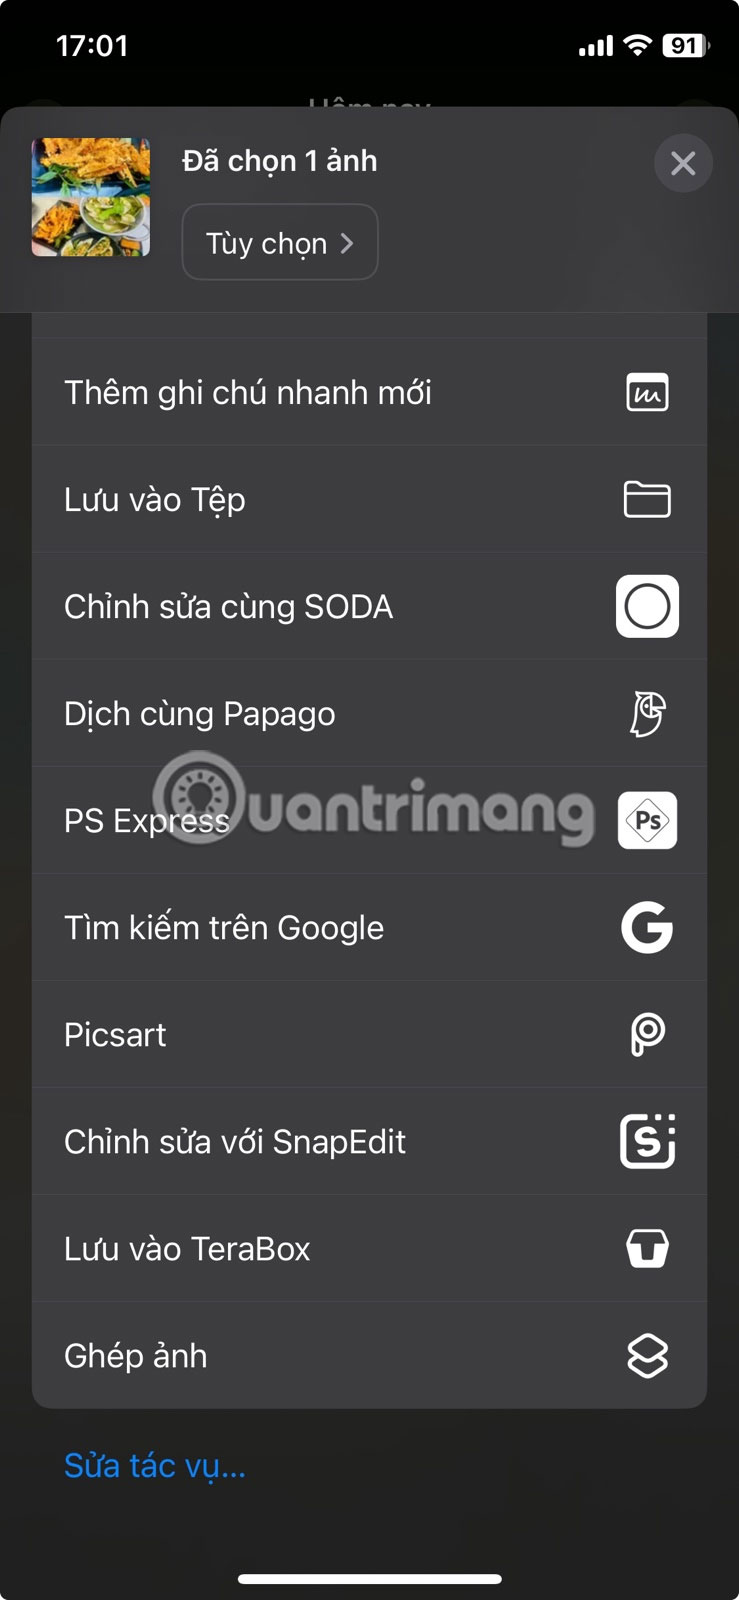
Swipe all the way down to the bottom and you'll see your shortcut as part of the share menu. Tap it.

The next step is to select the two photos you want to merge. Tap Add .
Go back to Recents in Photos. You should now see your work.
Use Instagram to create quick collages
Since Instagram is so popular, chances are you already have the app installed on your phone. If so, you can use it to create a quick collage.
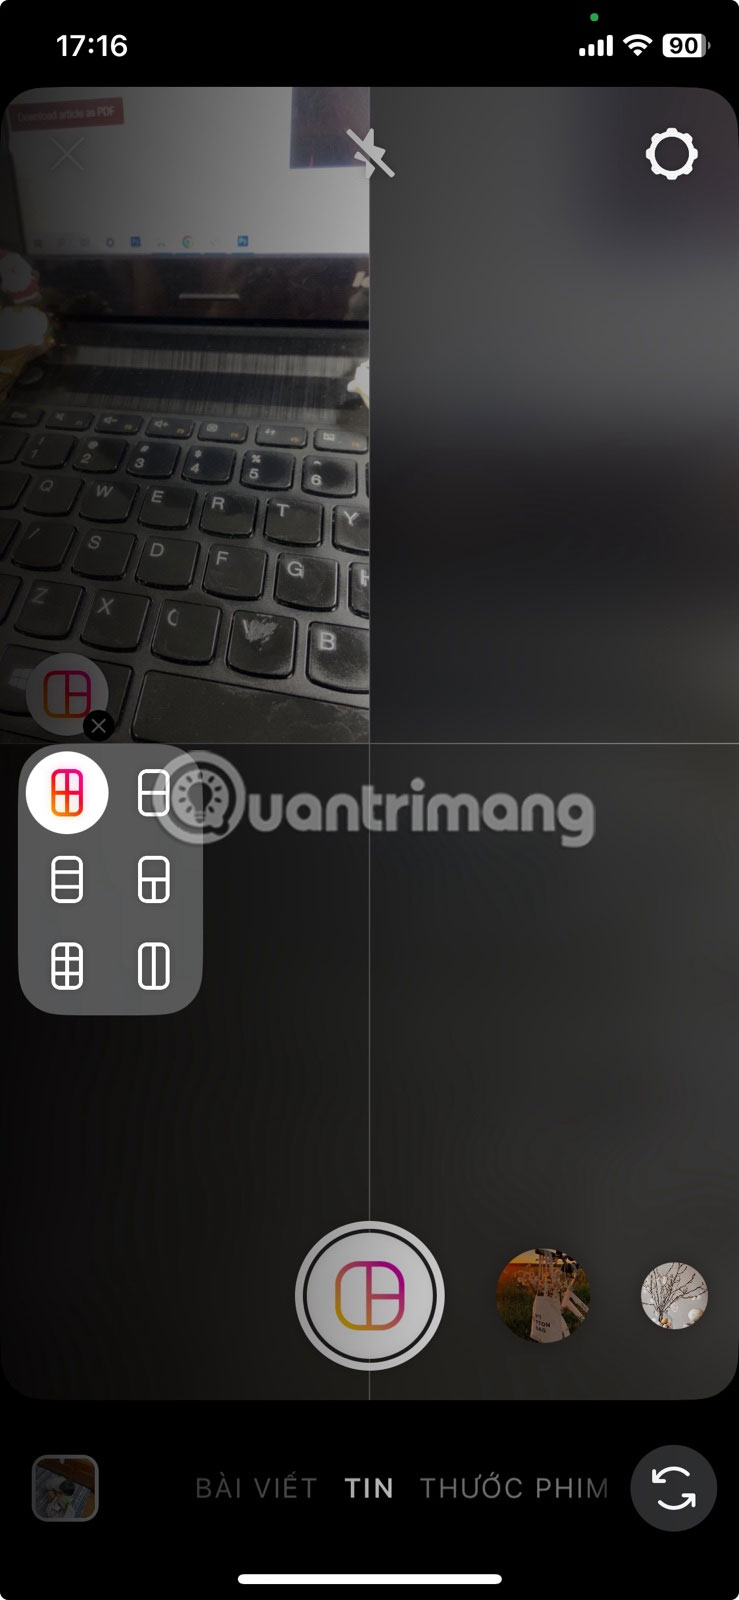
Open the Instagram app and swipe from the left to bring up the content creation screen. Switch to Stories at the bottom.
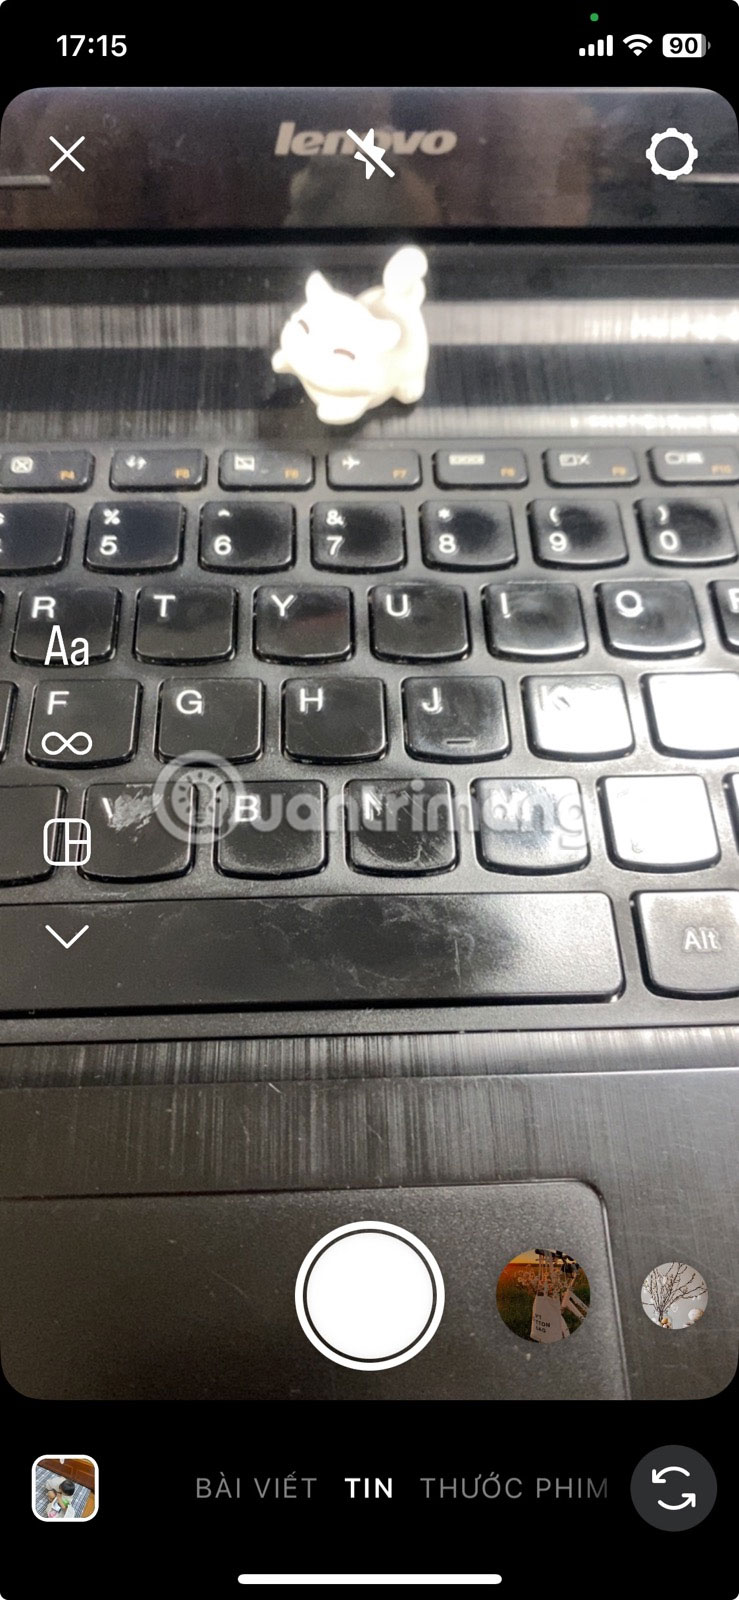
On the left, tap the grid icon and select the Change grid option .
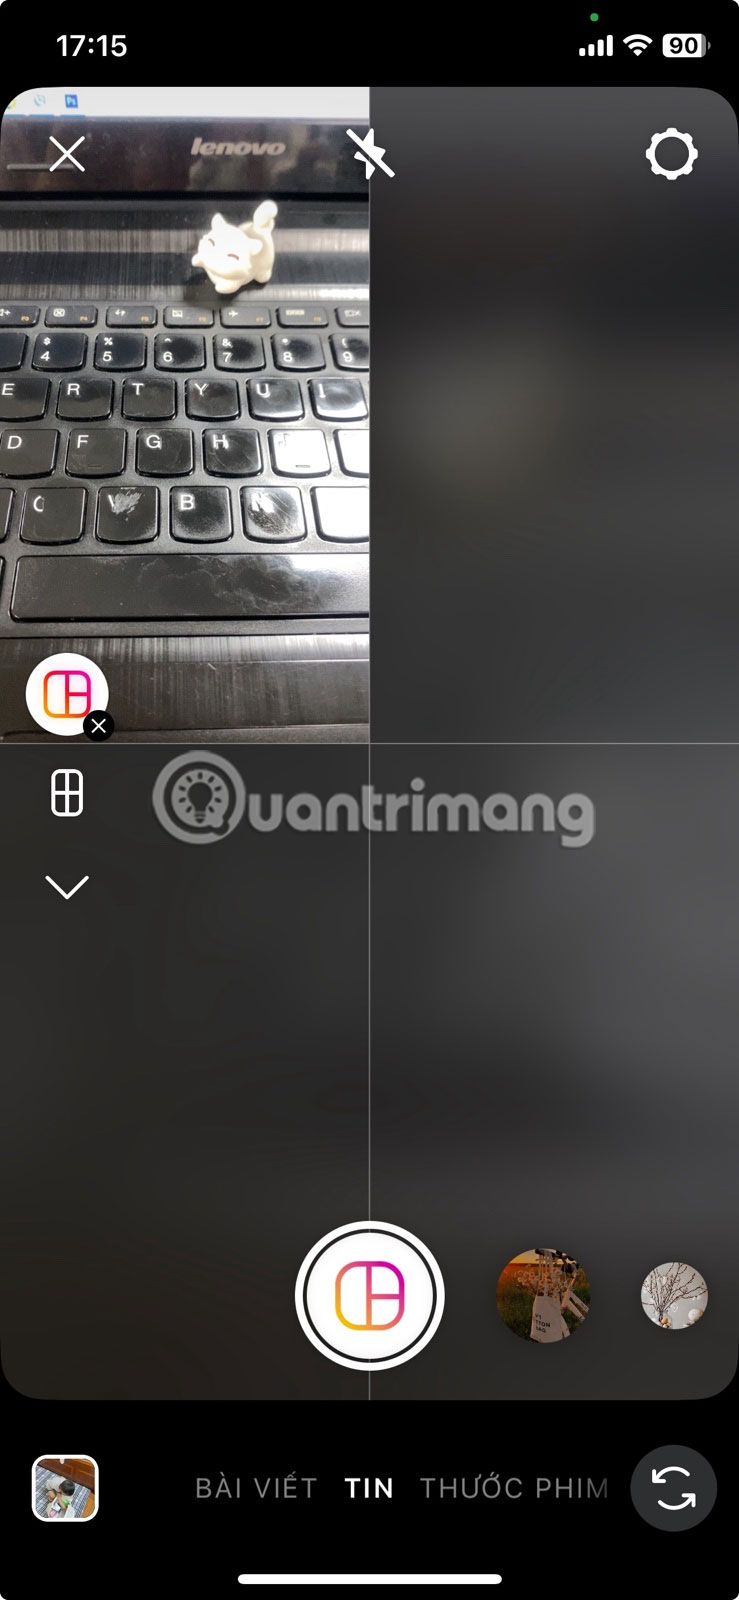
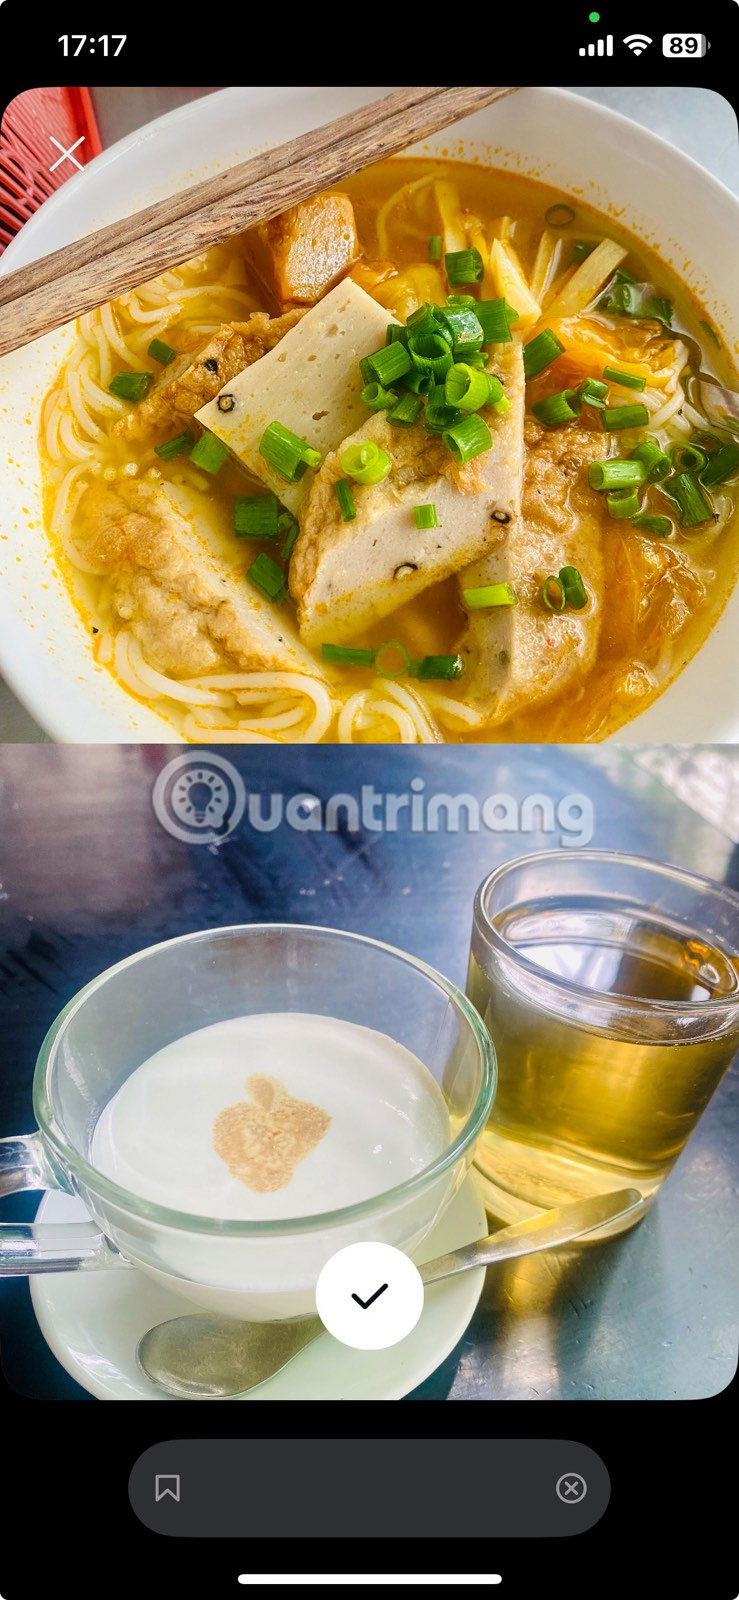
Select a layout. Next, tap the small rectangle in the bottom left to access the library and fill in the first part of the grid.
Click on the next section of the grid to select and add another photo.
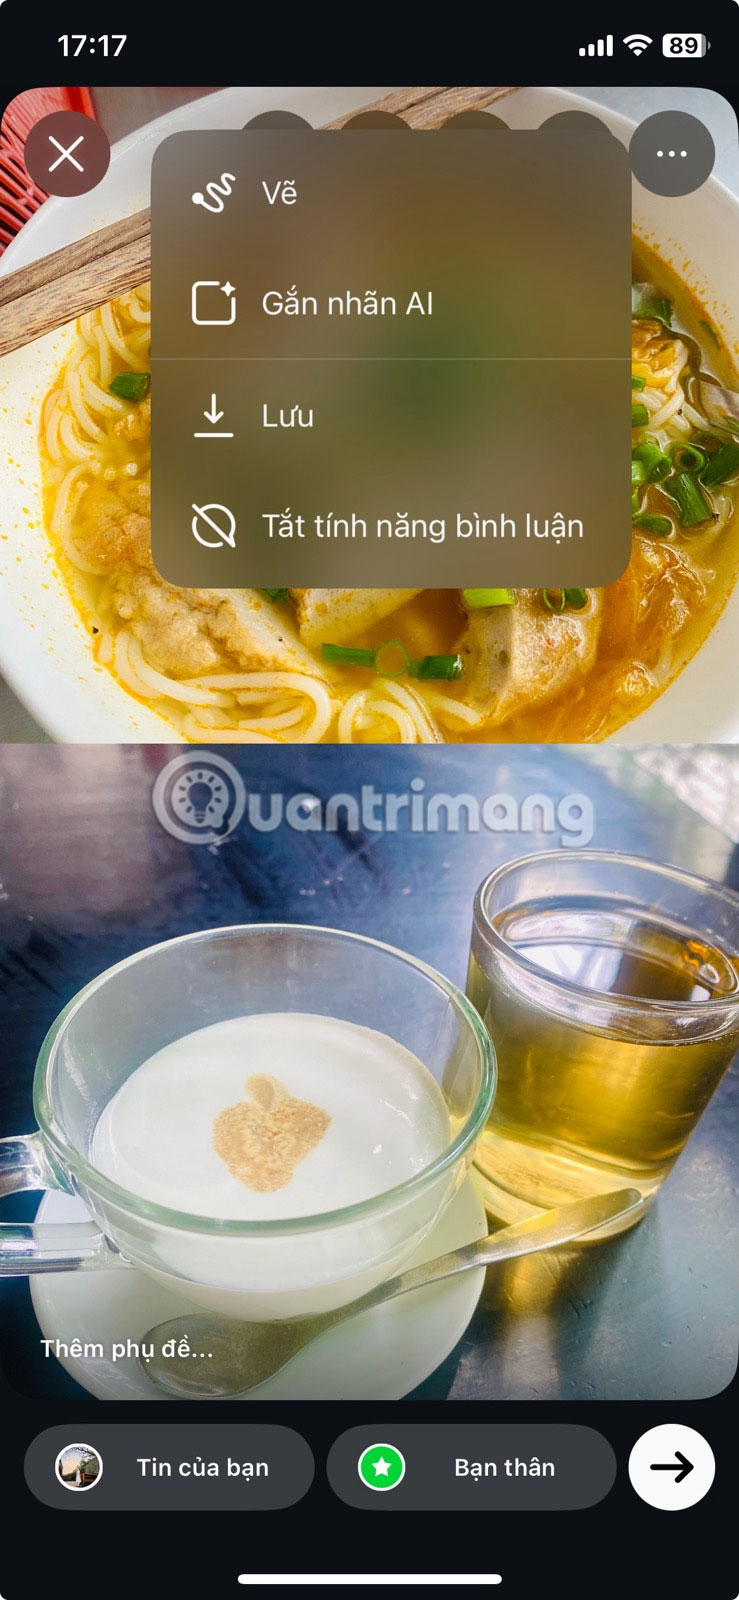
Once you have added them, tap the check mark button.
Your Story is now ready to go live on Instagram. However, we'll skip this step for now. Instead, we'll tap the three dots in the upper right corner and select Save .
The resulting image will appear in your gallery.
For more photography tips, check out how to post live photos on Instagram . Also, read all the best ways to organize photos on iPhone .