How to manage photos on iPhone using iPhone Photo Manager
iPhone Photo Manager is iPhone photo management software, transfer and delete photos right on your computer..
With iOS devices to be able to manage image and video media files on your computer, you will need to install iTunes. Otherwise, we will only be able to perform the transfer of photos from iPhone to the computer. However, iTunes has a complicated user interface, or if the software has problems, how do you do it?
Currently there are many software to manage images, videos, mp3 on iOS devices that users do not need to install iTunes, such as iPhone Photo Manager. This is a photo management tool on iPhone / iPad device. You can manage images on the device, or can transfer photos and delete photos easily without needing through iTunes.
iPhone Photo Manager Free is compatible with Windows operating system versions and iOS 8 and above.
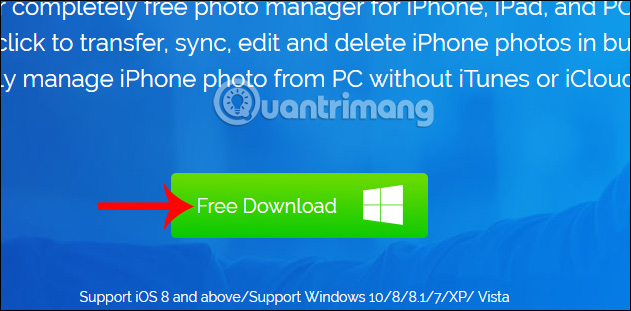
Step 1:
We access the link below to download iPhone Photo Manager to your computer and install it. Click the Download button to download the installation file.
- http://www.iotransfer.net/iphone-photo-manager.php
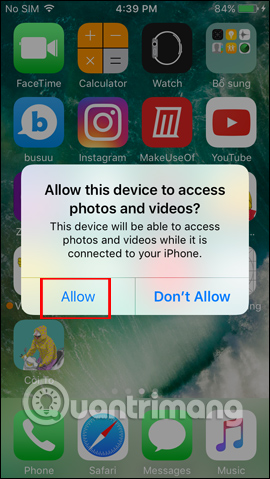
Step 2:
Click on the .exe download file to run the software. iPhone Photo Manager will not need to undergo installation steps like other programs. You just need to connect the device to the computer with a cable. Then, on the device screen will ask the user to authenticate the computer, click Allow to allow it to complete.
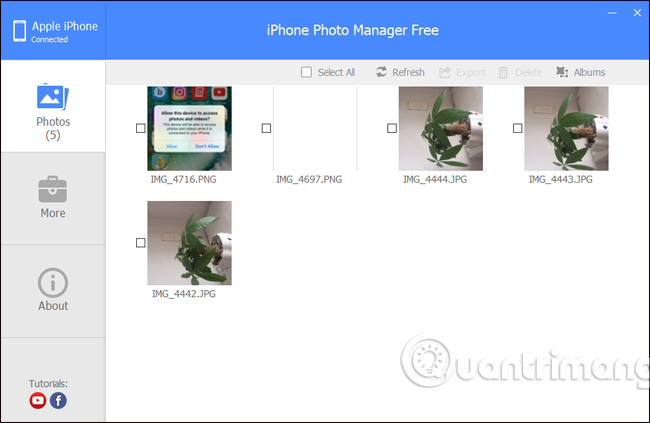
Step 3:
Wait a few minutes for the software to identify the device and download the image contained in the image gallery. You will see all the photos in iPhone on the iPhone Photo Manager interface.
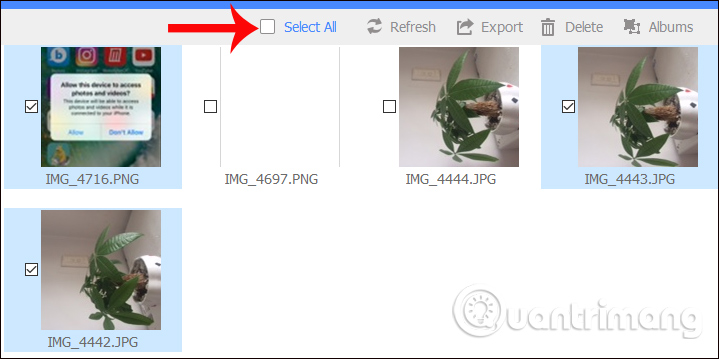
Step 4:
To move the image from iPhone to your computer, check the image you want to transfer or click Select All to select all images.
Step 5:
Then click Export above to extract images to the computer.

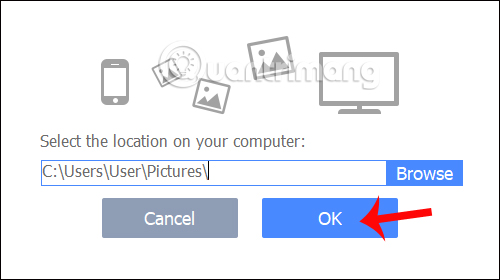
By default, the saved folder is selected to store images as Picture. If you want to change another folder, click the Browse button and select the new folder. Finally click the OK button to proceed with the image transfer.
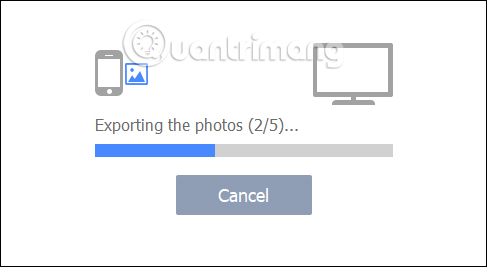
We wait for the process to copy the image from the device to the computer.
Step 6:
To delete images on an iPhone device, the operation is simple and similar to extracting images to a computer. Select the image you want to delete and press Delete .
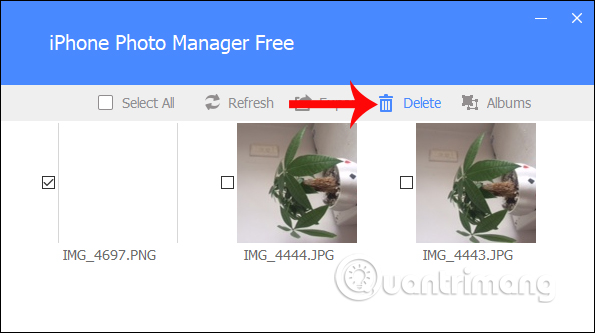
Soon, the software will ask if we want to be sure to delete the image, click OK to delete.

Note to the user , this operation will delete the image directly on the device so we will not be able to recover the image in the trash as we did on the iPhone / iPad.
Thus, with iPhone Photo Manager software, we can easily manage images on iPhone / iPad device, transfer images to computer or delete photos on iPhone. Users do not need to use iTunes as before to manage images on iOS devices anymore.
I wish you all success!