How to manage a huge WinSxS folder in Windows 10
When system drive capacity is low, third-party utilities will help you detect large files and smaller collections of files in no time. That's where you might come across the WinSxS folder. It is between 5 and 10GB in capacities and for many users WinSxS is like a black box in the Windows world.
This raises the question of what exactly are the files installed in WinSxS and why is it so big. Let's clear up the secrets of WinSxS and how to manage this directory through the following article.
WinSxS folder size
WinSxS contains all the files required to maintain compatibility with the hardware and software on your PC. One of Windows' greatest strengths is its ability to run legacy hardware and applications. But this backwards compatibility comes at the cost of disk space and error.
Navigate to C: WindowsWinSxS , right-click on WinSxS and select Properties. This folder consumes almost 7.3GB of disk space. But that's not the problem with actual size. The reason for this is hard links that File Explorer and other third-party tools do not take into account.
It counts each reference to a hard link as a separate version of the file for each location. So if a system file is in both WinSxS and System32 folders , File Explorer will incorrectly double the folder size.

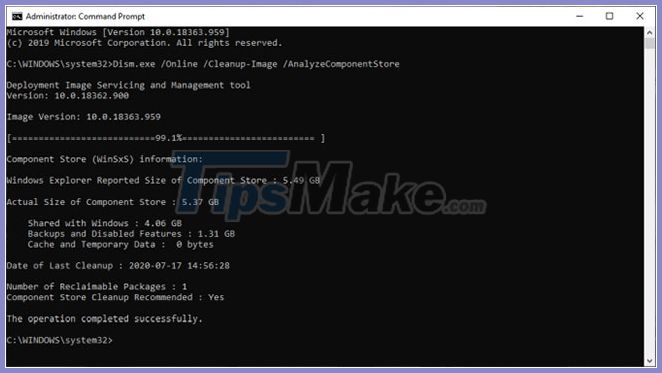
To check the actual capacity of this Windows component store, open a Command Prompt window with admin rights and enter:
Dism.exe /Online /Cleanup-Image /AnalyzeComponentStoreNote : The / AnalyzeComponentStore option isnot recognized on Windows 8 and earlier.
After analysis, actual capacity is reduced to 5.37GB. This value affects hard links in the WinSxS directory. Shared with Windows gives you the file size to be hard linked. The Date of Last Cleanup is the recently completed component repository cleanup date.

Method of reducing the size of the WinSxS folder
Many users often ask if it is possible to manually delete files from the WinSxS folder. The answer is no.
Deleting files will most likely damage Windows, and critical Windows updates may not install properly. Even if you successfully delete a file from the WinSxS folder, you will never know which application will stop working.
However, you can reduce the size of the WinSxS folder with some built-in tools. We'll use tools like Disk Cleanup, the DISM command, and delete Features on Demand to cut down on the WinSxS folder.
Disk Cleanup tool
In the search box, type disk cleanup and select Disk Cleanup. From this window, click the Clean up system file button . This restarts the utility and unlocks access to the full range of cleaning options. You can delete installation files, earlier versions of Windows, etc. The Disk Cleanup tool is a starting point for cleaning Windows 10.

Delete Features on Demand
Windows allows you to enable or disable Windows Features on Demand by default. You can add some useful features - Hyper V, Print to PDF, Windows Subsystem for Linux (WSL), etc.
Features that you unchecked are still in the WinSxS folder and take up disk space. Users with low storage capacity may want to cut back on Windows installation as much as possible. Open a Command Prompt window with admin rights and enter:
DISM.exe /Online /English /Get-Features /Format:TableYou will see a list of the features names and their status.

To remove a feature from the system, type:
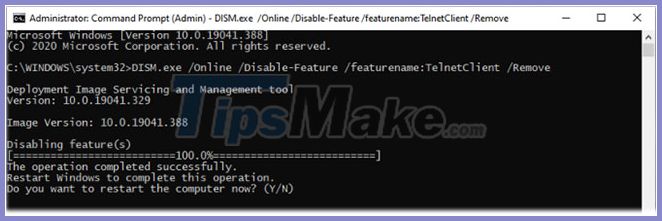
DISM.exe /Online /Disable-Feature /featurename:NAME /Remove(Replace 'NAME' with the name of the object mentioned in the list).
 Remove a feature from the system
 If you run the / Get-Features command again , you will see a status of 'Disabled with Payload Removed' instead of just 'Disabled' . Then, if you choose to install the removed components, Windows will prompt you to re-download the component files.
DISM cleanup components
Windows 8 / 8.1 has a built-in feature to automatically clean the component store when the system is not in use. Open Task Scheduler and navigate to Microsoft> Windows> Servicing . Right-click on the item and select Run.

The task will wait at least 30 days after an updated component is installed, before uninstalling the previous version of that component. The task also has a one-hour timeout and may not delete all files.
With the DISM / Cleanup-Image parameter , you can immediately delete the previous version of the component (there is no 30-day grace period) and there's no 1 hour time limit. Open Command Prompt (Admin) and enter:
DISM.exe /online /Cleanup-Image /StartComponentCleanupIf you add a ResetBase switch , you can delete all alternate versions of every component. But remember that you won't be able to uninstall any of the current updates (even if they fail).
DISM.exe /online /Cleanup-Image /StartComponentCleanup /ResetBaseThe following command will remove any backup components needed to uninstall the service pack. This is a set of cumulative updates for a specific version of Windows.
DISM.exe /online /Cleanup-Image /SPSupersededThe last resort is that you can wipe the WinSxS folder to free up Windows space. However, the instructions should be carefully followed to avoid causing serious errors on the system.
You should read it
- ★ Wipe the winSxS folder to free up windows space
- ★ How to set the default name of a newly created folder according to the current date on Windows 10
- ★ Set a password for the folder, set a password for the folder or folder using Folder Guard
- ★ Use CMD to create an 'undeleted' folder on Windows
- ★ Tips to change the default name of the newly created folder on Windows 10