How to make realistic tattoo art with Adobe Photoshop
Tattoo art with Adobe Photoshop helps create realistic effects on photos. Combining techniques such as blend modes, color correction and Free Transform, you can combine tattoos into natural photos without complicated software..
Create artistic tattoo effects in Photoshop with Free Transform, blend modes and color adjustments. The method is very simple, suitable for beginners.
How to tattoo with photoshop
First of all, you must download Photoshop to your computer.
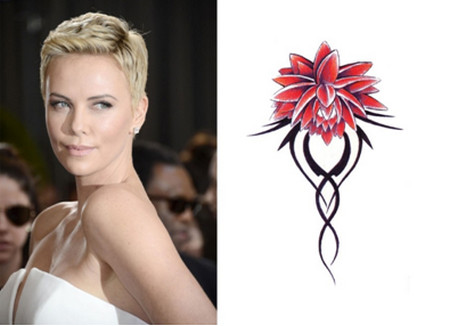
Step 1 : Choose the tattoo you like best, open the photo file you want to combine on Photoshop.
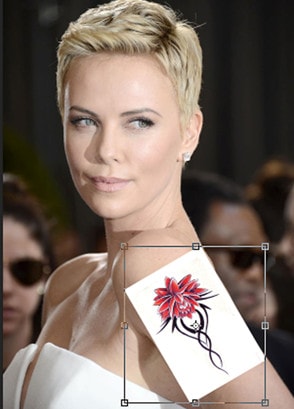
Step 2 : Drag the tattoo to the side of the photo, then use the Edit ---> Free Transform command (shortcut key is Ctrl + T ) to stretch and rotate the image to fit the photo in both size and angle like this:
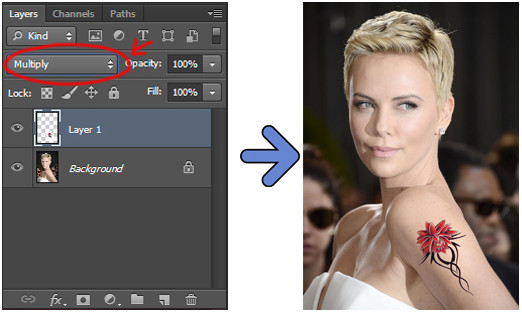
Step 3 : Set the tattoo layer mode to Multiply as shown:
Step 4 : The tattoo layer looks a bit dark now, we need to adjust the color so that the color of the tattoo blends with the character's skin color to create a more realistic looking work, here I use the command
Image --> Adjustments --> levers (shortcut is ctrl + L ), this step requires us to have a bit of an aesthetic eye:
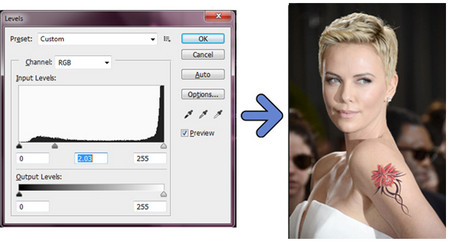
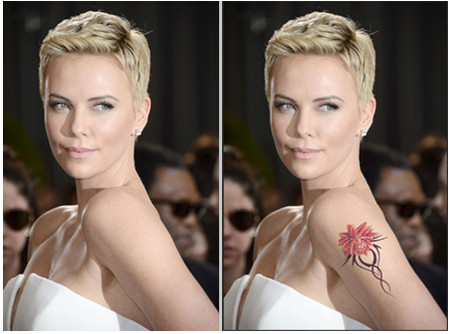
and finally we get the following result:
So, you have learned how to tattoo art with Adobe Photoshop with simple steps such as aligning the tattoo with Free Transform, using Blend Mode Multiply to blend with the skin and adjusting the color with Levels. Thanks to that, the image can look more natural and realistic without complicated techniques. If you want the tattoo to be sharper, you can apply the Dodge & Burn Tool to create light and shadow effects, making the image more vivid.