Table of Contents
Can you install Windows 11 on an Android phone and turn it into a pocket-sized Windows PC? Surprisingly, the answer is yes—but only on certain devices, and the process is much more complicated than installing an Android app.
Thanks to community projects such as Renegade Project, some Qualcomm Snapdragon-powered smartphones can boot a real version of Windows 11 on ARM. However, most Android phones cannot run Windows 11 natively because they lack compatible firmware, drivers, and boot support.
Fortunately, there are alternatives if your goal is simply to run Windows applications or access a Windows 11 desktop from your phone.
In this guide, we'll explain how to install Windows 11 on a compatible Android phone, what hardware you need, the risks involved, and two easier ways to enjoy Windows functionality on Android.
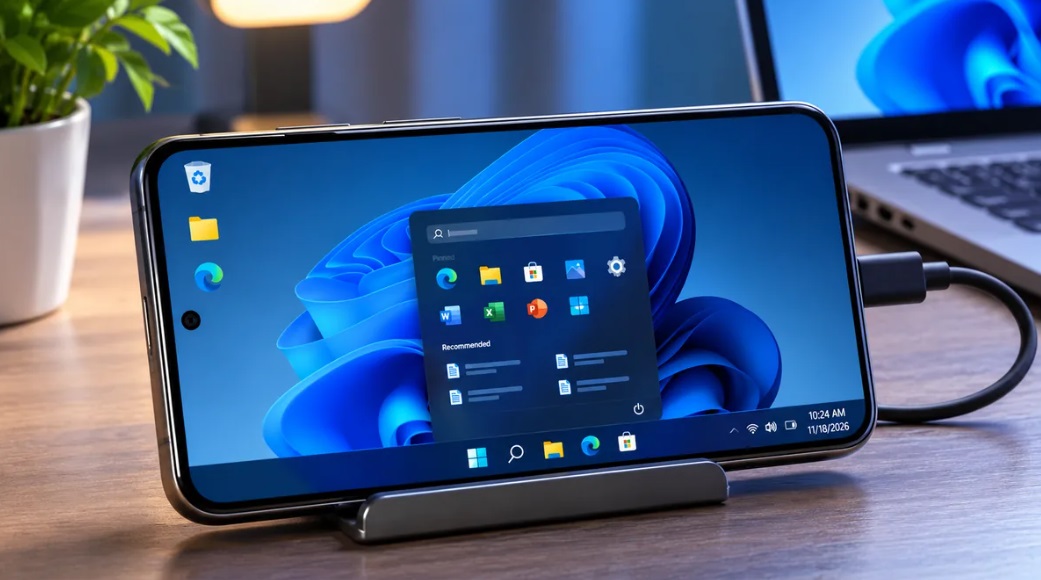
Can You Really Install Windows 11 on an Android Phone?
Yes, but not on every Android phone. A native Windows 11 installation requires a device with a compatible processor, custom boot firmware, appropriate Windows drivers, and a supported installation procedure.
Unlike a traditional PC, an Android smartphone doesn't normally include the UEFI firmware and hardware support needed to boot Windows.
Projects such as Renegade help bridge that gap by developing custom UEFI firmware for select Qualcomm Snapdragon devices.
There are three main ways to experience Windows on Android:
| Method | Runs Real Windows 11? | Difficulty | Best For |
|---|---|---|---|
| Native installation using Renegade | Yes, on supported devices | Advanced | Developers and enthusiasts |
| Winlator | No, runs compatible Windows apps | Moderate | PC apps and older games |
| Remote Desktop | Yes, on another computer | Easy | Everyday productivity |
Important: An app claiming to install a complete Windows 11 operating system with a single APK is not a legitimate native Windows installation method.
What You Need Before Installing Windows 11 on Android
Before attempting a native installation, make sure you have the following:
-
A smartphone with a specifically supported Qualcomm Snapdragon chipset.
-
A computer running Windows or Linux.
-
A USB cable capable of transferring data.
-
An unlockable bootloader.
-
Compatible UEFI firmware and Windows-on-ARM drivers for your exact device.
-
An official Windows 11 ARM64 image.
-
Sufficient free storage and preferably at least 6GB to 8GB of RAM for experimentation.
-
A complete backup and a verified way to restore the phone's original firmware.
These memory and storage recommendations are practical considerations, not guarantees of compatibility.
For comparison, TipsMake's Windows 11 Compatibility Checker helps evaluate common PC installation requirements. However, it cannot determine whether an Android smartphone is supported by Renegade Project.
The most important requirement is a verified, device-specific Windows port.
Method 1: Install Windows 11 Natively Using Renegade Project
Renegade Project is a community-driven initiative that develops EDK2-based UEFI firmware for certain Qualcomm-powered devices.
This firmware can allow supported smartphones to boot operating systems such as Windows 11 ARM.
Some historically demonstrated devices include the OnePlus 6, OnePlus 6T, and Xiaomi Mi 8. However, support varies by firmware version and hardware feature, and past demonstrations do not guarantee that the latest Windows release works correctly.
Step 1: Identify Your Android Phone's Exact Model
On your smartphone:
-
Open Settings.
-
Navigate to About phone.
-
Record the device model and model number.
-
Identify its Qualcomm Snapdragon processor and device codename.
The device codename matters because different regional variants can have different hardware configurations.
Visit the official Renegade Project supported devices list and look for your exact model.
Check the available firmware, installation documentation, and Windows driver status.
If your phone is not specifically supported, do not attempt to flash firmware designed for another device.
Step 2: Back Up Your Android Phone
Installing Windows natively may require changing the device's partition layout.
That can erase Android, remove user files, or leave the phone unable to start.
Before continuing:
-
Back up photos, videos, and important documents.
-
Export authenticator and other account-recovery information.
-
Save anything stored only on the phone.
-
Obtain the official stock firmware for your exact device.
-
Confirm that you can restore the original Android installation.
If you rely on the phone for work, banking, or everyday calls, use a separate test device instead.
Warning: Unlocking a bootloader commonly wipes user data. Flashing incompatible firmware can permanently damage a device.
Step 3: Prepare Your Computer and Unlock the Bootloader
Many supported phones require an unlocked bootloader before installing alternative firmware.
Install Google's Android SDK Platform-Tools on your computer, which provides ADB and Fastboot.
On the phone, enable Developer Options and USB debugging if your device supports them.
Connect the phone to your computer and verify that ADB recognizes it.
You can perform a basic connection check using:
adb devices
Authorize the computer on your phone if prompted.
Bootloader unlocking differs significantly between manufacturers. Follow the official procedure for your exact model rather than copying commands from a different smartphone.
Some carrier-locked devices cannot be unlocked at all.
Step 4: Obtain Compatible Windows 11 ARM Files
For a native installation, you'll need two different components:
Windows 11 ARM64: The operating system image.
Device-specific firmware and drivers: The files that allow Windows to boot and communicate with your smartphone's hardware.
Microsoft provides Windows 11 ARM64 installation media through its official Windows 11 ARM download page.
Use an authentic image and comply with Microsoft's licensing and activation requirements.
Next, obtain your phone's supported UEFI firmware and driver package from the project maintainer.
Do not substitute an ordinary x64 PC ISO for an ARM64 installation, and do not assume that an official Windows ISO includes the drivers required by your phone.
Step 5: Follow the Device-Specific Installation Procedure
This is the most technical stage.
Depending on the model, the documented process may involve:
-
Preparing or resizing storage partitions.
-
Creating the Windows boot and system partitions.
-
Deploying the Windows ARM64 image.
-
Installing the matching device drivers.
-
Configuring the custom UEFI boot environment.
-
Booting into Windows for the first time.
The exact procedure depends on your phone's partition layout, firmware version, and driver package.
There is no safe, universal set of partitioning or flashing commands for every Android phone.
Follow the complete installation guide maintained for your exact device and verify that it also documents how to recover Android.
Never erase, repartition, or flash an unfamiliar partition simply because an online tutorial instructs you to do so.
Step 6: Complete Windows Setup and Test the Hardware
If the device successfully boots Windows 11, complete the initial setup.
Then check:
-
Touchscreen and display functionality.
-
Wi-Fi and Bluetooth.
-
Audio output and microphone.
-
Charging and battery reporting.
-
USB devices and external peripherals.
-
Graphics performance and system stability.
Windows may start even when some of these features are unavailable.
In particular, cellular calling, cameras, sensors, and power management can remain unsupported.
You can also explore TipsMake's Windows Essentials course to learn Windows system settings, file management, and basic troubleshooting.
Method 2: Run Windows Applications on Android With Winlator
If your goal is to run Windows programs rather than replace Android, Winlator is a more practical option for many users.
Winlator uses Wine and x86/x64 translation technologies such as Box86 and Box64 to run compatible Windows applications on Android.
Unlike a native Windows installation, Winlator does not install the complete Windows 11 operating system.
Step 1: Download Winlator
Visit the developer's official Winlator GitHub releases page.
Download the appropriate APK for your device.
Avoid modified APK files from unknown websites because they may contain malware.
Step 2: Install the APK
Open the downloaded file on your Android phone.
If Android blocks the installation, allow your file manager or browser to install apps from that source.
Complete installation and then revoke the temporary permission if you no longer need it.
Step 3: Create a Winlator Container
Launch Winlator and allow its initial setup to finish.
Create a new container using the available settings.
You may need to configure display resolution, graphics drivers, and performance options.
Start with the default settings before making advanced changes.
Step 4: Launch a Windows Application
Copy a compatible Windows installer or executable to your phone.
Open the Winlator container, locate the file, and attempt to launch it.
Compatibility varies depending on the application, processor, graphics driver, and Winlator configuration.
For more instructions, see our step-by-step guide to running Windows applications on Android using Winlator.
Winlator can be useful for older PC games and lightweight desktop utilities, but it does not guarantee compatibility with every Windows application.
Method 3: Use Windows 11 on Android With Remote Desktop
If you already own a Windows 11 PC, remote desktop software provides one of the easiest ways to access a complete Windows environment from your Android phone.
Microsoft's Windows App allows supported Android devices to connect to remote Windows PCs and eligible cloud-hosted Windows environments.
Unlike Winlator, this option gives you access to a genuine Windows operating system. However, Windows is running on the remote computer, not locally on your phone.
Step 1: Enable Remote Desktop on Your Windows PC
On a compatible Windows 11 Pro, Enterprise, or Education PC:
-
Open Settings.
-
Select System.
-
Open Remote Desktop.
-
Turn on Remote Desktop.
-
Confirm the PC name and authorized user account.
Windows 11 Home cannot act as a built-in Microsoft Remote Desktop host.
Step 2: Install Windows App on Android
Open the Google Play Store and search for Windows App by Microsoft.
Install the official application.
Your phone and remote PC must have a working network connection.
Step 3: Connect to Your Computer
Open Windows App and add a remote PC connection.
Enter your Windows computer's name or local IP address, along with the appropriate login credentials.
Connect and accept the identity prompt only after verifying that you're connecting to your intended computer.
You should now see and control the Windows desktop from your Android phone.
For connections outside your home or office network, use a trusted VPN or an approved remote-access solution. Do not expose the PC's Remote Desktop port directly to the public Internet.
If your computer uses Windows 11 Home, an alternative is Chrome Remote Desktop. Follow our Chrome Remote Desktop setup guide for PCs and Android phones.
Can You Install Windows 11 With an Android Emulator?
Some advanced users experiment with complete operating-system emulation using QEMU-based tools.
In theory, a sufficiently configured emulator can boot Windows in a virtual environment on Android.
However, Windows 11 requires substantial processing power, memory, storage, and appropriate virtual hardware.
Full-system emulation can be extremely slow, particularly when the guest processor architecture differs from the phone's hardware.
It is also more difficult to configure than Winlator and may have limited graphics acceleration.
For most users, native installation on supported hardware, Winlator for individual applications, or remote access to an existing Windows PC are more useful choices.
Common Problems When Running Windows 11 on Android
Windows 11 Won't Boot
The UEFI firmware may not match the phone, the partition layout may be incorrect, or required drivers may be missing.
Review the exact device installation instructions. Do not flash random boot images to troubleshoot.
Touchscreen or Wi-Fi Doesn't Work
Custom Windows-on-ARM ports depend on device-specific drivers.
Check the project's hardware compatibility information. Some components may remain unsupported even when Windows boots successfully.
Windows Applications Run Slowly
Performance depends on the phone's processor, available RAM, storage speed, and graphics capabilities.
Lower application resolution, close unnecessary tasks, and monitor the device's temperature.
The Phone Overheats or Loses Battery Quickly
Desktop operating systems and compatibility layers can place sustained workloads on mobile hardware.
Stop testing if the phone becomes unusually hot. Do not assume that custom Windows firmware provides the same thermal and charging protections as the original Android software.
Frequently Asked Questions
Can I install Windows 11 on any Android phone?
No. Native installation is limited to specific devices with compatible custom firmware and Windows drivers. Most Android phones cannot run Windows 11 natively.
Can I install Windows 11 on a Samsung Galaxy phone?
Only if your exact model has a verified, working Windows-on-ARM port. Having a Snapdragon processor does not automatically make a Samsung Galaxy phone compatible.
Can I install Windows 11 on Android without rooting?
Winlator and remote desktop applications normally do not require rooting. Native Windows installation generally requires bootloader-level changes and device-specific firmware, which are different from ordinary Android root access.
Can I dual-boot Windows 11 and Android?
Some community projects support dual-boot configurations on particular phones. Others may require replacing or modifying the existing Android installation. Dual boot should never be assumed.
Is Windows 11 on Android free?
Winlator and several community firmware projects are available free of charge. However, Windows licensing requirements still apply when installing and activating Windows 11.
Will installing Windows 11 damage my phone?
Incorrect flashing or partition changes can cause data loss or make the device unbootable. Hardware features may also malfunction under unsupported firmware. Native installation should be treated as an advanced experimental project.
Final Thoughts
Installing Windows 11 on an Android phone is technically possible, but it's not a simple upgrade that works on every smartphone.
If you own a specifically supported Snapdragon device and understand bootloader unlocking, firmware flashing, and recovery procedures, Renegade Project can provide a path to running Windows 11 ARM natively.
For everyone else, there are better alternatives.
Use Winlator if you want to run compatible Windows games or applications without replacing Android.
Use Remote Desktop if you want access to a complete Windows 11 computer from your smartphone.
Whichever method you choose, verify compatibility, use official software sources, and protect your data before making significant changes to your device.
Related Articles
 How to install Android Apk on Windows 10 phone
 How to install Android on a Windows computer without software emulation
 Can I install Windows 10 from my Android phone, have you tried it?
 How to Extract APK Files of Apps on Android Phone
 Use Android operating system on Windows Mobile Phone
 How to install Windows 10 using Android phone
Reader Comments 0
Sign in with email or Google to join the discussion.