How to install Windows 10 with USB is quick and simple
If you do not know, Windows 10 can be easily installed on computers, laptops by USB. How to do it? Please follow the article below for more details.
To be able to perform the installation of Windows 10 using USB, you should refer to the step-by-step instructions below to make the process go smoothly and without problems.
1. Prepare the USB and prepare the computer to configure as required
- Prepare USB
USB is an important tool, indispensable in this process. If you do not have USB, you can CLICK HERE to find yourself a suitable USB. USB should have a capacity of 4GB or more to be able to hold data of the operating system.

Once you have the USB, you need to install it so that the USB can accommodate the Windows 10 installer. Refer to the article below to know how to create a Windows 10 installer USB.
- Prepare the computer with the required configuration
Processor : Minimum speed 1 GHz, with support for instructions and technologies such as PAE, NX, and SSE2.
+ RAM capacity : Minimum 1 GB (for 32-bit version) or 2 GB (for 64-bit version).
Minimum memory : 16 GB (for 32 bit version) or 20 GB (for 64 bit version).
Graphics card : Microsoft DirectX 9 with WDDM driver.
2. Connect the computer with USB
After the USB has contained the Windows 10 installer, you insert the USB into the computer's USB port> Turn on the computer.
When the computer is starting up, you need to repeatedly press the function key to be able to open the computer's BIOS interface .
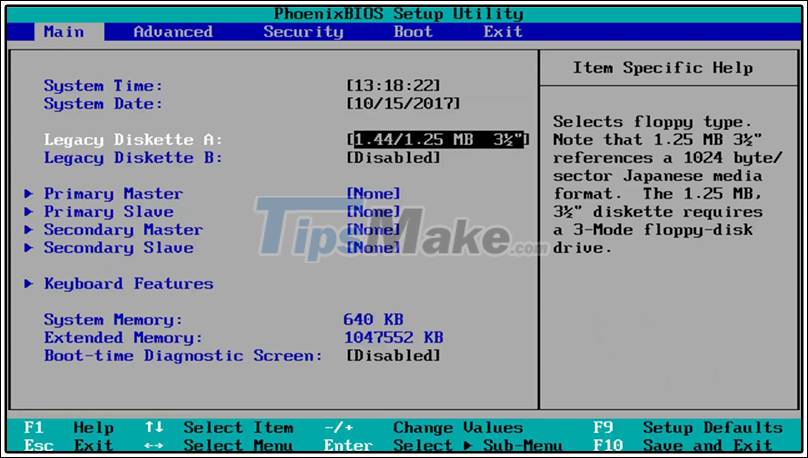
Depending on the different manufacturers, the function keys will be different, as follows:
- Laptop SONY VAIO : Key F2.
- Laptop HP : Key F10.
- Laptop ACER : Key F12.
- ASUS Laptop : ESC key.
- LENOVO Laptop : F1 key.
- Laptop DELL : F2 key.
In addition, if you pressed a function key according to the instructions above but failed, your computer may have a different way of pressing. When having this problem, keep pressing F1 through F12 while the computer is booting.
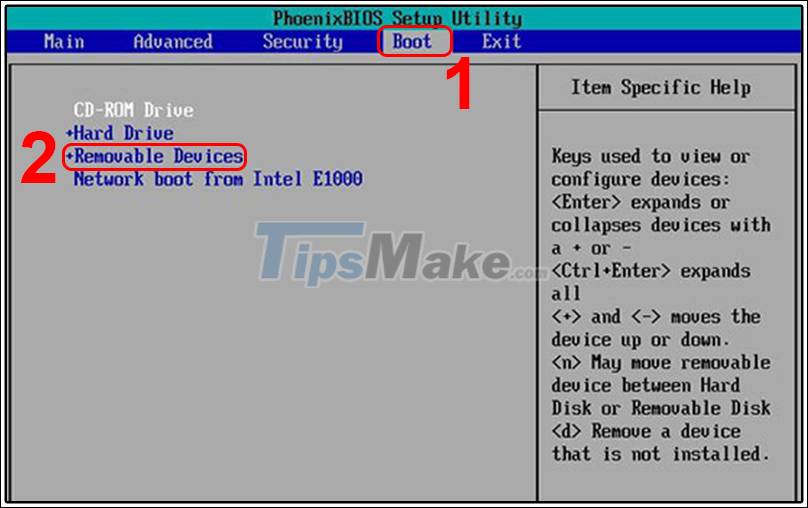
Once you have entered the computer's BIOS interface, you use the navigation keys up, down, left, right to move to Boot > Select Removable Devices (Depending on the model, it can be USB Storage Device or External Drive)> Press Enter to get data from USB.
3. Start installing Windows 10 on your computer
- Step 1: Select the language to install and enter the license key
In the Language to install box, select the language as English (United States) > Select English (United States) in the Time and currency format box> Select US in the Keyboard or input method box> Click Next .

You enter the license key in the box under Activate Windows> Click Next.

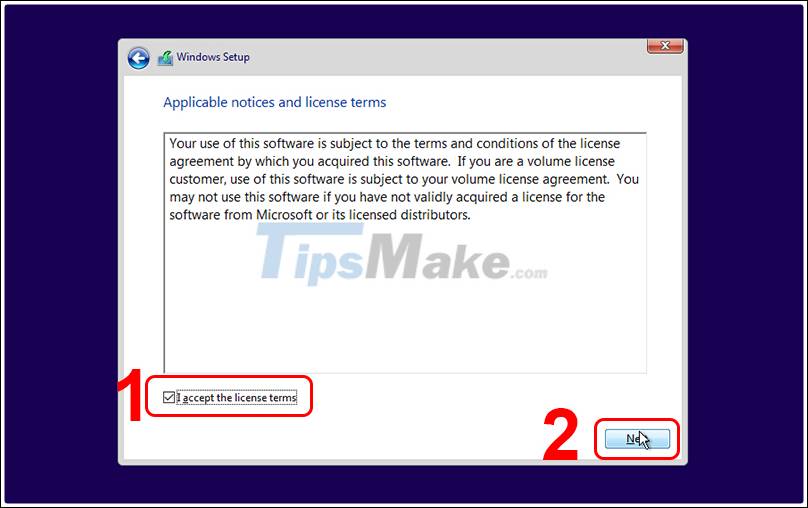
You check the box I accept the license terms > Click Next .
- Step 2: Customize and choose where to save the operating system
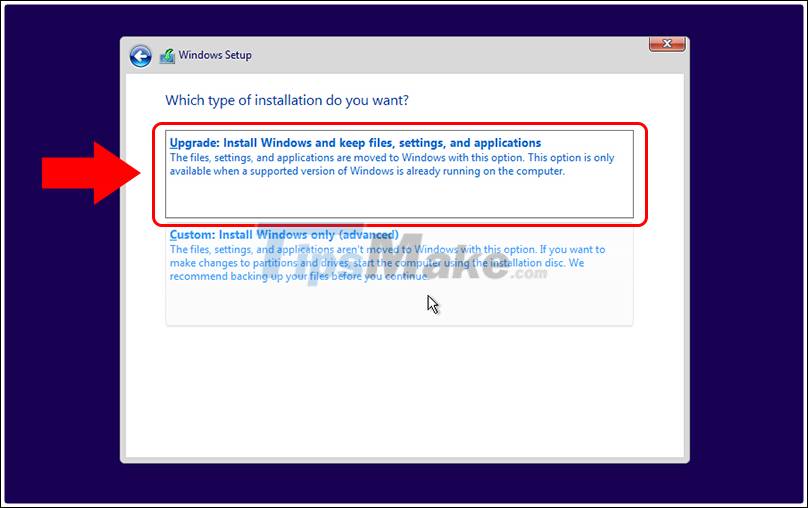
Next, there will be 2 options appear:
+ Upgrade : You are using old versions of Windows 7, 8, 8.1, you can choose Upgrade to upgrade to the latest operating system version in USB.
+ Custom : You choose Custom when you want to install Windows 10 on your computer.
The next step, you will need to select the drive to install Windows, the selected drive will be erased all data> Click New .
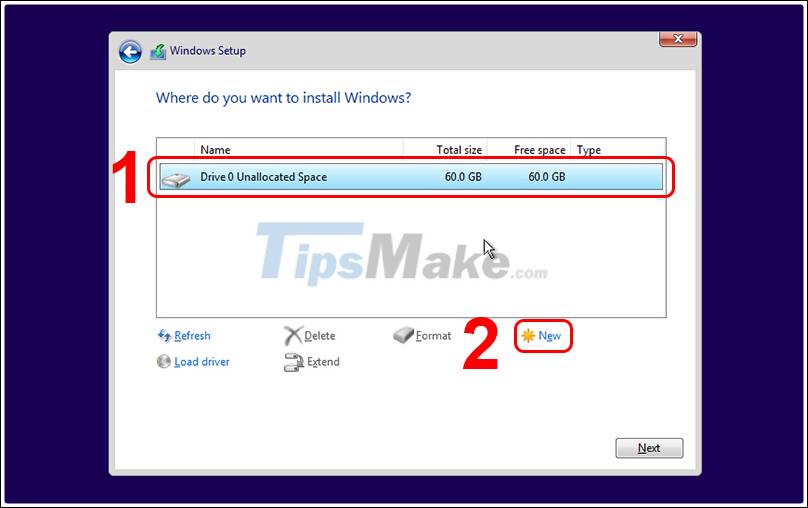
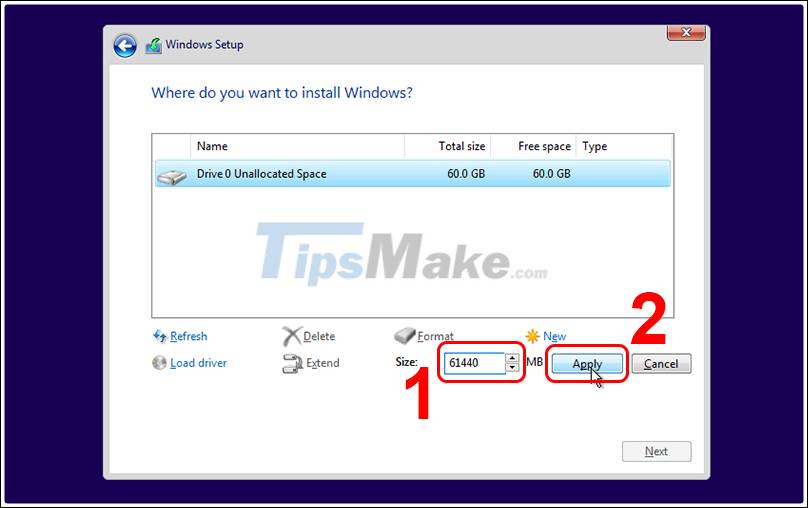
Enter the amount of space to create to hold the operating system's data. Because 1024MB = 1GB, so how many GB do you want to create, then multiply that number by 1024. For example : If I created a 60GB drive, I would take 1024 x 60 = 61440. Click Apply to save.
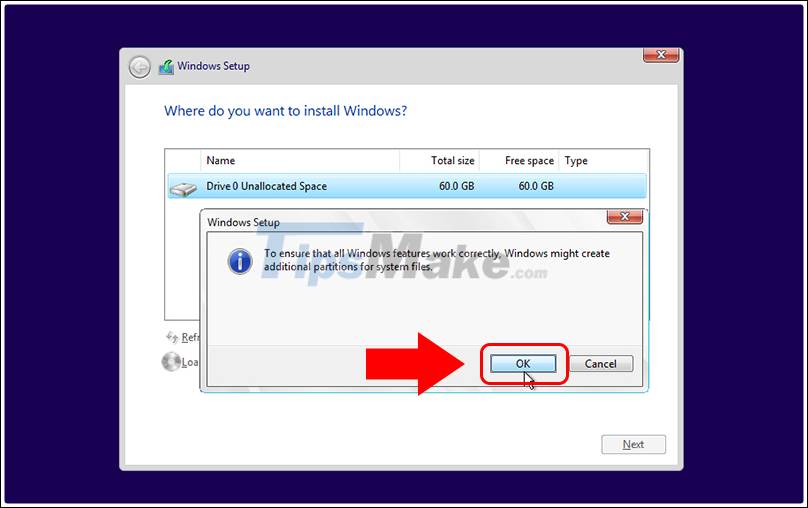
Note : In case you cannot press the New button, click the Format button to delete all the partitions before installing Windows> The system will appear a message asking if you want to delete all> Click OK .
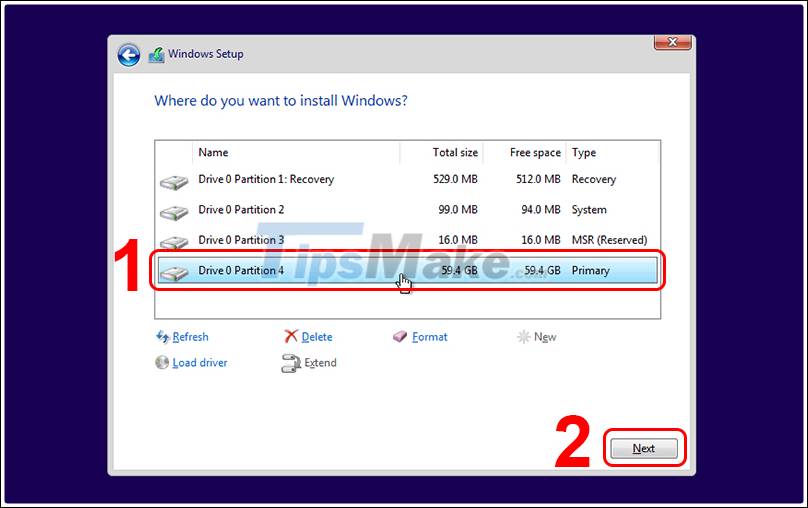
After that, the system will appear many different partitioned drives, you cannot delete those drives. Choose a drive you want to install Windows 10 on> Click Next .
At this point, the Windows 10 installation process will automatically take place.

- Step 3: Perform other settings
Once the installation is complete, the computer will reboot again and you will go through the installation steps in the end. The first is to select the language, you scroll down to find and select United States > Click Yes .
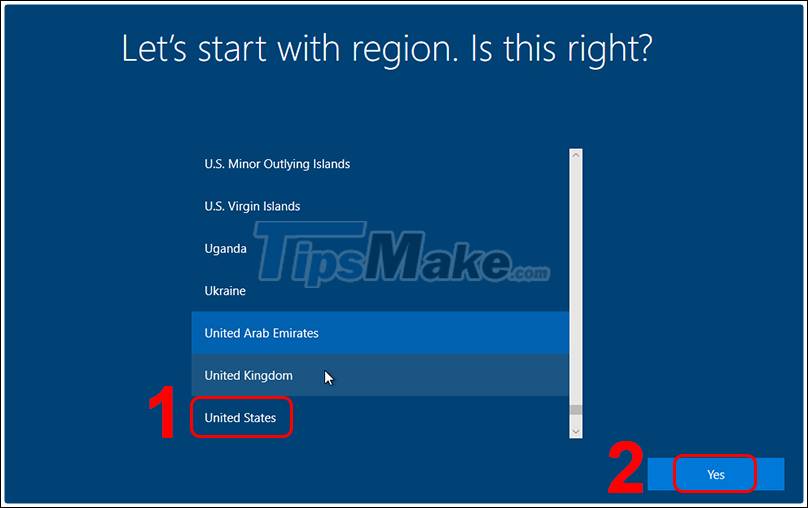
In the selection of keyboard input method, you choose US > Click Yes .

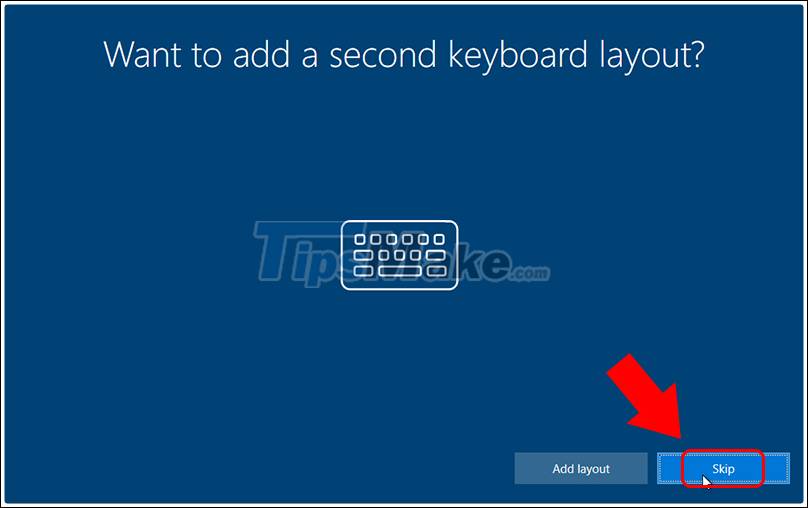
Next, if you want to add one more keyboard typing method, click Add layout . If not, press Skip to ignore.
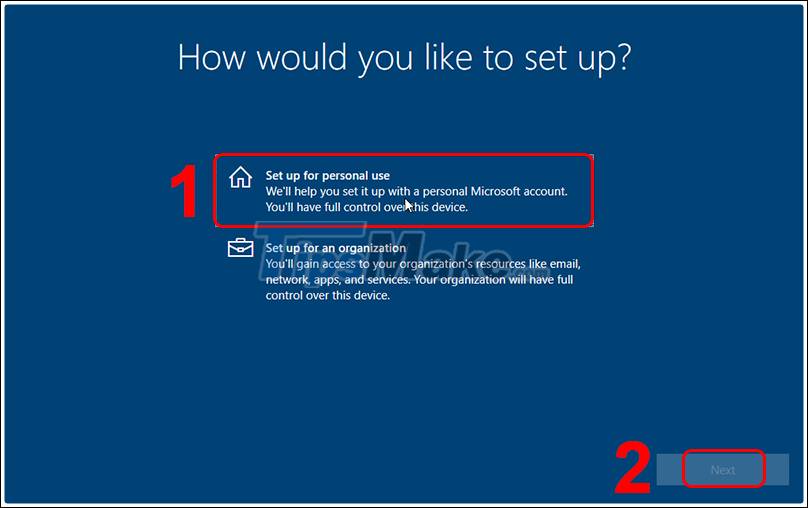
Select Set up for personal use > Click Next .
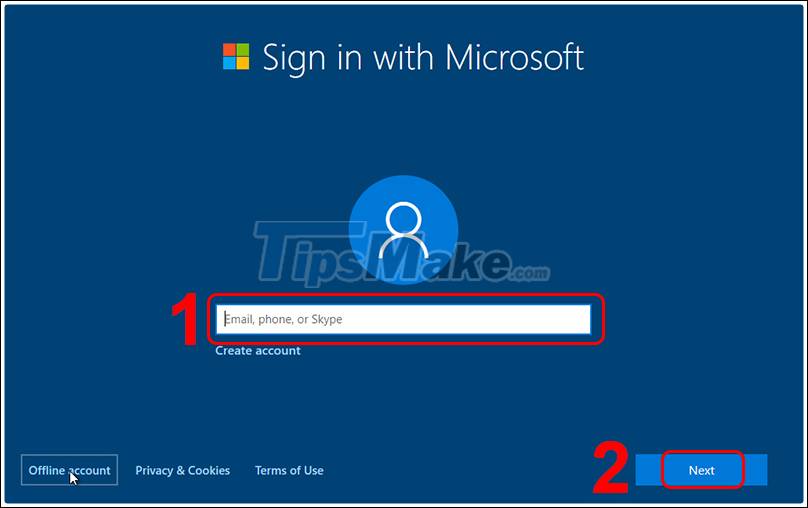
Now you will be redirected to Sign in with Microsoft, enter your Microsoft account in the box Email, phone, or Skype> Click Next . If you don't have an account, click Create account to sign up for a new account.
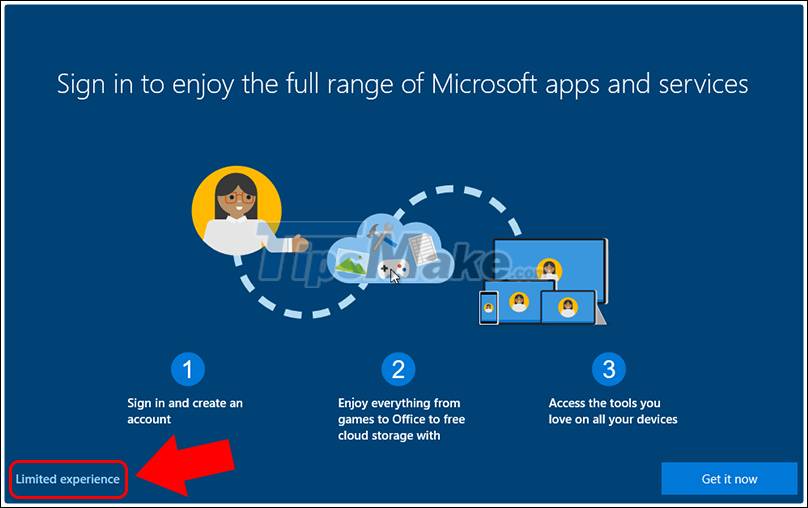
Click the Limited experience button to skip the steps to download and sync Microsoft's default apps.
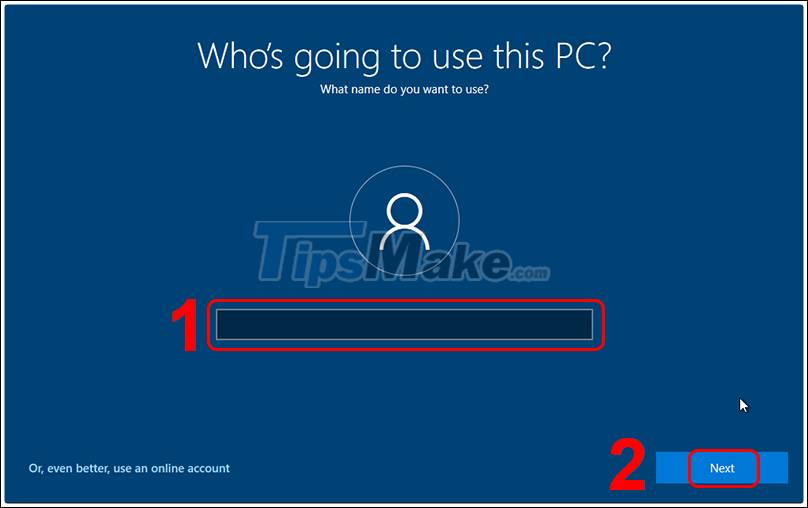
You enter a name for the computer> Click Next .
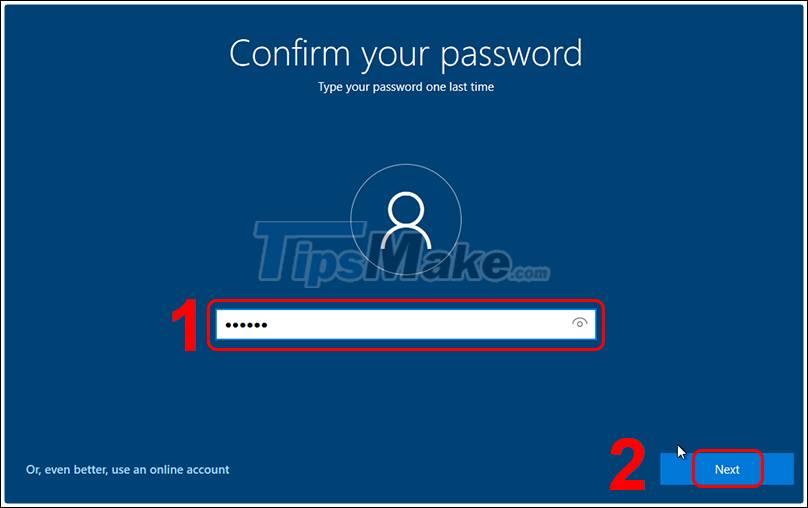
You enter the password for your computer> Click Next .
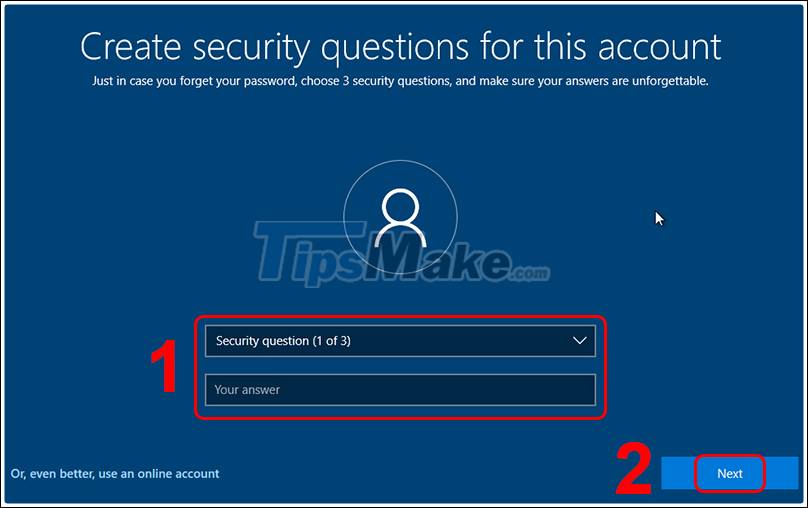
Next, you will choose the secret questions and answer. These are the questions to use in case of password recovery. You need to remember it and not reveal it to anyone. Then press Nex t.
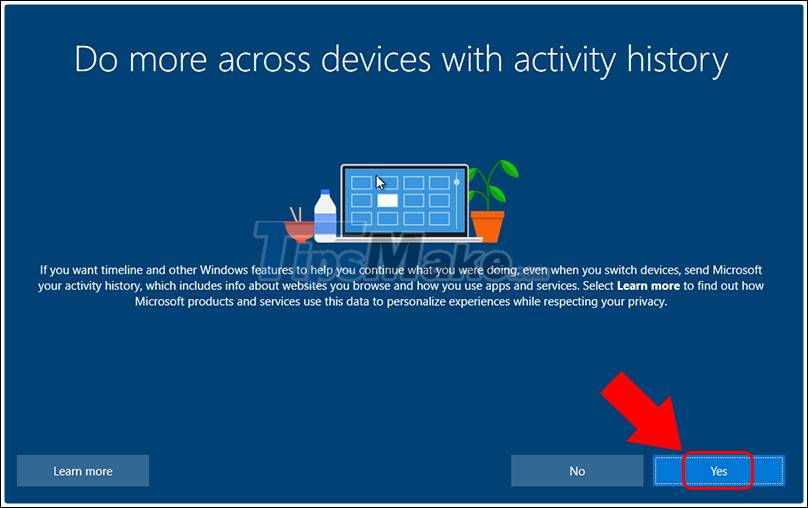
Click Yes to continue.
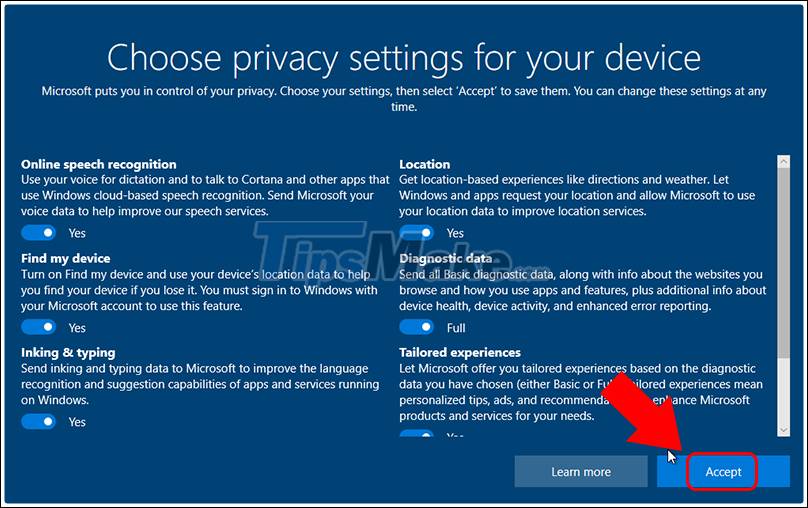
Click Accept .
Finally, the Windows 10 desktop interface will appear. So you have successfully performed the process of installing Windows 10 using USB.
Above are the steps on how to install Windows 10 using USB. Thank you for watching and see you in the following articles.
You should read it
- Install Win 10 for Android tablet
- How to install Windows 8.1 from USB
- Instructions for installing Windows 8.1 on Mac
- How to install Windows 11 iSO by USB, for machines that do not support
- Install Windows XP from a USB Flash drive
- Instructions to install Windows by USB, create USB boot, USB install Windows
 How to split hard drive, Set Active, Fix MBR before GHOST
 Learn the Windows 10 installation process
 Instructions to install Win 7/8/10 in WinPE (Mini Win) environment
 7 common errors during Windows installation and how to fix them
 How to upgrade to the latest Windows 10, Update Win!