Table of Contents
How to Install Putty on Windows is easier to understand when the core ideas are paired with practical examples. The sections below explain the topic clearly, highlight useful steps, and point out details that can prevent common errors.
This article provides detailed instructions for installing PuTTY on Windows 10, 8 or 7. However, the installation is similar to other Windows versions.
Download the installation package
First, you need to download the installation package (For instance,, putty - installer.msi ). If you have a 64-bit Windows computer, you should install the 64-bit version putty-64bit - installer.msi. Almost any computer purchased after 2015 has a 64-bit processor, except for low-cost processors. Many high-end computers sold a few years earlier also used 64-bit versions. If you don't know or don't care, it's safer to use 32bit version (putty - installer.msi).
You can download the installation package here.
Start installation
On Windows 10, Edge browser will run the installer when the download is complete. Just click to install the software.
On older Windows versions, you may need to run the installer manually. Open Windows Explorer (right-click the Windows icon in the bottom left corner), navigate to the Downloads folder (or wherever you saved the installer), and double-click the file name.
Note: However, the installation must be done with admin rights (or with an admin account or your personal account must have admin rights).
Sometimes, some people may have trouble installing MSI files.
Configure and install
When the installer starts, it will display the welcome screen. Just click Next .
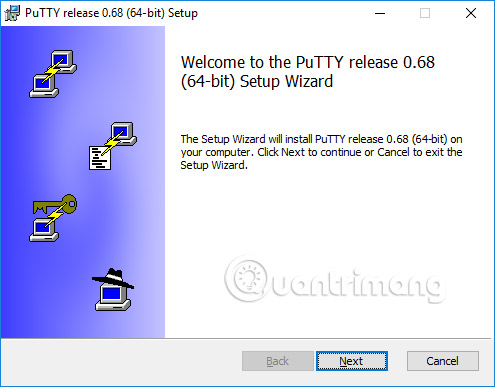
The installer will then ask for the destination folder to install the software. Almost in all cases, a practical approach is to use the default value. Just click Next .
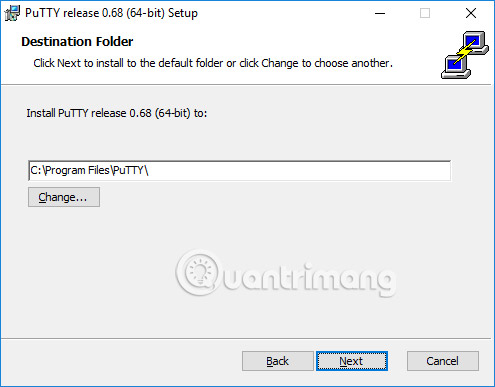
Then, the installer will ask for product features to be installed. You may want to add a shortcut on the screen if you want to use the software regularly. All other options should be enabled. When everything is ready, click Install .
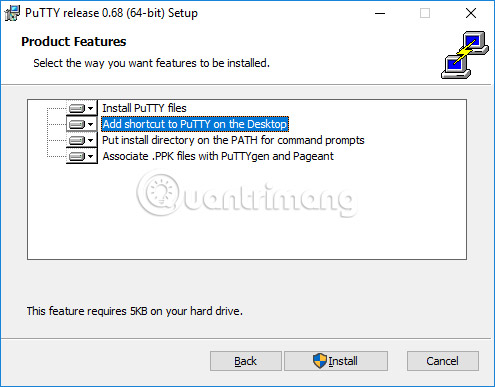
When the installation process is completed successfully, the screen with the message ' Completed ' will display. Click Finish to exit the installer.
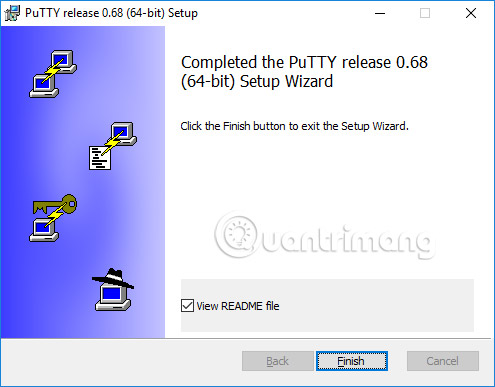
Run PuTTY
After a successful installation, you should check to make sure PuTTY is running properly and you can find the program. If you have a shortcut installed on the desktop, you will be able to find the PuTTY icon here. Try clicking (double) on this icon and the software will be opened.
If you don't create a shortcut on the desktop, you'll be able to find software from the Windows Start menu in the lower left corner of the screen. The Start menu will vary slightly in every Windows version. On Windows 10, scroll down until you see PuTTY. Open and select PuTTY .
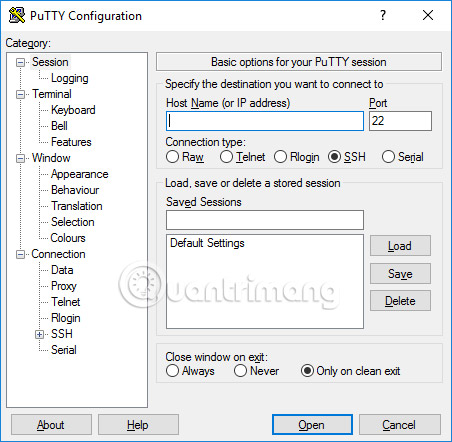
When the software starts, you will get a window with PuTTY Configuration header with a Host Name field in the upper middle section. Try entering the server name to connect in that field and click Open.
How to have a server
SSH client helps connect to the SSH server. Since you installed PuTTY, you already have a server to connect to. Server can be placed at your own university, agency or home. You need the server name (For instance,, student.example.edu) or IP address (For instance,, 177.33.189.54) to connect. Enter the server name or IP address into the Host Name field.
If you don't have a server but want to use it, try installing Tectia SSH Server for Windows or IBM mainframes or OpenSSH on Linux.
Other SSH clients
PuTTY is a pretty good client, but it's a bit old. Its user interface is very outdated and it does not provide a graphical interface for transferring files. For alternatives, see the following SSH clients.
SSH client is a program that allows to establish a secure and authenticated SSH connection to SSH servers.
SSH client options in Windows
There are several other clients and servers available. There is typically no support for SSH key management and may not have commercial support or 24x7 support.
- Tectia SSH is a SSH application that is commercially supported for businesses, with 24x7 support.
- PuTTY is a free client for SSH and telnet protocols.
- WinSCP is a free, open-source client application for Windows to transfer files. In addition to transferring files (with FTP, SFTP or SCP protocols), WinSCP also provides basic file management and script support.
- FileZilla is another free file transfer application.
- Chrome SSH extension - Google Chrome browser can be converted into an SSH client application with a utility available in the Chrome Web Store. Chrome SSH (beta) provides a basic amount of SSH protocol.

- Back up the entire website with SSH Command Line
- Install SSH on the Router for secure web access anywhere
FAQ
What should you know about download the installation package?
First, you need to download the installation package (For instance,, putty - installer.msi ). If you have a 64-bit Windows computer, you should install the 64-bit version putty-64bit - installer.msi. Almost any computer purchased after 2015 has a 64-bit.
What should you know about start installation?
On Windows 10, Edge browser will run the installer when the download is complete. Just click to install the software.
What should you know about configure and install?
When the installer starts, it will display the welcome screen. Just click Next.
Related Articles
 How to Use Putty on Windows15 minutes read
 How to Install Putty SSH Client on Ubuntu 20.04 LTS4 minutes read
 How to Use Putty on Cisco Routers and Switches3 minutes read
 How to Activate and Use SSH Commands on Windows 105 minutes read
 How to Install Windows 8.1 from USB7 minutes read
 How to Install Windows 10 from USB with ISO File8 minutes read
Reader Comments 0
Sign in with email or Google to join the discussion.