Table of Contents
This practical guide walks through how to install and use a VPN on Windows 11, explains the main requirements, and highlights common issues that may appear along the way.
In this article, this guide will show you how to install and use a VPN on Windows 11.
How to Install a VPN on Windows 11
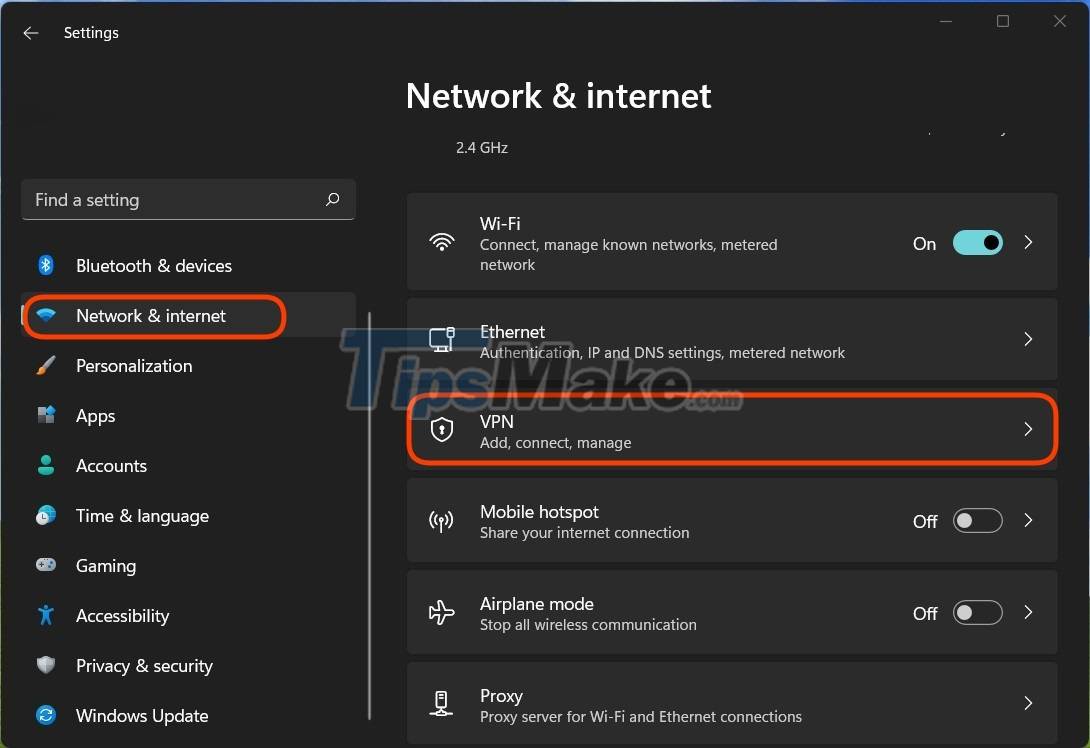
Step 1 : Open Settings > Network & internet > VPN .
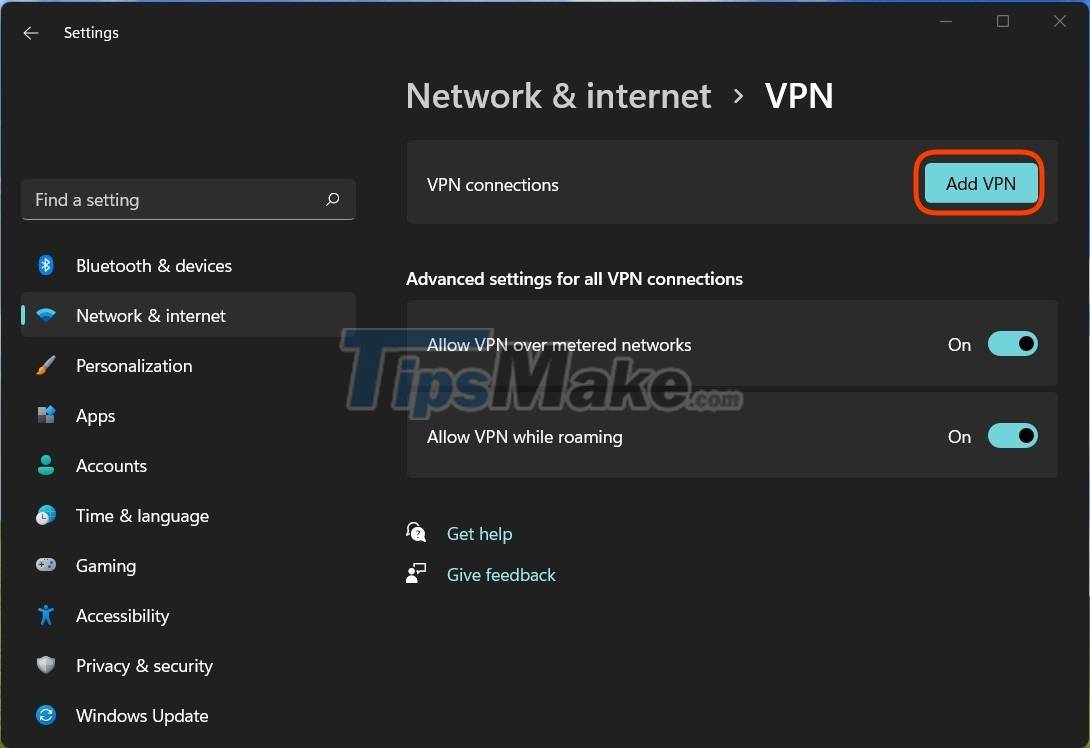
Step 2 : In the VPN connections section, click Add VPN to add a new VPN.
Step 3 : Open the drop-down menu in the VPN Provider section and select Windows (built-in) .
Step 4 : In the Connection name setting , enter the name you want to set for your VPN (Example: Tipsmake).
Step 5 : In the Server name or address settings , enter the VPN server name or the VPN's IP address (Example: Tipsmake or 183.183.1.10).

Step 6 : If your VPN does not require a protocol, select Automatic in the VPN type section or enter the protocol provided by your company or school.
Step 7 : If your school/company provides an authentication account, you need to enter the account and password in the Type of sign-in info section .
Step 8 : Select Save to save the VPN.
How to use VPN on Windows 11
There are many ways to use a VPN, and the easiest way is to connect from the Quick settings area.
Step 1 : Click on the location of the network, sound and battery icons on the Taskbar to open Quick settings.
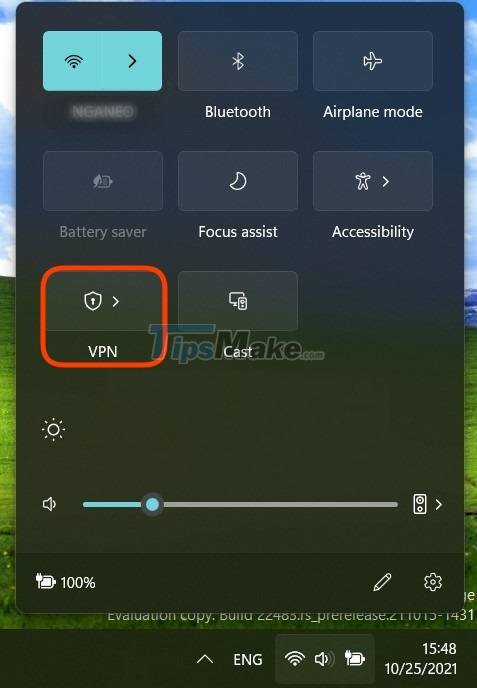
Step 2 : Click the arrow next to the VPN icon to select the VPN you need to connect to.
Step 3 : Click Connect.
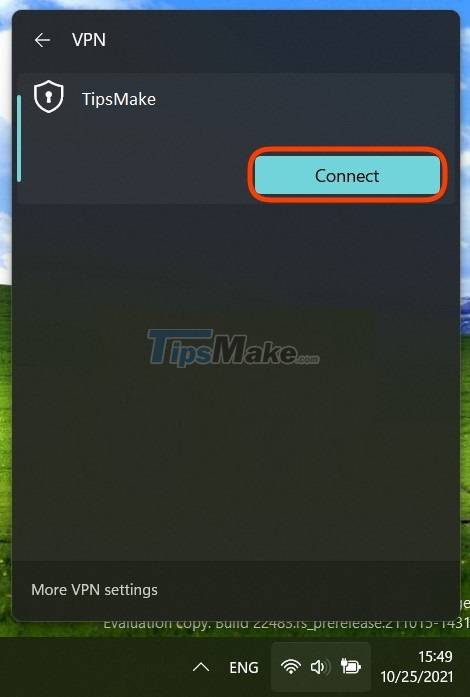
If you can't access the VPN from Quick settings, you can go to Settings > Network & internet > VPN and then click Connect in the VPN section you need to connect to.

How to delete a VPN
Step 1 : Open Settings > Network & internet > VPN .
Step 2 : Click on the VPN to remove. If that VPN is connecting, you need to press the Disconnect button to disconnect first.
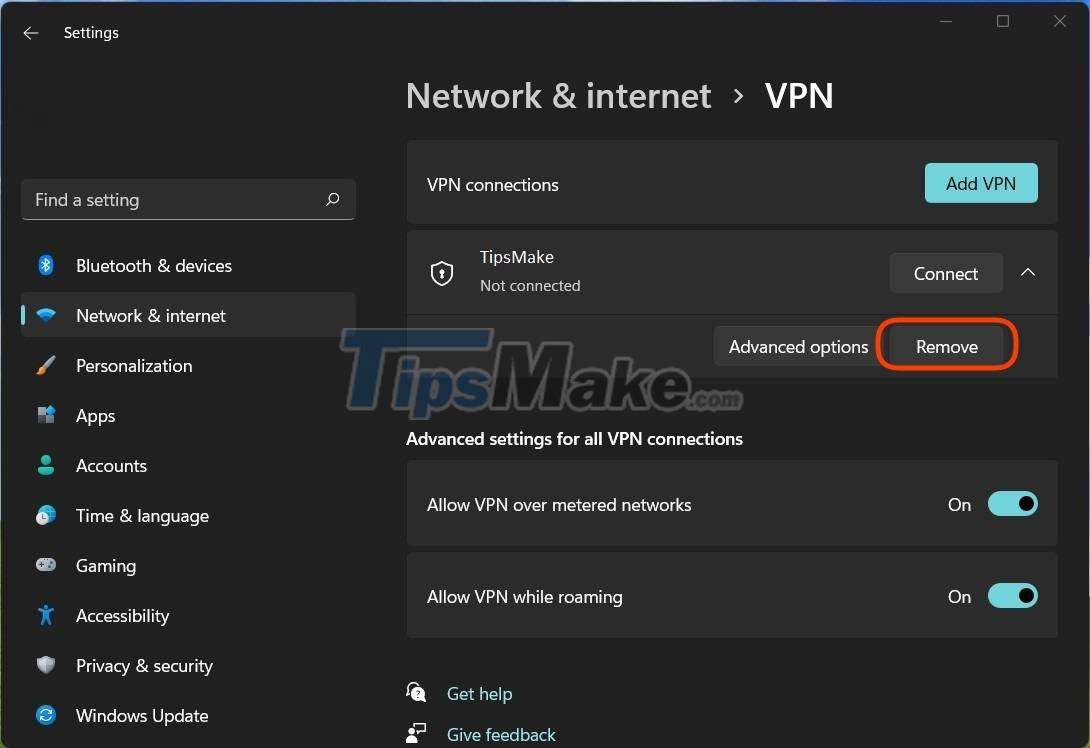
Step 3 : Click the down arrow next to the word Connect and then click Remove to remove the VPN.
Good luck!
Key Takeaways
Use the information above as a practical reference for how to install and use a VPN on Windows 11. Review each step carefully, confirm any requirements, and choose the option that best fits your situation.
FAQ
What does this guide explain about Install and Use a VPN on Windows 11?
It explains the main concepts, practical considerations, and useful steps related to install and use a VPN on Windows 11 without requiring advanced knowledge.
Who can benefit from learning about Install and Use a VPN on Windows 11?
This information is useful for readers who want a clear overview, practical guidance, and reliable steps related to install and use a VPN on Windows 11.
What should I check before applying this information?
Review the requirements, confirm that your device, software, or situation matches the instructions, and back up important data before making major changes.
Related Articles
 How to Install Windows 8.1 from USB7 minutes read
 How to Install Windows 10 from USB with ISO File8 minutes read
 Install Windows 10 with a Super Fast USB in Just a Few Simple Steps5 minutes read
 Install Windows 10: Install Win 10 for Android Tablet4 minutes read
 How to Install Windows 7 Using USB - Create a Bootable USB to Install Windows 78 minutes read
 Install Win Xp from Usb: Install Windows XP from a USB Flash6 minutes read
Reader Comments 0
Sign in with email or Google to join the discussion.