How to Install and Setup Snort IDS for Linux Network Security
If you are serious about network security, then installing an IPS or IDS solution is a must to strengthen the network perimeter and deflect potentially unwanted network traffic.
Table of Contents
If you are serious about network security, then installing an IPS or IDS solution is a must to strengthen the network perimeter and deflect potentially unwanted network traffic.
Snort is one such famous, free and open source IPS/IDS solution. Learn how to install and set up Snort on Linux to protect your network from attacks through the following article!
What is Snort?
Snort is an open source Network Intrusion Prevention and Detection System (NIDS/IPS) software that helps protect your network by enforcing detection rules and filters, removing potentially malicious packets. included in your network.
With Snort, you'll be able to perform advanced network traffic logging, packet detection and analysis, and set up a powerful intrusion prevention system to protect your network from unwanted traffic. desirable and potentially harmful.
Prerequisites for installing Snort
Before installing Snort, you need to do some preliminary setup. This mainly includes updating and upgrading the system, as well as installing dependencies that Snort requires to function properly.
Start by updating and upgrading your system.
On Ubuntu and Debian-based Linux distributions:
sudo apt update && apt upgrade -yOn Arch Linux and its derivatives:
sudo pacman -SyuOn RHEL and Fedora:
sudo dnf upgradeOnce your system has been upgraded, continue to install the dependencies that Snort requires. These are the commands you need to run:
On Ubuntu and Debian, run:
sudo apt install -y build-essential autotools-dev libdumbnet-dev libluajit-5.1-dev libpcap-dev zlib1g-dev pkg-config libhwloc-dev cmake liblzma-dev openssl libssl-dev cpputest libsqlite3-dev libtool uuid-dev git autoconf bison flex libcmocka-dev libnetfilter-queue-dev libunwind-dev libmnl-dev ethtool libjemalloc-dev libpcre++-devOn Arch Linux, run:
sudo pacman -S gperftools hwloc hyperscan ibdaqlibdnet libmnl libpcap libunwind luajit lz4 openssl pcre pulledporkxz zlib cmake pkgconfFor RHEL and Fedora, run the following command:
sudo dnf install gcc gcc-c++ libnetfilter_queue-devel git flex bison zlib zlib-devel pcre pcredevel libdnet tcpdump libnghttp2 wget xz-devel -yIn addition, you also need to manually install the Data Acquisition Library, LibDAQ for Snort to work properly and also gperftools to generate build.
First, download the LibDAQ source files from the official website using the wget command. Then unzip the archive and move into the directory with cd. Inside the directory, run the bootstrap and configure scripts , then proceed to prepare the files with the make command and install it with the make install command.
wget https://www.snort.org/downloads/snortplus/libdaq-3.0.11.tar.gz tar -xzvf lib* cd lib* ./bootstrap ./configure make sudo make installAfter installing LibDAQ, you need to install one final dependency: gperftools. Start by grabbing the source files from the GitHub repo. Unzip the files, move into the directory and run the configuration script. Finally, install the package using make and make install commands.
wget https://github.com/gperftools/gperftools/releases/download/gperftools-2.10/gperftools-2.10.tar.gz tar -xvzf gper* && cd gper ./configure make sudo make installOnce these dependencies have been installed, you can move on to the next steps to install Snort.
Install Snort from source on Linux

With the preliminary setup, you can now focus on the actual software installation. You will be building it from source, so first get the necessary build files.
Use the wget command or download the files manually from the official download page:
wget https://www.snort.org/downloads/snortplus/snort3-3.1.58.0.tar.gzDownload Snort
Once the archive containing the build files has finished downloading, extract it with the tar command:
tar -xzvf snort*Move into the extracted directory, run the configuration script, use the make command to prepare the files, and finally install them with make install :
cd snort* ./configure_cmake.sh --prefix=/usr/local --enable-tcmalloc cd build make sudo make installNow, Snort has been successfully installed in your system. However, you need to complete one more step. When new software is installed manually, the installation directory and required libraries may not be automatically included in the system default path. So you may get an error when starting the application.
To avoid this problem, you need to run the command ldconfig. It will sync the system's shared library cache with newly installed libraries and binaries. Run the ldconfig command from the root shell or use the sudo prefix:
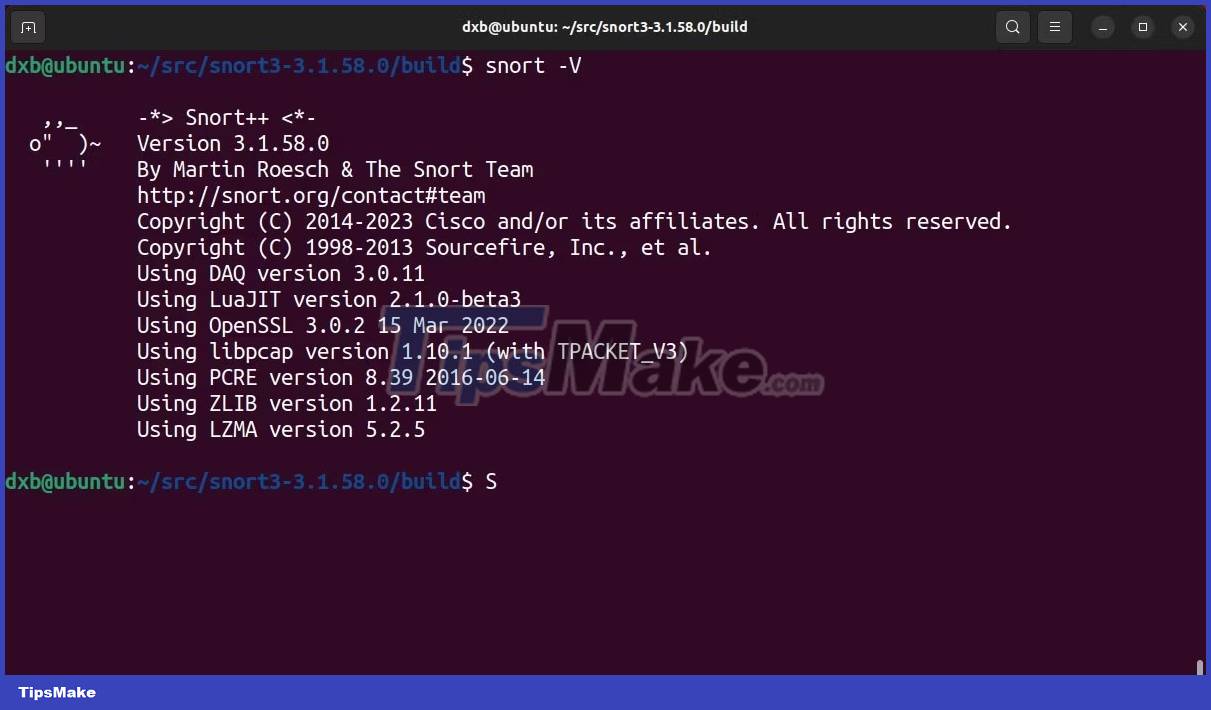
sudo ldconfigYou have now completed all the important steps required to install Snort. To verify the installation, run the Snort command with the -V flag and you should see an output that returns the version name and other data.
snort -VOnce you've verified the Snort installation, move on to the next steps to set it up as a full-blown IDS/IPS.
Initial Configuration of Snort on Linux
The effectiveness of Snort is almost entirely dependent on the quality of the rule sets it is powered with.
However, before setting up the rules, you need to configure the network cards to work with Snort and you also need to check how the default configuration is being handled by Snort. Start by configuring the network cards.
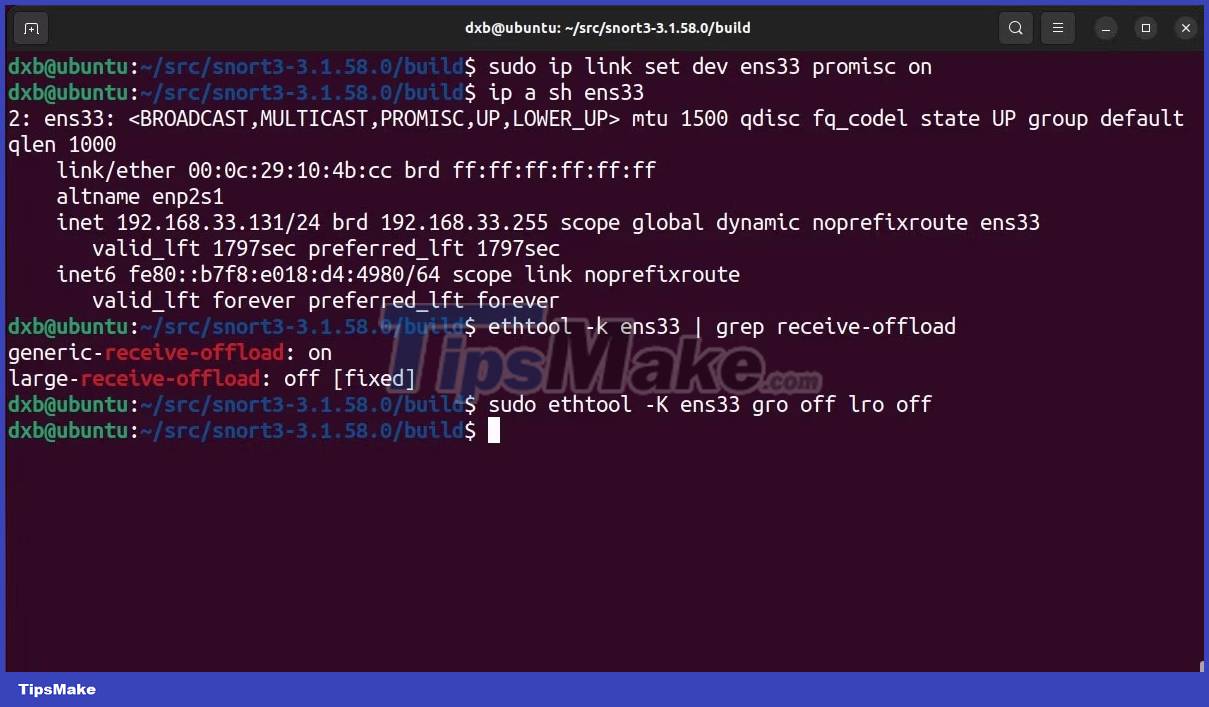
Put the network interface in promiscuous mode:
sudo ip link set dev interface_name promisc onUsing ethtool, disable Generic Receive Offload (GRO) and Large Receive Offload (LRO) to prevent larger network packets from being truncated:
sudo ethtool -K interface_name gro off lro off

Check out how Snort works with default configuration:
snort -c /usr/local/etc/snort/snort.luaThis will return a successful output, meaning you have installed and set up Snort correctly in your system. Now you can tinker with its features and experiment with different configurations to find the best set of rules to secure your network.
Set up rules and enforce them with Snort
With the basic settings in place, Snort is now ready to protect your network. As you know, Snort needs rule sets to determine traffic validity, let's set up a couple of free community-created rule sets for Snort.
Snort reads rule sets and configurations from specific directories. So, first, using the mkdir and touch commands, create a few important directories to store the rules and other related data for Snort:
sudo mkdir -p /usr/local/etc/{lists,so_rules,rules} sudo touch /usr/local/etc/rules/local.rules sudo touch /usr/local/etc/lists/default.blocklistWith these directories created, you can download the community rule set from the official website using the wget command:
wget https://www.snort.org/downloads/community/snort3-community-rules.tar.gzOnce the rule set has finished downloading, unzip it and copy it to the /usr/local/etc/rules/ directory.
tar -xvzf snort3-com* cd snort3-com* cp * /usr/local/etc/rules/
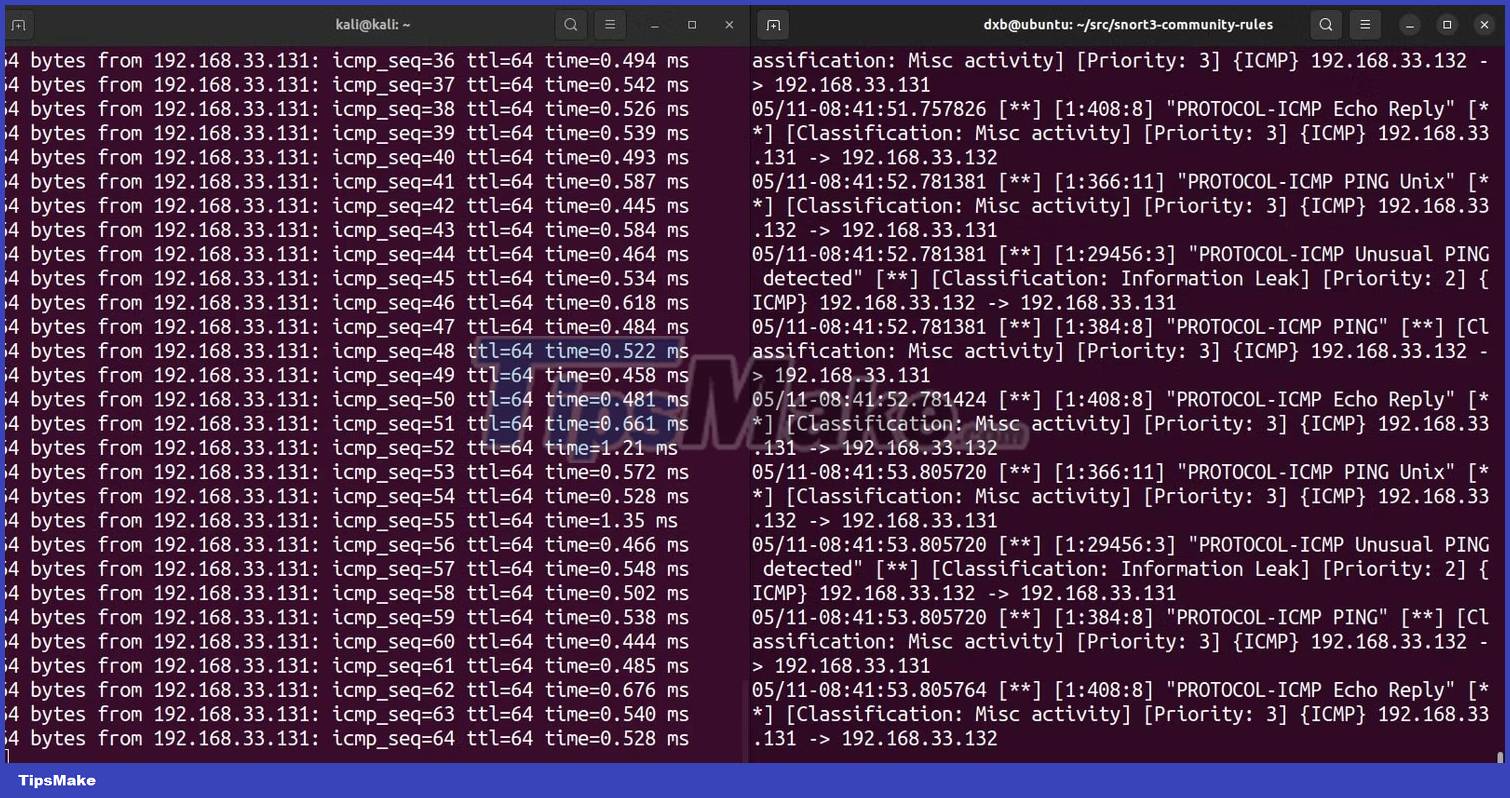
To run Snort with the rule set, execute this command:
sudo snort -c /usr/local/etc/snort/snort.lua -R /usr/local/etc/rules/snort3-community.rules -i interface_name -s 65535 -k noneCommand analysis:
- -c sets the path to the default configuration file
- -R sets the path to the rule set to execute
- -i setup interface
- -s remove snaplen limit
- -k ignore the checksums
This will validate the configuration and enforce all rule sets on Snort. As soon as it detects any network disturbance, it will alert you with a console message.
If you want to create and enforce your own set of rules, you can learn more about them from the official documentation pages.
Set up logging with Snort

By default, Snort does not export any logs. You need to specify with the -L flag to start Snort in logging mode, specifying the log file type, and the -l flag to set the directory for Snort to dump logs.
Here is the command to start Snort with logging enabled:
sudo snort -c /usr/local/etc/snort/snort.lua -R /usr/local/etc/rules/snort3-community.rules -i interface_name -s 65535 -k none -L file_type -l /var/log/snortCommand analysis:
- -c sets the path to the default configuration file
- -R sets the path to the rule set to execute
- -i setup interface
- -s remove snaplen limit
- -k skip checksum
- -L enables logging mode and defines log file type
- -l defines the path where the log is stored
Note that in the example command, the logging directory is set to /var/log/snort. While this is the recommended method, you are free to store your logs elsewhere.
You can read the Snort log files from the directory you specified or pass them into SIEM software like Splunk for further analysis.
Add Snort as system startup daemon

Even though Snort has been installed and set up, you need to make sure it starts executing at startup and runs as a background daemon. Adding it as an autostart system service will ensure that Snort is up and running and protects your system every time it's online.
Here's how to add the Snort startup daemon on Linux:
1. Start by creating a new systemd service file:
touch /lib/systemd/system/snort.service2. Open the file in a text editor of your choice and fill in the following data in the file. You can modify the flags to fit your needs:
[Unit] Description=Snort Daemon After=syslog.target network.target [Service] Type=simple ExecStart=/usr/local/bin/snort -c /usr/local/etc/snort/snort.lua -R /usr/local/etc/rules/snort3-community.rules -s 65535 -k none -l /var/log/snort -D -L pcap -i ens33 [Install] WantedBy=multi-user.target3. Save and exit the file. Then, using the service and systemctl commands, fire up and start the script:
sudo systemctl enable snort.service sudo snort startThe Snort-based daemon should now be up and running. You can verify the status of the script with the command systemctl status snort .
While IDS implementation is a good practice, it is a passive measure, not an active one. The best way to improve and ensure the security of the network is to continuously test the network and look for errors to fix.
Penetration testing is a great way to find exploitable vulnerabilities and patch them.
Was this article helpful?
Your feedback helps us improve.
Related Articles
 How to Set Up an Independent IDS/IPS Lab Enviroment (Using Snort, Pytbull, Eclipse and Tomcat)7 minutes read
 How to set up a printer in Linux12 minutes read
 How to set up your own Git server on Linux7 minutes read
 Use Snort to detect some of the current popular attacks on Web applications7 minutes read
 How to Install Tor on Linux4 minutes read
 How to install and use Kali Linux on VmWare virtual machine9 minutes read
Reader Comments 0
Sign in with email or Google to join the discussion.