How to setup web based code server in Linux
Setting up a code-server ensures a consistent and accessible development environment, while your code and data remain under your control.
Table of Contents
Want to code on the go without having to carry your laptop everywhere? Try code-server, a powerful self-hosted application that brings the full functionality of Visual Studio Code to your web browser. Instead of relying on third-party cloud IDEs, you can set up a code-server on your homelab server and securely access it from any device. Setting up a code-server ensures a consistent and accessible development environment, while your code and data remain under your control.
Setting up code-server on Linux
Installing code-server is easy. We will use Docker to install it.
Run the following command to download the official code-server image from Docker Hub:
sudo docker pull codercom/code-serverThis ensures you have the latest version of the image available locally before creating the container.

Next, start a new code-server container in the background with a custom password and persistent storage:
sudo docker run -d --name code-server -p 8443:8080 -v "$HOME/code-server-data:/home/coder/project" -e PASSWORD="my_password" codercom/code-server

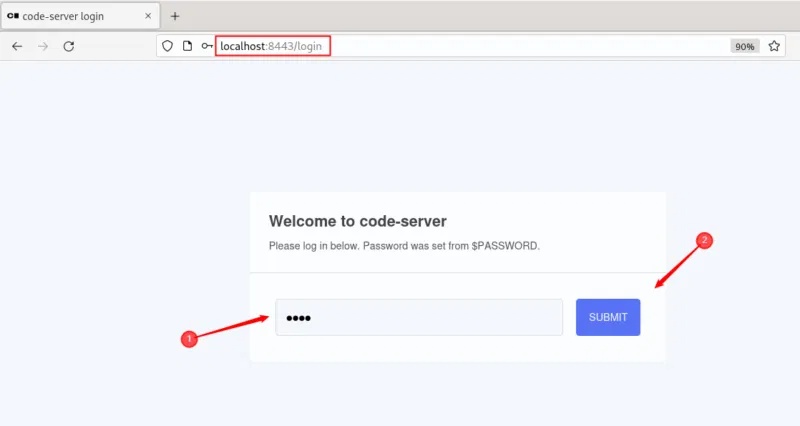
Once you have set up the code-server, you can access it from your browser by typing http://localhost:8443. Enter the password you set in the docker run command and click the Submit button to log in to the code-server.
Getting Started with Code Server
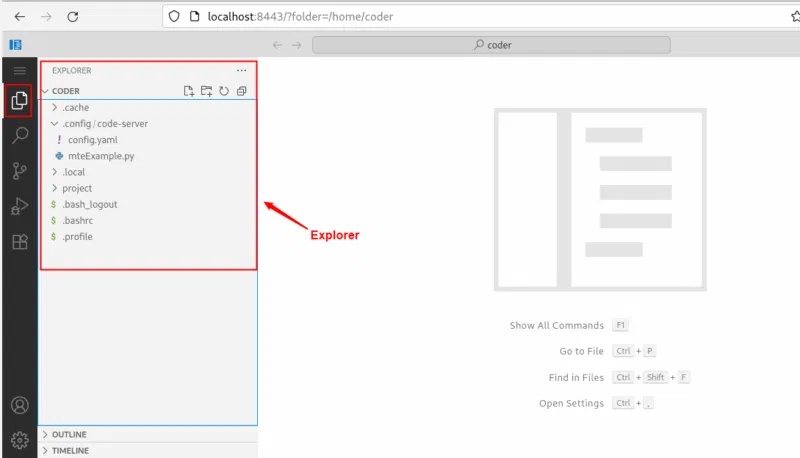
Once logged in, you'll see an interface that looks exactly like the regular desktop version of VS Code. Here's a quick overview of what you'll find:
File Explorer
Explorer helps you navigate through your project. You can browse folders, open files, create new files, and manage your project structure with ease.
Editor
The Editor is the central area and acts as your main workspace. When you open a file, it appears here.

Here you can write, edit, and format code just like in the desktop version of VS Code.
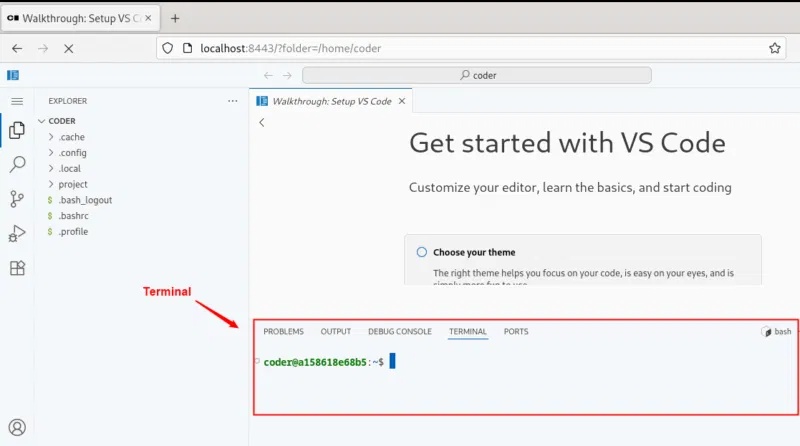
Terminal
Terminal is located at the bottom of the server code. You can open it from the top menu Terminal -> New Terminal or by pressing Ctrl + ` .
You can also use the shortcut Ctrl + Shift + C to access your terminal in the code server.
Extensions
The Extensions feature is what makes VS Code great. You can use the Extensions tab (sidebar icon) to browse, install, and manage VS Code extensions like linters, themes, and language support.
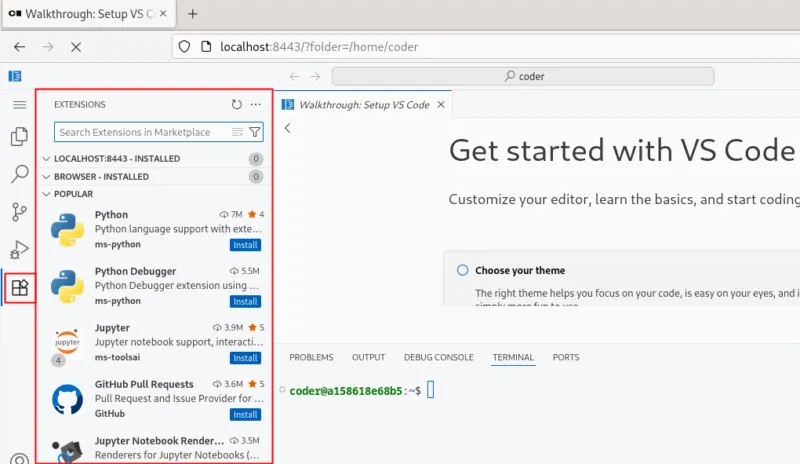
You can search for extensions using the search bar, then install and activate them instantly to add new features or enhance existing functionality.
Customize browser-based IDE
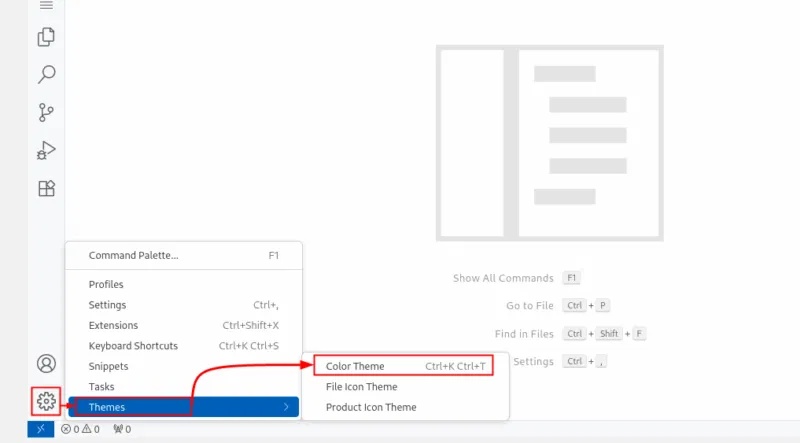
You can now customize your server code to your liking, such as installing extensions, changing themes, updating settings, or modifying configuration files. For example, to set a new theme, you can click the gear icon in the lower left corner, hover over Themes , and select Color Theme from the menu:
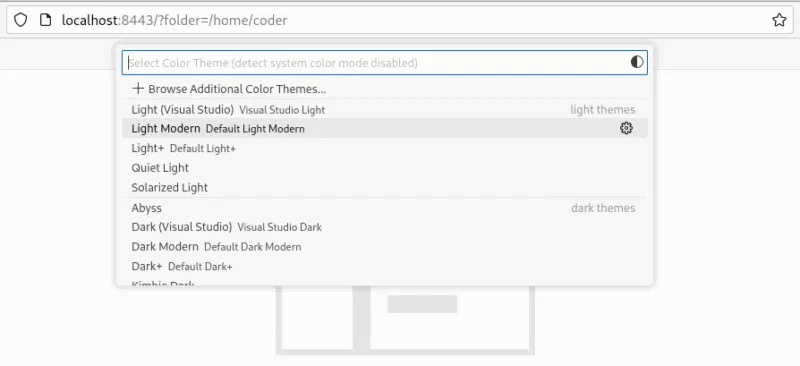
Now, a list of available themes will appear. Click on a theme to preview and apply it.
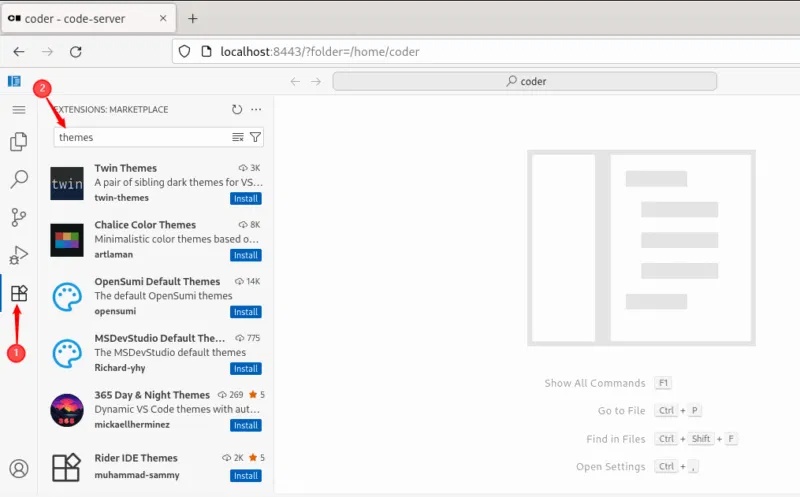
Additionally, you can easily install your favorite theme from the Extensions tab and activate it instantly.
Likewise, you can also customize other server code settings. To do this, simply click on the gear icon and select Settings .
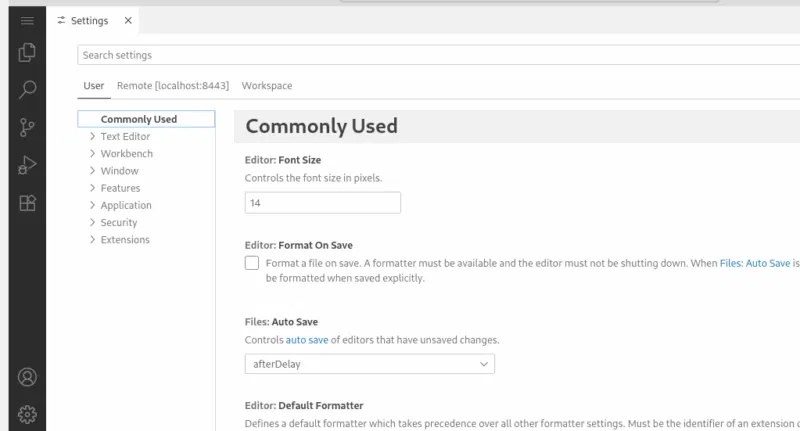
From here you can customize the editor's behavior, font size, formatting, and more.
Create and run the first program in code-server
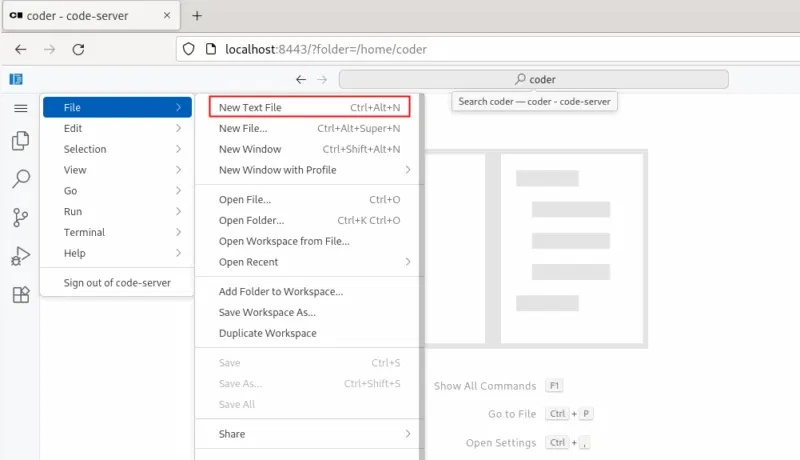
Create a new text file from the Explorer panel or by pressing the shortcut Ctrl + Alt + N :
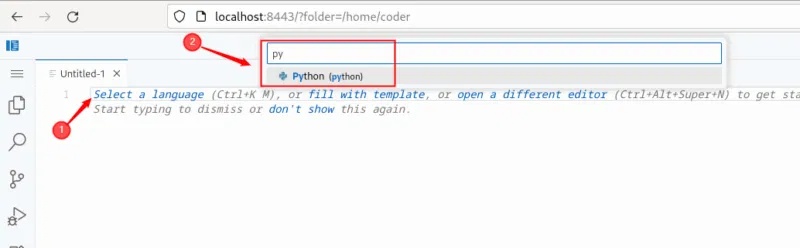
Click Select a language or press Ctrl + K , then M to select the desired language, such as Python.
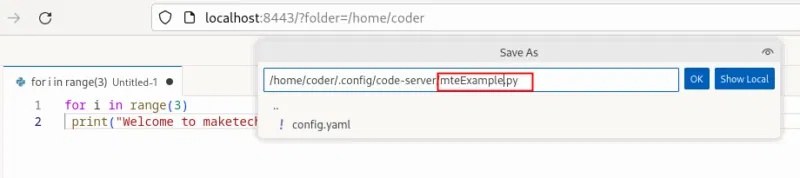
Now, paste the following code in there to output "Welcome to maketecheasier.com" 3 times on the console:
for i in range(3): print("Welcome to maketecheasier.com")Before running this program, make sure Python is installed. Then, press Ctrl + S to give the file a suitable name, then click OK to save the file:
Now, press Ctrl + ` to open terminal and run the Python script with the following command:
python3 mteExample.py

Now that your code-server is up and running on your Linux system, you're ready to take full advantage of browser-based development. You can customize your environment with themes and extensions, create and run code in different programming languages, and even secure access with custom domains and HTTPS . Next, consider exploring how to integrate a Git workflow, enable SSL for production use, or extend your home lab with other web-based tools like JupyterLab, Docker, or Portainer for a more robust and flexible development setup.
Was this article helpful?
Your feedback helps us improve.
Related Articles
 How to set up your own Git server on Linux7 minutes read
 New points in SQL Server 201714 minutes read
 How to set up VS Code with WSL 2 on Windows 10/115 minutes read
 How to manage remote Linux server using SSH11 minutes read
 What is Cloud Server Linux? Advantages and disadvantages of Cloud Server Linux4 minutes read
 How to set up a printer in Linux12 minutes read
Reader Comments 0
Sign in with email or Google to join the discussion.