How to highlight video objects on Camtasia
When editing videos sometimes you want viewers to pay attention to a detail or object in the video. Then the object is more prominent than the surrounding scene, such as taking photos of the font deletion for example. On video editing software Camtasia has the option to highlight the object in the video, next to the option to blur video object on Camtasia. Users have additional options to adjust the outstanding effect for the object in the video, such as the time to display or disappear of the effect on the video. In addition, we can also adjust the size of the area we want to highlight on the video. The following article will guide you how to highlight details in videos on Camtasia.
- 8 tips to edit videos professionally
- The best video editing applications for iPhone
- Instructions on how to edit videos right on iPhone and iPad
Instructions to highlight Camtasia video object
Step 1:
You can use screen-recording videos on Camtasia or videos available on your computer. Then drag the video to Timeline to edit the video.

Step 2:
Click the Callouts item in the toolbar and then click the triangle icon to expand the other video editing tools.

Step 3:
In the list of tools find the Special section and select Spotlight to select the highlight effect in detail in the video.

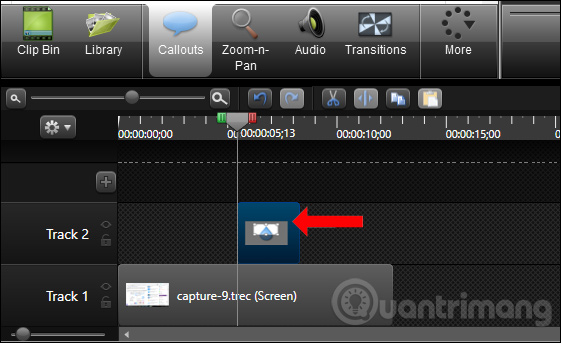
Then the screen will display the video highlighting frame, by default the effect will be displayed in Track 2 bar and start the video.
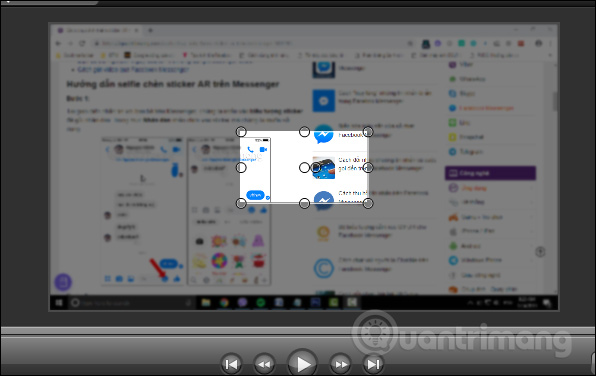
Drag this effect to the location you want to highlight details in the video.
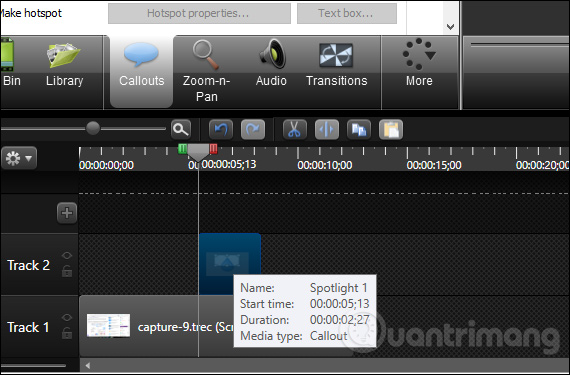
When hovering on the effect, there are also details about the effect including:
- Name: Spotlight name 1.
- Start time: The time when the effect appears on the video.
- Duration: The total time from when it appears to disappear of the effect on the video.
- Media type: Callout type.
Step 4:
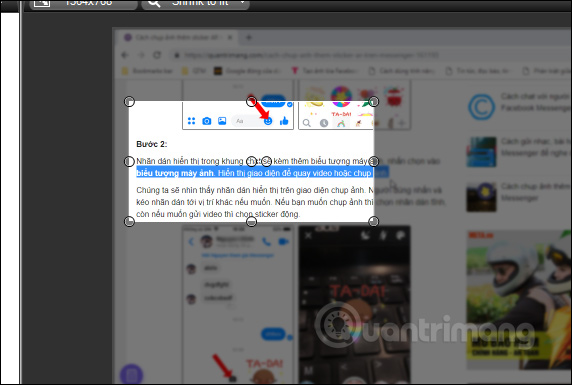
Now adjust the size and highlight area on the video, through the effect frame as shown below. Depending on the content you want to highlight on the video, we adjust the highlight area accordingly. Then the content in the surrounding area will be clearer and more prominent than the content outside the effect area. We can move this highlight effect area to any location you want.
Step 5:
When clicking on the Timeline bar effect, the user has some options to adjust the effect.Fade in is used to adjust the display time of highlighting effects, Fade out adjusts the effect time to disappear gradually.
Intensity to adjust the level of masking of the content area around the highlight area.
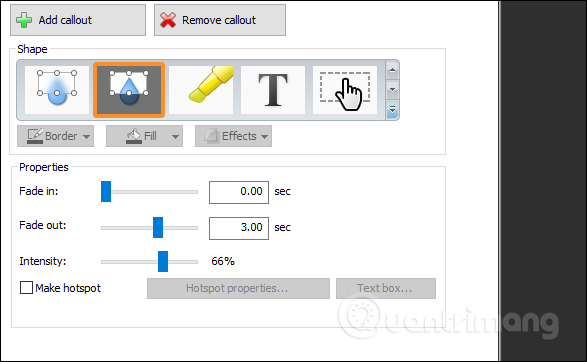
If left 100%, the whole area will turn black as shown below. You should rely on the video screen beside to find the appropriate coverage level.

Above is a detailed way to highlight a content area, any details in the video on Camtasia. If you use additional settings for the effect, you need to preview it through the video screen next to it to adjust accordingly.
See more:
- How to make 360-degree logos on Camtasia Studio
- How to adjust video audio on Camtasia Studio
- How to cut videos on Windows 10 without software?
I wish you all success!