Table of Contents
This guide explains how to enlarge video object in camtasia using a clear, step-by-step process. It also highlights the settings and checks that can help you avoid common errors.
Camtasia offers users a variety of tools, video editing features, create completely new videos from the video capture screen on Camtasia, or existing videos. With a rich set of video content editing tools, you can easily customize video like highlighting an object.
To highlight an object we can use video animations, or enlarge content when it comes to the slideshow. This also helps viewers focus on the subject being shown on the video. The steps below explain how to enlarge the object on video with Camtasia.
- How to pair 2 videos into 1 using Camtasia Studio
- How to adjust video audio on Camtasia Studio
- How to separate audio, split video by Camtasia Studio
- How to cut video by Camtasia Studio
Instructions to enlarge video objects on Camtasia
Step 1:
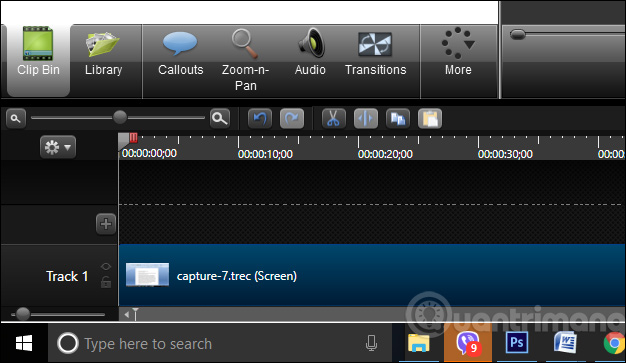
Start by import the video you want to edit into Camtasia, then Put the video in the Timeline bar To proceed with the editing.
Step 2:
We then click The Zoom and pan tool Available in Camtasia to zoom in on the object in need.

Step 3:
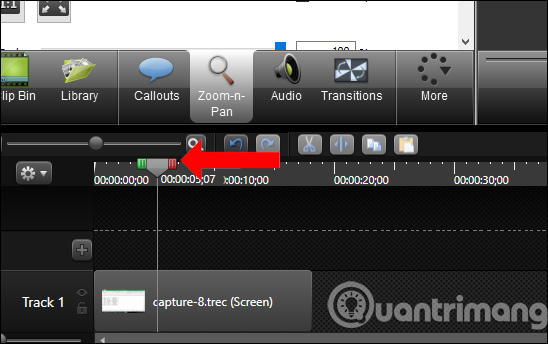
Next, users Drags the time bar To the position where he wants to enlarge the object.
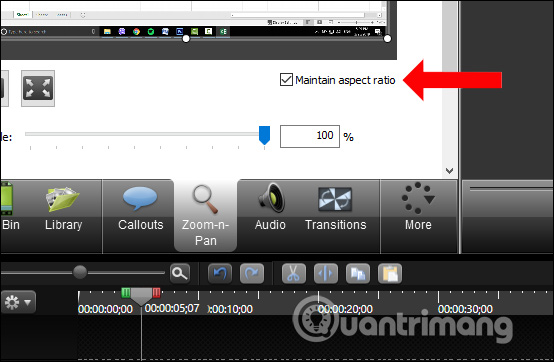
Look up the above interface area and select the Maintain aspect ratio To keep the current Aspect ratio , to avoid changing the frame.
Step 4:
To enlarge the object in the video we will have 2 ways to do it. You can use The Zoom and pan frame Around the video with round dots, then shrink to the object you want to enlarge as shown below.
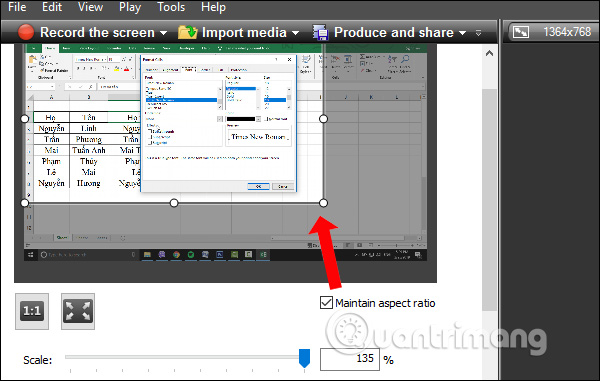
The object results will be enlarged when the slideshow arrives. The matte frame is the original video frame and the frame with the round dots is the new video frame that has been enlarged.
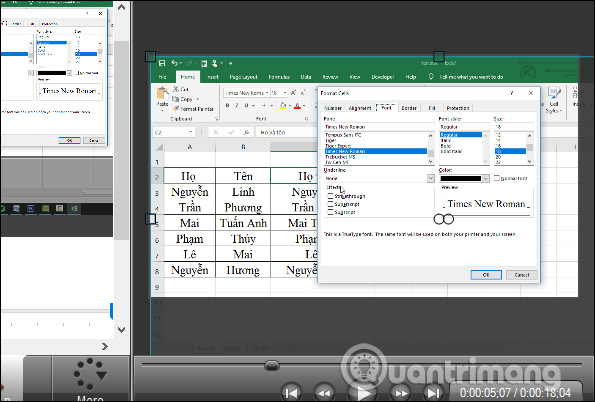
Or right in the video display frame, users clicks on any dot displayed on the frame and pulls out to enlarge the object. Users should choose a video display rate of 25% for ease of implementation.
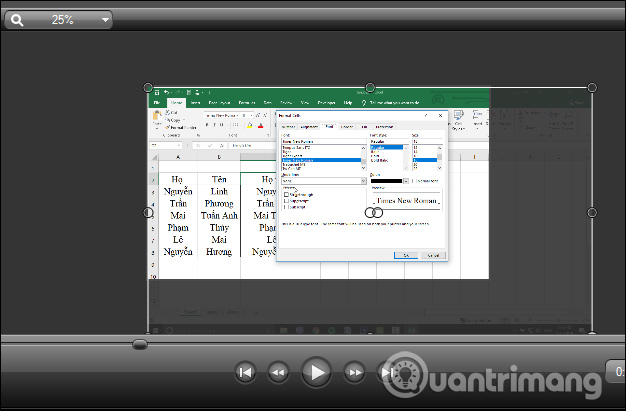
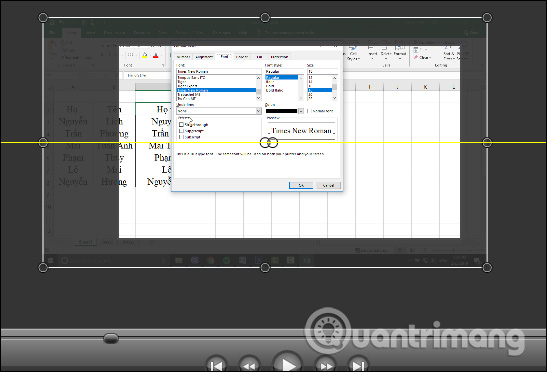
We can also Move This Zoom frame to Another location if desired. Put the mouse pointer on the video frame to display a 4-way arrow, then press and hold the left mouse button to drag the frame to a new position.
Step 5:
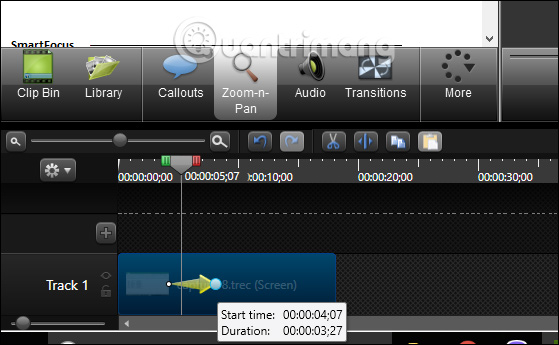
If we want this magnification effect to extend the time, at the Timeline bar below, Extend the arrow To increase the duration, the longer the pull, the longer the time increases.
Step 6:
To Bring the video back to its original state , users just need to click the video in the Timeline bar and then press Delete to delete the zom icon.
Or click The Scale media to fit entire canvas icon To bring the video back to the old frame size.
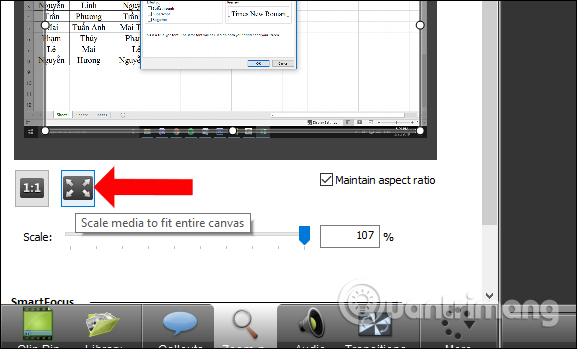
So you know how to enlarge any object in the video on Camtasia. When the set time is reached, the object in the video will automatically be enlarged so that the viewer can see more clearly than other objects.
I wish you all success!
FAQ
What should I prepare before I enlarge video object in camtasia?
Review the requirements in the guide, confirm that your device or software is compatible, and save important work before changing settings related to enlarge video object in camtasia.
Why might enlarge video object in camtasia not work as expected?
The most common causes are incompatible versions, missing permissions, incorrect settings, or an interrupted internet connection. Recheck each step and restart the app or device when appropriate.
Can beginners follow these enlarge video object in camtasia steps?
Yes. Follow the steps in order, avoid skipping confirmation screens, and compare your interface with the screenshots because labels may differ slightly between versions.
Related Articles
 How to Obscure Objects on Videos Camtasia6 minutes read
 How to Highlight Video Objects on Camtasia6 minutes read
 How to Adjust Video Audio on Camtasia Studio10 minutes read
 How to Trim a Screen Displaying Videos on Camtasia6 minutes read
 How to Insert Text into Videos on Camtasia7 minutes read
 Shortcuts in Camtasia Studio6 minutes read
Reader Comments 0
Sign in with email or Google to join the discussion.