Table of Contents
You can hide a data volume from File Explorer by removing its drive letter. The files and partition remain intact, and an administrator can assign a letter again later. This is useful for reducing clutter or preventing casual browsing, but it is not a security control: the volume can still be discovered through Disk Management, DiskPart, administrative tools, or another operating system.
Do not remove the letter from the Windows, boot, paging, application, backup, or recovery volume. Programs and shortcuts that depend on the old path can stop working. Verify the volume by label, capacity, and current letter before making the change.
Use encryption when the data needs protection
Removing a drive letter does not encrypt files or restrict an administrator. If the aim is to protect data after a laptop or external drive is lost, use full-volume encryption and save the recovery key separately. See the guide to BitLocker for removable drives and compare BitLocker alternatives where the built-in feature is unavailable.
Method 1: Remove the letter in Disk Management
- Press Windows + R, type
diskmgmt.msc, and press Enter. - In the lower pane, locate the intended data volume by disk number, size, file system, label, and drive letter.
- Right-click the volume and choose Change Drive Letter and Paths.
- Select the letter, choose Remove, and read the warning.
- Confirm only if no application or Windows component depends on that path.
The volume disappears from This PC after File Explorer refreshes, but it still appears in Disk Management. Open applications that already had a file handle may continue working until they close.
Method 2: Remove the letter with DiskPart
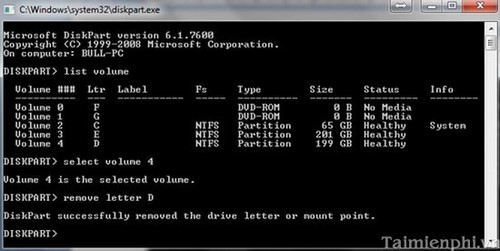
DiskPart is useful in scripts or recovery environments, but it provides fewer visual safeguards. The following example hides D:. Your volume number will almost certainly be different.
1. Open an elevated terminal
Search for Terminal or Command Prompt, right-click it, and choose Run as administrator. Type:
diskpart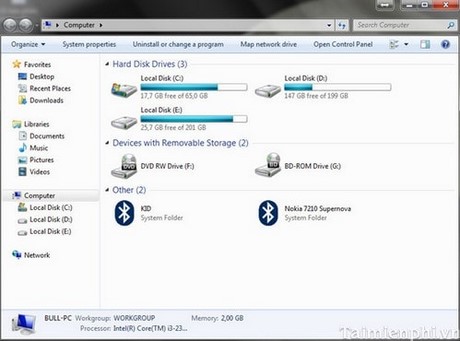
2. List and identify volumes
Run:
list volume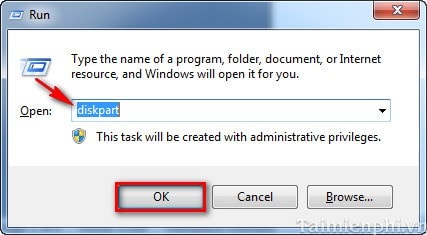
Match the letter, label, file system, size, and status. Never select a volume only because an example uses the same number.
3. Select and verify the volume
If the intended data volume is number 4, enter:
select volume 4
detail volume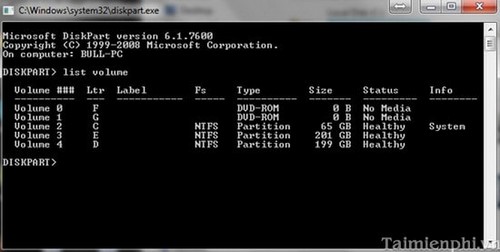
Read the detail output. If the identity is not certain, type exit and stop.
4. Remove the drive letter
For a verified D: data volume, enter:
remove letter=D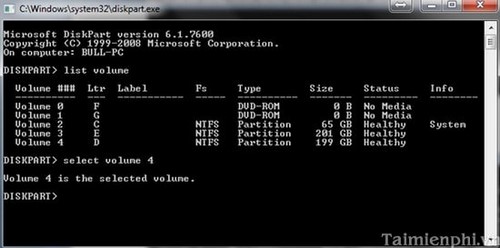
DiskPart should report that it removed the drive letter or mount point. Refresh This PC to confirm that the volume is no longer listed.
Show the volume again
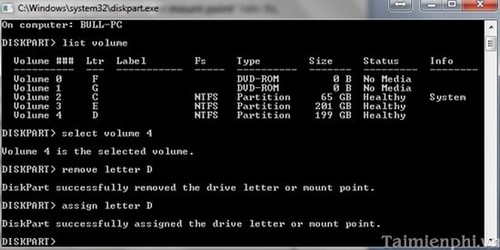
Open DiskPart as administrator, select the same verified volume, and assign an unused letter:
list volume
select volume 4
detail volume
assign letter=D
exit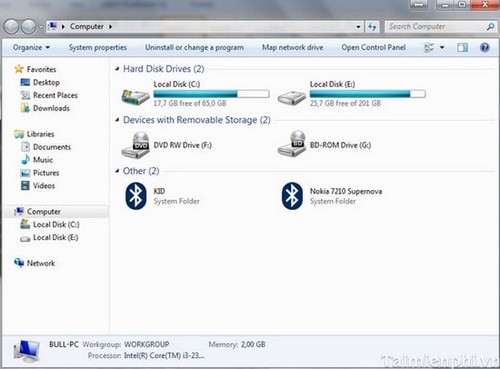
The volume should reappear in File Explorer.
You can perform the same restore in Disk Management: open Change Drive Letter and Paths, choose Add, and select an unused letter.
What changes when a drive letter is removed?
- File Explorer and ordinary Open/Save dialogs no longer show the volume under a letter.
- Paths such as
D:Projectsstop resolving. - Installed applications, scheduled tasks, libraries, backup jobs, and sync clients that use that letter may fail.
- The data remains on the volume; no formatting or partition deletion occurs.
- An administrator can discover and remount the volume quickly.
- Disk encryption, access-control lists, and share permissions are unchanged.
Safer use cases
Removing a letter can be appropriate for a dedicated backup volume, a volume mounted inside an NTFS folder, or a data partition that should not appear in everyday browsing. It is a poor choice for hiding sensitive files from another user with administrative access.
If the task is to create, resize, or format a volume rather than hide it, use Disk Management's partitioning tools. Do not use DiskPart commands copied from an example until the exact volume has been verified.
Related Articles
 2 Ways to Hide Hard Disk Partitions on Windows3 minutes read
 How to Fix a Broken Laptop Keyboard Key4 minutes read
 Looking Back on 60 Years of Miraculous Development of Hard Drives6 minutes read
 How to Create a Partition7 minutes read
 Fix Errors Can Not Merge Hard Drives, Partitions on Windows4 minutes read
 Hard Drive Hdd: Learn About Hdd Hard Drive8 minutes read
Reader Comments 0
Sign in with email or Google to join the discussion.