How to use Quick Assist to control a remote computer
Quick Assist controls remote computers with the same features as Teamviewer.
To control remote computers, support remote computers, we will need to use remote control software such as Teamviewer, Ultraview. However, if you use Windows 10, you just need to use the Quick Assist application, and also have the ability to access and control the remote computer.
Because Quick Assist is available on Windows 10 versions, it is simpler to use than other software, you do not need to install or send an email to request a connection. This app also supports users to connect and talk with many others. In order to use Quick Assist, users need to make a connection to have access to other people's devices. The following article will show you how to use Quick Assist on Windows 10.
- 10 applications to help 'cricket' control remote computers
- How to use ASUS Remote Link to control remote Windows computers
- Limit remote control to Teamviewer
- How to use AnyDesk Remote to control remote computers
How to use Quick Assist to access Windows 10 remotely
Step 1:
In the search bar on Windows 10, we type the keyword Quick Assist and then click on the search result.

Step 2:
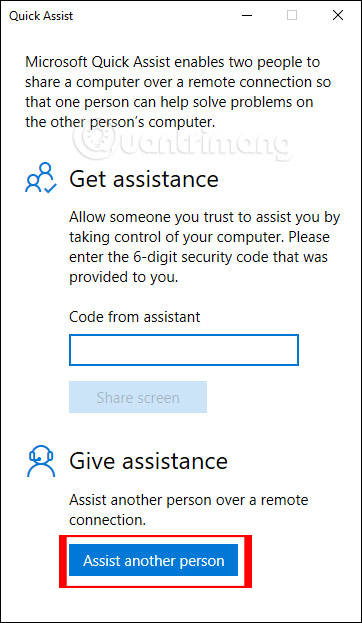
Displays the Quick Assist application interface. There are two different options for users, with Get assistance, which gives you access to other computers and Give assistance to allow others to access your computer.
First we click on Give assistance , then click Assist another person .
Step 3:
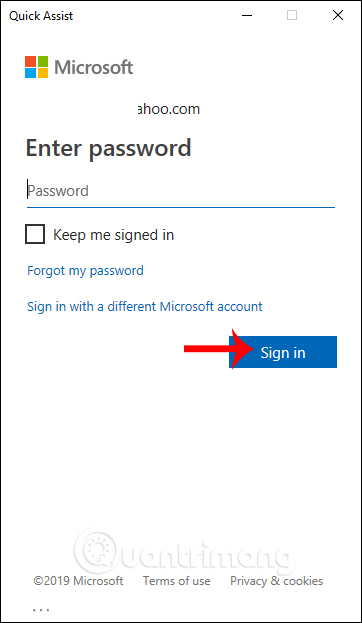
Users are then required to sign in to their personal Microsoft account. Click Keep me signed to use this account for future login.
Step 4:
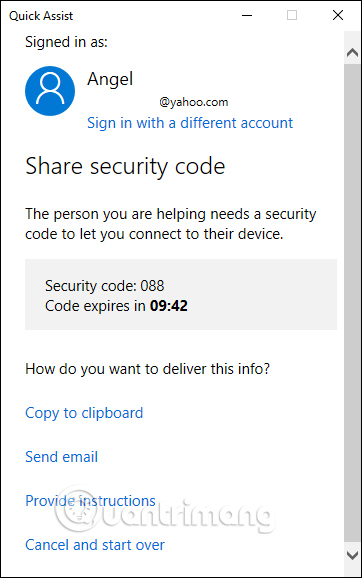
Display interface provides security code with 6 characters with a maximum time of 10 minutes . Within 10 minutes you must send this connection code to access. If 10 minutes have passed, you have to start again.
Step 5:
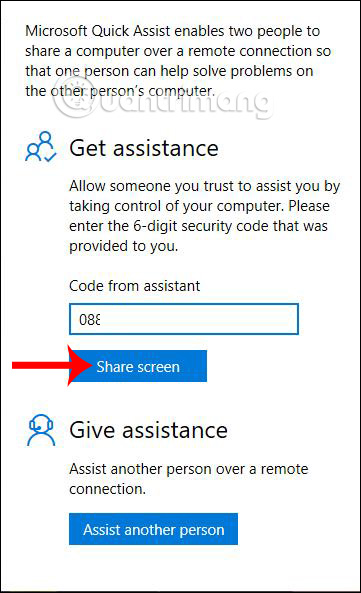
Then another connected computer must also open the Quick Assist application and then in the Get assistance section enter the connection number you sent in Code from assistant and then click Share screen below.
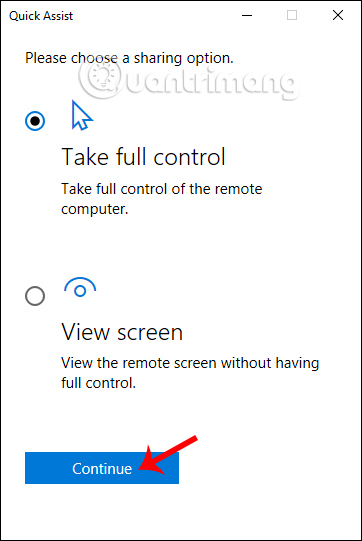
Then on your computer, there is a screen access mode option including Take full control (screen and control enabled) and View screen (see the connected screen only without screen control). Here we choose Take full control and click Continue to continue.
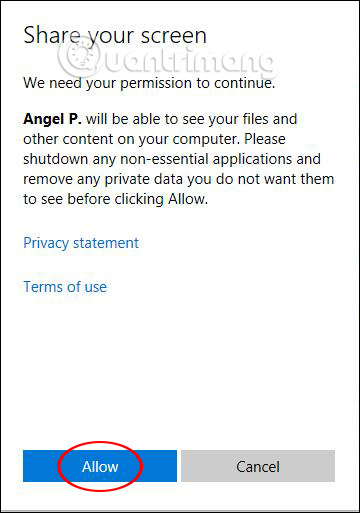
At the connected computer, they must click Allow to allow 2 computers to access each other.
Step 6:
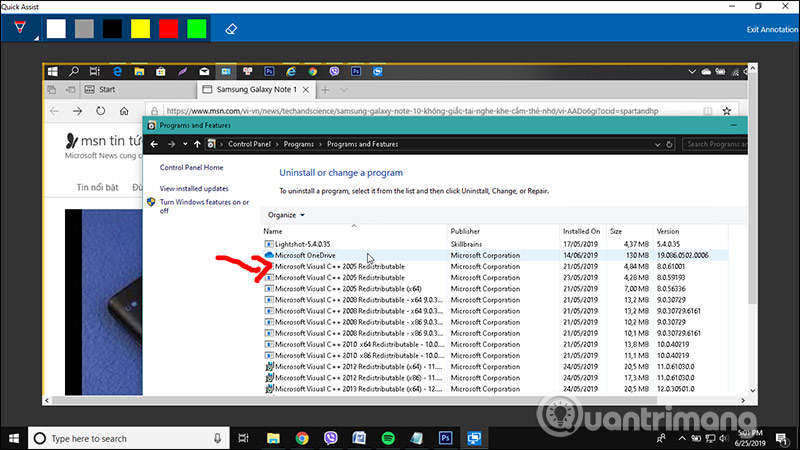
As a result, you will see a window displaying the screen of the other computer. You will have full access on their computers, so you can launch any program or access any file. This is useful for fixing computers, rescuing remote computers without being present directly.
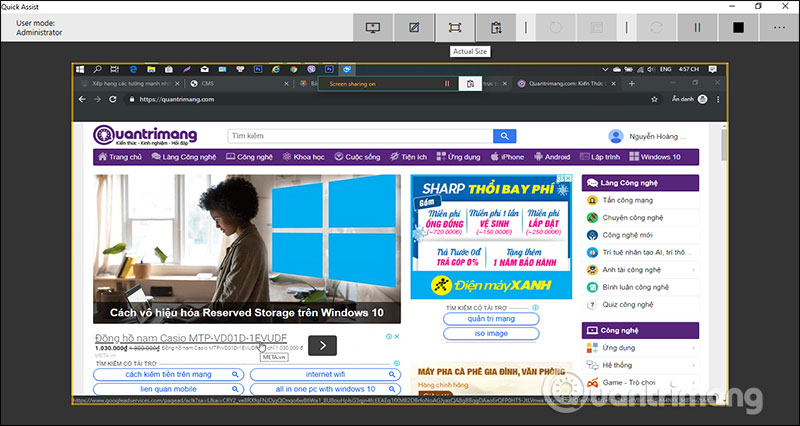
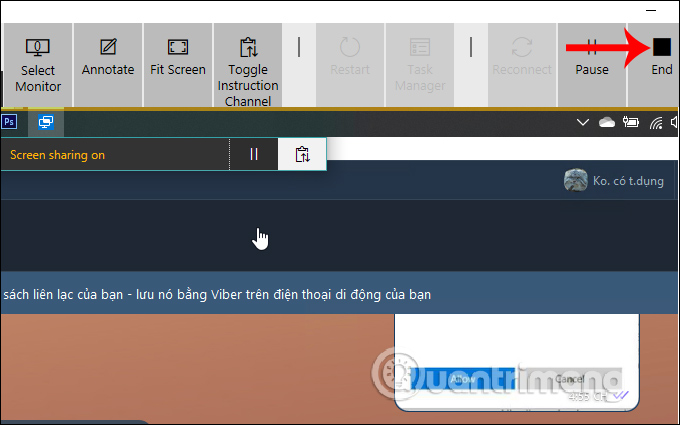
Above are icons that allow users to annotate, resize the window display, restart the connection, open task manager, send messages, pause or end the connection.
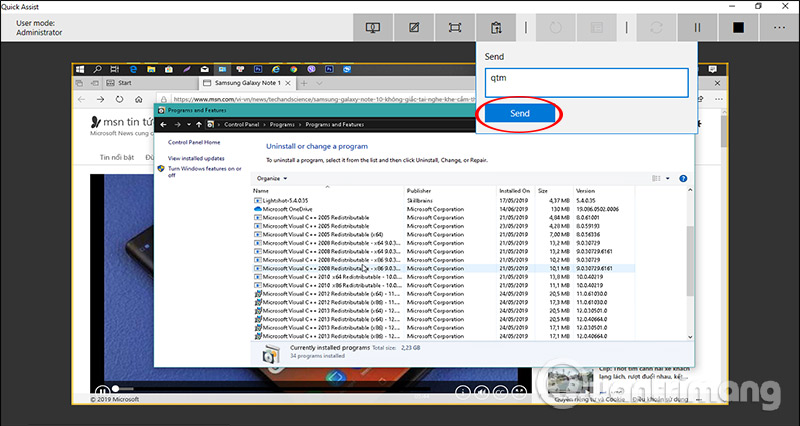
Every activity that we perform on the computer of the other person they know and are observable.
Step 7:
To stop the connection , one of you just needs to turn off the Quick Assist application bar or you can press the End button .
Compared to other remote connection software, Quick Assist application is much simpler and easier to use. As long as the two senders and the correct connection code are entered, we can access each other's computer screen. Quick Assist is available on Windows 10 and is completely free.
I wish you all success!
- How to open the Quick Assist tool in Windows 11
- 8 best ways to control Kodia remotely
- Where to buy TV control, how to buy it well?
- Set up, control new Android TV Box faster thanks to Android TV Remote Control
- How to set up a Kodi remote control
- How to use Ultraviewer to control remote computers
- How to control a remote computer with AnyDesk Remote
- 10 applications to help 'cricket' control remote computers
- Instructions for installing and setting up AnyDesk
- 8 features you may not know even though you have used Windows for many years
- 9 great built-in apps and tools on Windows 11 that you shouldn't miss
- 9 Old Windows Tools That Are Still Useful Today
- How to get and provide remote support using the Quick Assist app in Windows 11
- How to open the Quick Assist tool in Windows 11
- How to control a remote computer with AnyDesk Remote
- How to use Ultraviewer to send and receive files
- How to fix the error does not show ID on Ultraviewer
- Remote management on Windows Server 2012 with Remote Management Service


-
 How to turn off Microsoft Edge Game Assist
-
Latest 2XKO Character Rankings
-
How to turn off Hold Assist notification on iPhone
-
How to get and provide remote support using the Quick Assist app in Windows 11
-
How to open the Quick Assist tool in Windows 11
-
How to turn off Focus Assist notifications on Windows 10
 How to turn off Microsoft Edge Game Assist
 Latest 2XKO Character Rankings
 How to turn off Hold Assist notification on iPhone
 How to get and provide remote support using the Quick Assist app in Windows 11
 How to open the Quick Assist tool in Windows 11
 How to turn off Focus Assist notifications on Windows 10