Table of Contents
This practical guide explains how to fix sound loss error when updating Windows 11. Follow the steps in order, review the requirements first, and use the troubleshooting notes when a setting or option does not work as expected.
Using Windows Troubleshoot
Windows has separate troubleshooting procedures for different components, including fixing no sound errors.
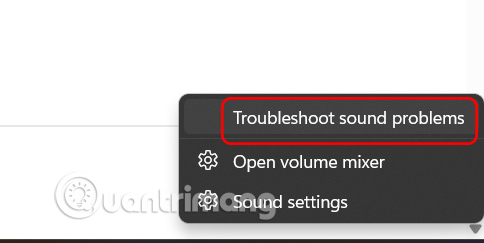
Right -click on the sound icon in the system tray and select Troubleshoot sound problems from the menu that appears. Follow the on-screen instructions to fix the error.
Re-identify audio devices connected to the computer
Your speakers or headphones are connected to the computer but not recognized also causes the sound loss error.
Step 1:
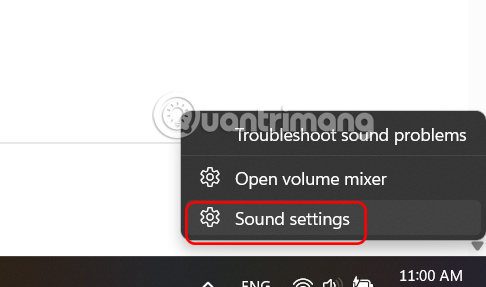
Right-click the sound icon in the system tray and select Sound settings .
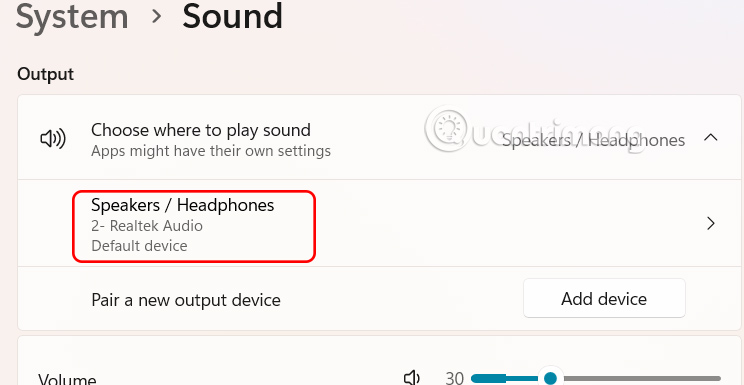
Display the sound settings interface on the computer. Scroll down to the Output section and select the connected sound device .
Step 2:
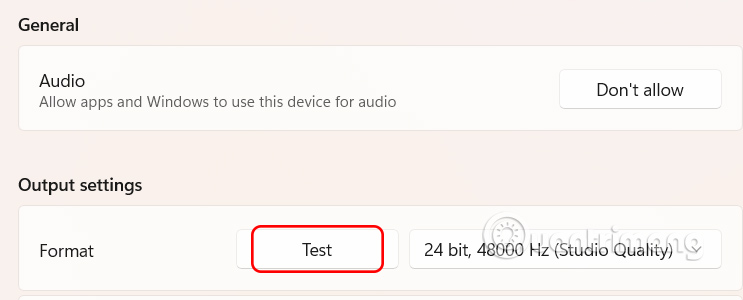
Continue clicking Test to check if the connected device has any errors.
In case you do not see the connected audio device, click Add device to proceed.
Restart Audio Services
When the sound has problems, we can restart Audio Services to fix it.
Step 1:
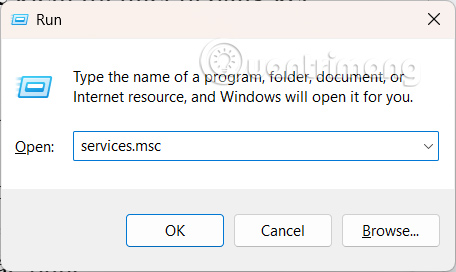
You enter the keyword services.msc in the Run dialog box to access services on the computer.
Step 2:
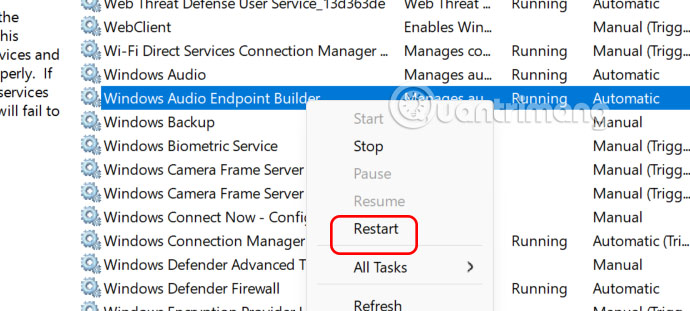
The new interface appears, find the Windows Audio Endpoint Builder sound service , right-click and select Restart . Then Audio Services is restarted.
Turn off Windows 11 audio enhancement
You can try disabling the audio enhancement feature available on Windows 11 to resolve the audio loss issue.
Step 1:
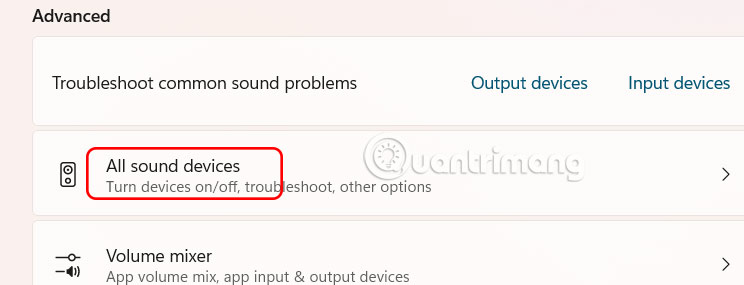
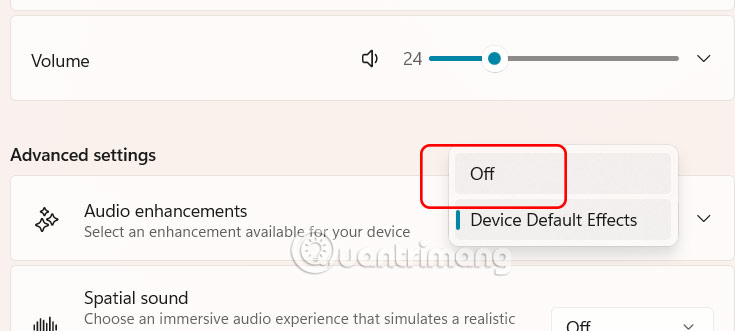
Go to Settings then select System , then look to the right and select Sound . Next, scroll down to Advanced and select All sound devices .
Step 2:
In Output settings, select the output device that is connected to the computer.
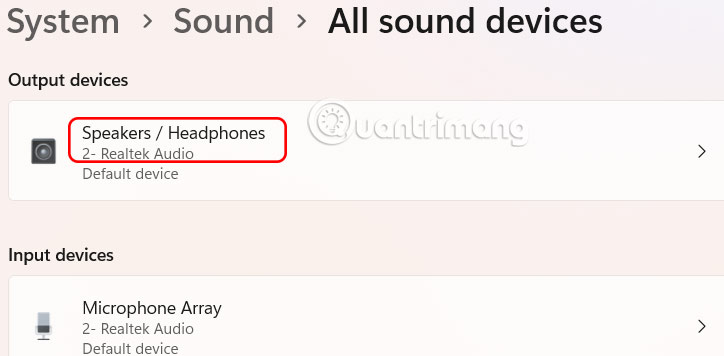
In the interface as shown in the picture at Audio Enhancements, you switch to Off mode to turn off sound enhancement.
FAQ
What should you know about using Windows Troubleshoot?
Windows has separate troubleshooting procedures for different components, including fixing no sound errors.
What should you know about re-identify audio devices connected to the computer?
Your speakers or headphones are connected to the computer but not recognized also causes the sound loss error.
What should you know about restart Audio Services?
When the sound has problems, we can restart Audio Services to fix it.
What should you know about turn off Windows 11 audio enhancement?
You can try disabling the audio enhancement feature available on Windows 11 to resolve the audio loss issue.
Related Articles
 The Most Effective Way to Fix Sound Loss Error on Windows 119 minutes read
 How to Fix the Sound Loss Error in Windows 103 minutes read
 20 Ways to Fix Computer Sound Loss Error on Windows 1012 minutes read
 How to Fix 8 Steps to Fix Sound Loss Problem in Windows15 minutes read
 How to Fix Audio Loss Sound Issue on Windows 105 minutes read
 Why Does the Downloaded MP4 File Have No Sound?4 minutes read
Reader Comments 0
Sign in with email or Google to join the discussion.