How to fix ms-windows-store: purgecaches on Windows 10
If you get the error 'ms-windows-store: purgecaches app didnt start' on the Microsoft Store, please follow the article below to know how to fix it.
Table of Contents
1. Fix ms-windows-store PurgeCaches by PowerShell
PowerShell is known to be a popular encoder, and in the future they will be the mainstream in Windows. To fix ms-windows-store PurgeCaches with PowerShell, do the following:
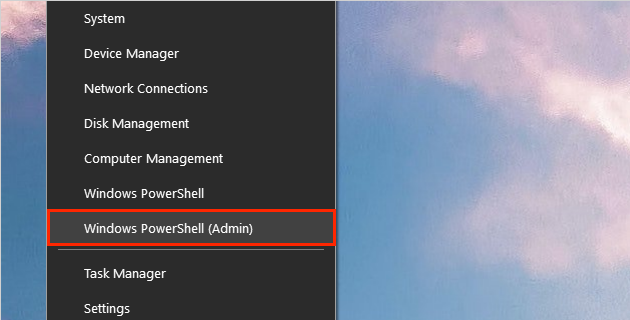
Step 1: You proceed Right-click on the Start Menu and select Windows PowerShell (Admin) to launch the software.
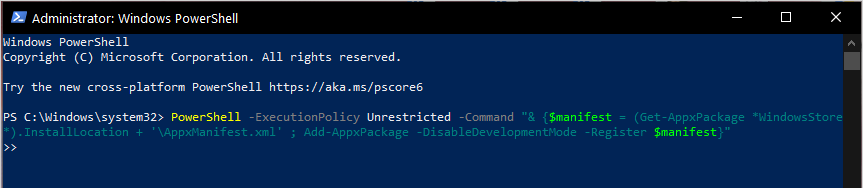
Step 2: After PowerShell appears, copy the command below to paste into the software and press Enter to run.
PowerShell -ExecutionPolicy Unrestricted -Command "& {$ manifest = (Get-AppxPackage * WindowsStore *). InstallLocation + 'AppxManifest.xml'; Add-AppxPackage -DisableDevelopmentMode -Register $ manifest}"
Step 3: Then, you continue to enter the command below and press Enter to re-launch the Microsoft Store.
Get-AppxPackage -allusers Microsoft.WindowsStore | Foreach {Add-AppxPackage -DisableDevelopmentMode -Register "$ ($ _. InstallLocation) AppXManifest.xml"}
Once finished, please reopen the Microsoft Store to check.

2. Fix ms-windows-store PurgeCaches by Command Prompt
Similar to PowerShell, Command Prompt is also a basic command prompt on Windows 10 and to fix ms-windows-store PurgeCaches by cmd, do the following:
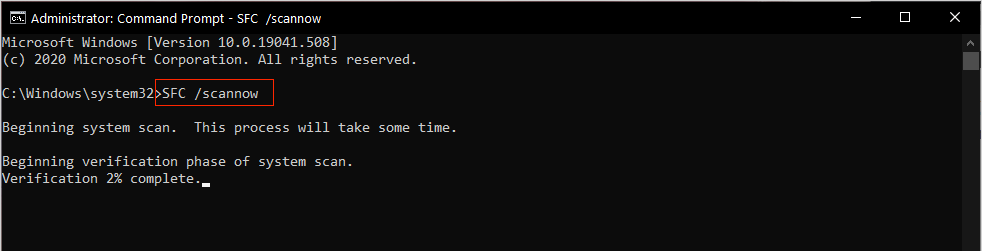
Step 1: You proceed to open the Start Menu , enter Command Prompt and select Run as administrator to open with admin rights.

Step 2: When the Command Prompt window appears, enter the following command and press Enter to run.
SFC / scannow
After the command has been run to 100%, exit the Command Prompt and reopen the Microsoft Store to check.
3. Fix ms-windows-store PurgeCaches error using Settings
In addition to the above methods, you can use Settings to restore the settings of the Microsoft Store.
Step 1: You shall open Settings by clicking on the Start Menu or press the Windows + I .
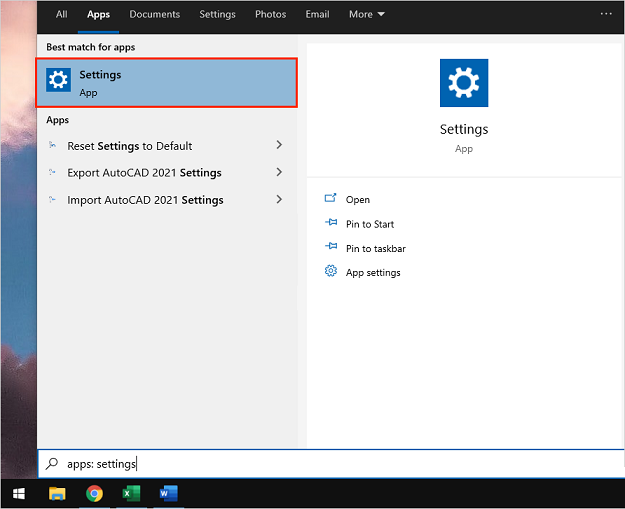
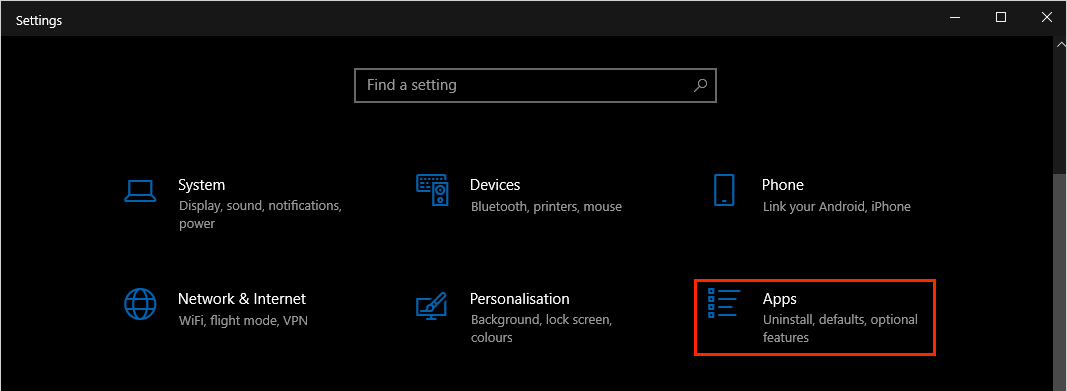
Step 2: Then, you select Apps to open the application settings on the computer.
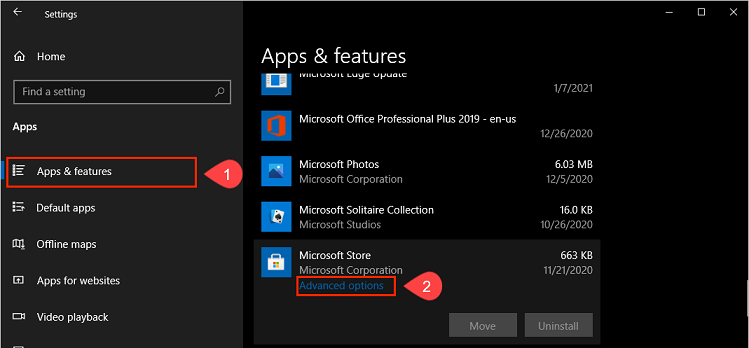
Step 3: Next, select Apps & features (1) and navigate to Microsoft Store to select Advanced Options (2) .
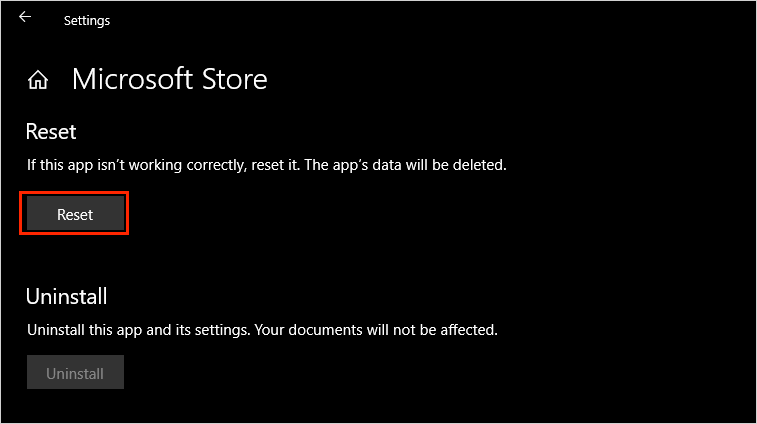
Step 4: Finally, you choose Reset to restart Microsoft Store to default.
4. Fix ms-windows-store PurgeCaches error with Registry Editor
Sometimes the error on the Microsoft Store also comes from an issue that doesn't have enough access. To solve this problem you will have to interfere in the Registry Editor.
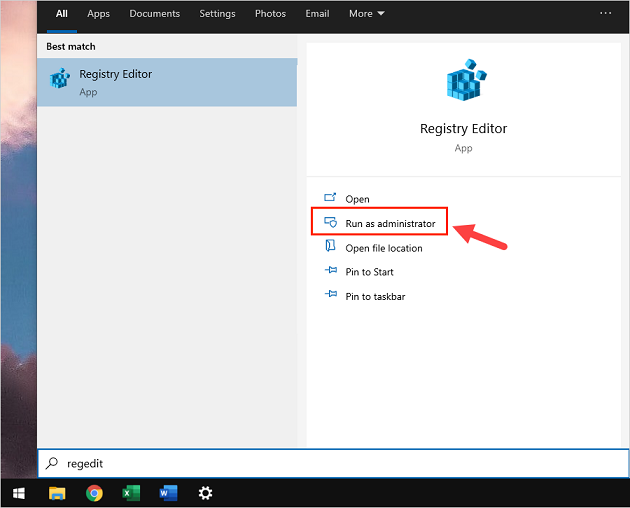
Step 1: You proceed to open the Start Menu and enter Registry Editor to open.
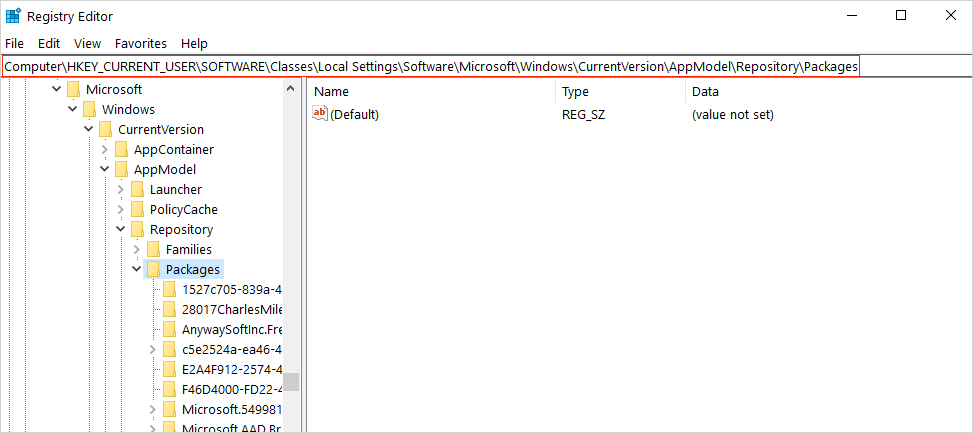
Step 2: Then, copy the following URL and paste it into the link bar on Registry Editor to move to the necessary location.
HKEY_CURRENT_USERSoftwareClassesLocal SettingsSoftwareMicrosoftWindowsCurrentVersionAppModelRepositoryPackages
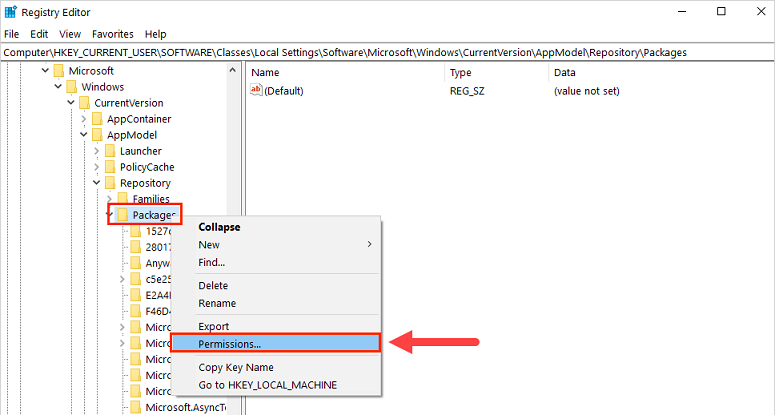
Step 3: Here, right click on Packages and select Permissions…
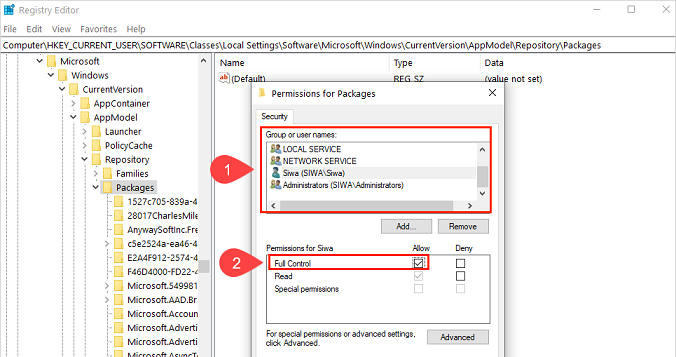
Step 4: Then, you proceed to select the User account you are using (1) and tick the Allow (2) section of Full Control . Finally, you choose Apply => Ok and restart your computer.
In this article, TipsMake guided you how to fix ms-windows-store PurgeCaches on Windows 10 quickly and effectively. Have a nice day!
Was this article helpful?
Your feedback helps us improve.
Related Articles
 4 ways to fix when problems do not find Windows Store on Windows 102 minutes read
 The Windows Store will be renamed to Microsoft Store in Windows 102 minutes read
 Windows Store rolled over 150,000 applications2 minutes read
 Instructions to reset Windows Store application on Windows 103 minutes read
 Windows Store on Windows 10 is faulty, this is a fix9 minutes read
 Steps to restore Windows Store on Windows 10 after removal2 minutes read
Reader Comments 0
Sign in with email or Google to join the discussion.