How to delete personal information from PowerPoint presentations before sharing
Removing your personal information from a file before sharing is a must. Office applications can store personal information in every file you create, meaning that all recipients of that file will have your information. This is a way to remove personal information from PowerPoint presentations before sharing.
Save a copy of the file
The first thing to note, before you plan to delete any personal information from a file, is that you may not be able to recover the data later. So it is better to have a backup. In addition to having a copy of the original document, be sure to give it a distinctive name, so you can quickly identify files.
For example, you have a slideshow presented at a sales workshop. After the seminar, you need to send the presentation to the customers. In this case, you will want to make a copy of the original file and then delete your personal information from the client's copy. You also want to make sure you don't send the wrong copy, so give it a clear name!

After saving a copy of the file, open it and delete your information.
Check the presentation to delete personal information
When you have opened the copy of the file you want to delete personal information, select the File tab . After selecting, you will automatically go to the Sub Info tab . Here, click the Check for Issues button.

Select Inspect Document from the menu that appears.

After that, the Document Inspector window will appear. Tell PowerPoint what kind of content you want to check by checking the box next to each option.
When you are ready, click Inspect.

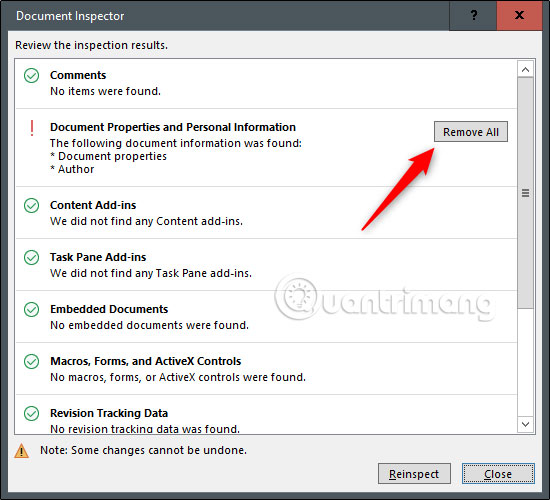
Test results will appear. If you see a green checkmark next to a section, no items will be found and no further action is required. However, if you see a red exclamation mark, that means the information was found in that section. Review, then select Remove All from each group containing sensitive information.

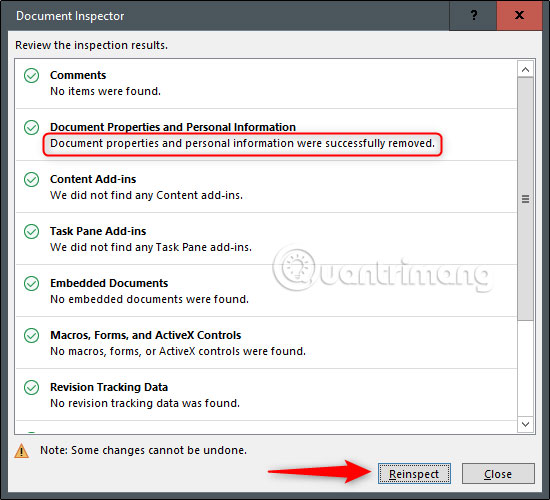
You will now receive a message telling you that the information has been successfully deleted. It is best to check the document again to make sure all data has been deleted. Go ahead and click Reinspect.

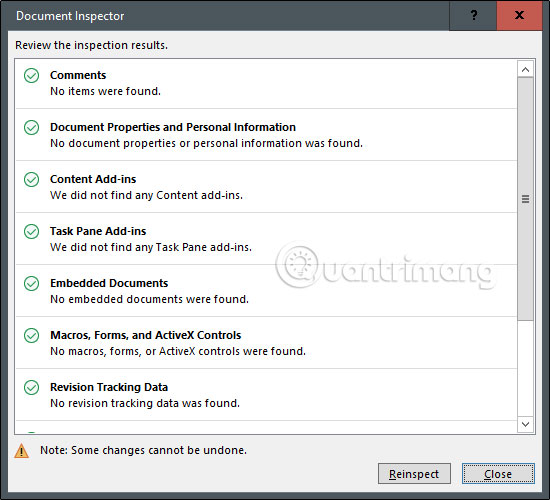
The document will go through the testing process again. If anything is missed, you will receive a notification. During the re-examination, everything is carefully reviewed. However, there may still be errors, because technology is not perfect. This reinforces the reason why it is important to check and check everything carefully, before sending them out, especially personal data.

Finally, save the file. You may have noticed that the size of the PowerPoint file has decreased. This is great because it is not always possible to send extremely large documents via email. That's all it takes!
Hope you are succesful.