How to create WordPress custom fields to add metadata
Wordpress comes with a custom fields feature for you to add any metadata to your posts. This could be information like the expiration date or simply the weather that day..
Wordpress comes with a custom fields feature for you to add any metadata to your posts. This could be information like the expiration date or simply the weather that day. Today's article will show you how to make good use of custom fields to improve your post functionality.
Enable custom fields in the block editor
If you're still using the classic editor, the custom fields section is enabled by default. You will be able to find it below the text editor.
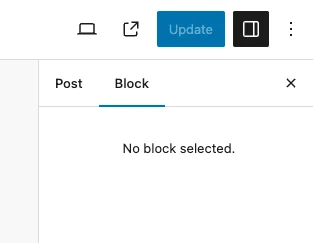
For the block editor (Gutenberg), the custom fields section is disabled by default, but you can easily enable it. Just go to the three dots in the top right corner of the screen and click on it.
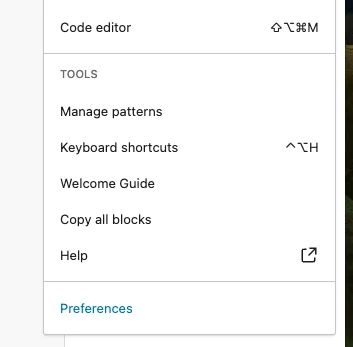
In the drop-down menu that appears, select Preferences at the bottom. Depending on the WordPress language you set, there may be the text Options instead .
In the Panels section , enable the Custom fields option . It will then ask you to reload the page, so make sure any unsaved works are saved first, otherwise you will lose them.

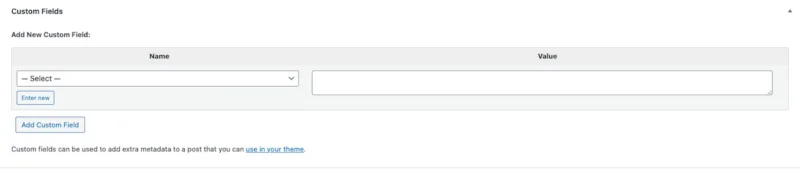
The new Custom Fields section will now appear below the post.
Once you start adding custom fields, it will only show up to 30 fields. You can continue to add more but they will not appear in the drop-down list.
Damien showed how to display more WordPress custom fields by default. This tweak increases the menu list to a maximum of 120. You can click through to the article or here is a summary.
Go to Appearance -> Editor in your WordPress backend and find the functions.php file . Add the following at the end.
function increase_postmeta_form_limit() { return 120; } add_filter('postmeta_form_limit', 'increase_postmeta_form_limit');After saving the changes, refresh your WordPress backend page and the number of custom fields in the menu will increase to 120.
Configure names and values for custom fields
You can add anything you want as a custom field. Whether it's the latest book you're reading or what the weather is like that day, you can add anything you want to your post. Click Enter new to get started.

In the Name section , add the title of the content you want to add. These can be things like:
- How do I feel today?
- The book I'm reading today.
- What do I hear today?
- Etc.
In the Value section , you now place the answer. Remember, custom fields are per post, so what you enter on one post won't appear on another.
It's also important to clarify that it's not necessarily a question in the Name section . It can also be standard text that you want at the beginning or end of your post. For example, maybe you want each post to have a linked disclaimer? Or is it a sponsored post? The possibilities are endless.
Note : To make accessing custom fields through code easier, it's best to keep Name short, all lowercase, and avoid any spaces. Link with an underscore (_). For example, use 'posts_to_redirect' instead of 'Posts to Redirect'.
After entering all information, click Add Custom Field to save. There doesn't appear to be a minimum or maximum number of characters for a field, but for the sake of its display on your page, try not to worry too much.
Display custom fields in WordPress themes
Life would be so easy if that was all it took to get WordPress custom fields working. Now, we have to make it visible on the page.
There is no easy way to display custom fields in your WordPress theme. You have to resort to inserting some PHP code into your theme.
In the file where you want to display custom fields, use the following code:
$custom_field = get_post_meta($post_id, 'custom-field-name', true) echo $custom_field;Some things to note:
- $post_id is the ID of the post for which you want to retrieve the custom field.
- custom-field-name is the name you used for your specific custom field.
You can get more information here.
Tip : Try using shortcodes instead if you want an easier method for adding metadata to your theme.