This guide provides a practical overview of Create USB Boot with 1 Click MultiBoot V5.0, Boot Both UEFI and Legacy, including its main features, benefits, limitations, and important considerations.
Learn some BIOS standards
Before starting to create this holy USB Boot, please prepare a little knowledge.
Create USB Boot to rescue repair computer software, there are countless types. However, you must understand why we need to create USB Boot for both UEFI and Legacy standards without creating other simple DLC boot kits.
You can quickly scroll to the end of the article to find the download link if you know all, but I still should read this analysis carefully, if there is a problem, you can fix it yourself.
What are UEFI and Legacy standards?
Put simply, it's the interface that appears before your 'loading windows' screen runs. This software checks the input and output devices of your computer, such as hard drives, keyboards, mice, etc., as a bridge between the Windows software and all hardware devices.
Back to the UEFI and Legacy standards, this is a software available on the motherboard so we can do nothing but 'choose' to go back and forth between these two standards, only the new motherboard will have to choose.
Legacy: Often called the traditional BIOS (Basic Input Output system), this software is stored on the computer's motherboard. It is a list of instructions for running devices to start the computer's OS.
When the computer is turned on, Legacy is run first, it checks the RAM and processor on your computer. Then check the devices attached on the computer such as printers, keyboards, mice. finally boot options such as CD-ROM, hard drive, USB, LAN.
UEFI ( Unified Extensible Firmware Inter ): Uses no different from its predecessor, Legacy BIOS , UEFI was developed with the purpose of solving weaknesses compared to its predecessors, operating strongly and gradually replacing. replace the Legacy BIOS standard. Support for 64-bit versions of Windows and from Windows 8 and above. The UEFI standard sometimes supports 32-bit editions.
UEFI is supposed to boot significantly faster, but I find it still not quite right, mostly because of whether you have a strong configuration or not.
What are standard MBR and GPT hard drives?
Generally the characteristics of these two standards are the same, both are the information management standard of the hard drive, only different from the time of launch, speed and memory.
MBR GPT Born in 1983 at the same time as IBM PS DOS 2.0 MBR - Master Boot Record. Until 2020, it is still quite popular. Born in 2010 GPT stands for of GUID Partition Table. This is a new standard, gradually replacing the MBR standard. The GPT standard does not have the same limitations as the MBR, but it is not very common. High compatibility with other hardware such as mainboard, supports all Windows operating systems from the old to the latest GPT standard can support hard drives up to 256 TB and allows the use of up to 128 partitions on the drive. Only support up to 2 TB capacity. Create up to 4 partitions on a hard drive. For example, create 4 partitions of C, D, E, F. Compatibility with old software is poor, on GPT hard drive, you can only install 64-bit operating systemsConclude:
Let's return to two questions:
- Why is it necessary to create USB Boot for both UEFI and Legacy standards?
- What happens when using UEFI - GPT USB Boot plugged into a PC that has Legacy - MBR standard?
Yes, with the above documents, you probably have the answer, surely the motherboard will not recognize your USB, so you have to create another USB boot using the standard Boot Legacy - MBR.
This article will help you not to buy more USB to create 2 different types of boot, no matter what your computer is, you will still be able to boot into all.
How to create USB BOOT with 1 Click MultiBoot v5.0
Advantages - Uses of the software:
- Boot support for both Legacy and UEFI standards.
- Full support for a computer technician. specialized in ghost walking, for example, the latest update in 2020
- Create a USB boot with one click and you're done
- Automatically divide USB into 2 partitions including:
- The partition contains the Boot Menu data.
- Multiboot name partition is empty with the size you choose, NTFS format for you to comfortably store data like a regular USB. (The maximum size of each file is not limited as the Fat32 format - only supports a maximum of files under 4GB).
Tools to prepare:
-
Main tool : Toolkit 1 Click MultiBoot v5.0 2020. Capacity 1.43GB Download Here
-
Support tool for testing USB boot : Qemu BootTester. Download Here
Proceed to install:
Step 1: Insert the USB disk you need to create into your computer, in this article, I use a Kingston DataTraveler 3.0 USB with a capacity of 16GB.
* Note : Back up all data on USB before doing, because when doing data in USB will be erased.
Step 2 : After downloading, extract the password: gameportable. net
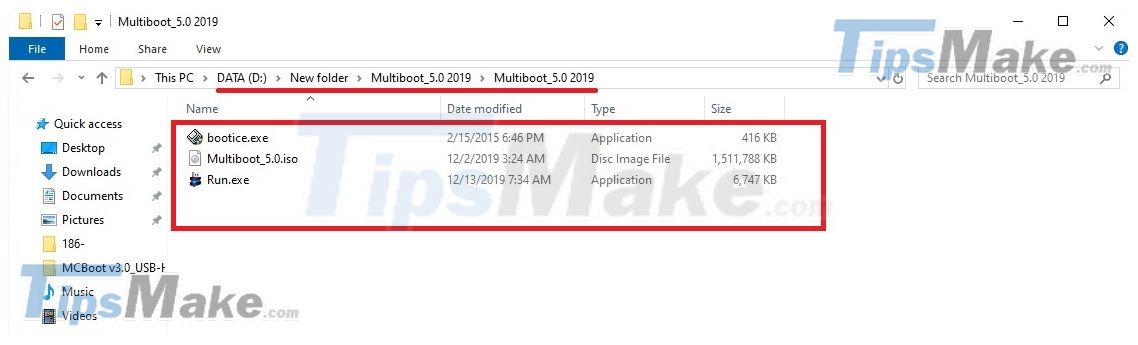
The toolkit includes 3 after unpacking the following file: bootice.exe, Multiboot 5.0.isoand Run.exe.

Step 3 : To start creating, run the file Run.exewith Administrator privileges.
Step 4 : After running the file with Administrator privileges, the software will appear 1 Click Multiboot 5.0 2019 asking for the USB disk number you want to create. In my article USB is at position 3, so enter 3 and press Enter to continue.

Step 5: Wait.

The process of creating the Boot Menu starts, including deleting, partitioning and formatting the USB disk, unpacking and copying the contents of the Multiboot_5.0. iso file to the USB disk, etc.
The software will complete and close on its own.
Step 6: Next we use bootice. exe included with the toolkit 1 Click MultiBoot v5.0 to check the partition of the USB disk after creating.
Right-click on the bootice.exerun file with Administrator privileges
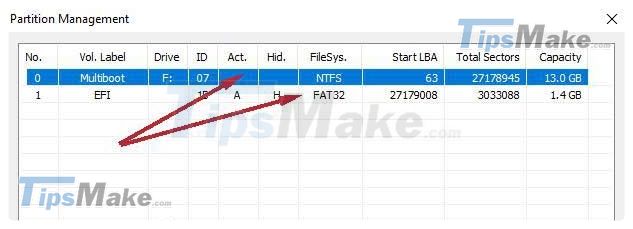
Step 7: The BOOTICE v1.3.3 - by Pauly window appears >>> Click Parts Manage, the Partition Management window appears.

If you see the tool has divided the USB disk into 2 partitions as required is successful. So complete the USB rescue rescue computer with 1 Click MultiBoot toolkit v5.0.
MultiBoot v5.0 2020 User Guide
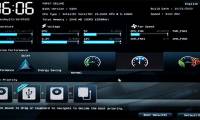
Restart the computer, press the key to activate Boot Options ( for example, HP machine press F9, DELL machine press F12. ), select USB boot into LEGACY or UEFI mode.
Here, choose Win PE that suits your needs.
Legacy mode :

UEFI mode:

Reader Comments 0
Sign in with email or Google to join the discussion.