Table of Contents
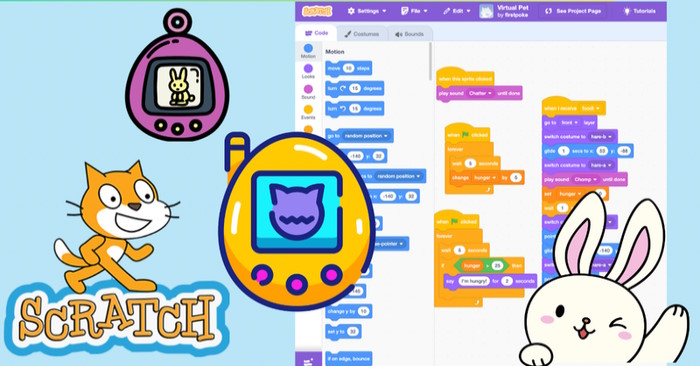
A Scratch virtual pet combines sprites, sounds, messages, animation, and variables in one approachable project. In this version, clicking the pet makes it talk, clicking food starts an eating sequence, and a Hunger variable rises over time and falls after feeding.
Plan the pet's behavior
Before building, decide what each action should do:
- Green flag: reset the pet, hunger, and food
- Click the pet: play a voice sound and show a short message
- Click the food: broadcast a Feed message
- Receive Feed: move the pet, animate eating, reduce hunger, and return home
- Every few seconds: increase hunger up to a maximum
- When hunger passes a threshold: warn the player once, then wait until the pet is fed
Keeping these responsibilities separate makes the project easier to debug.
1. Create the project and backdrop
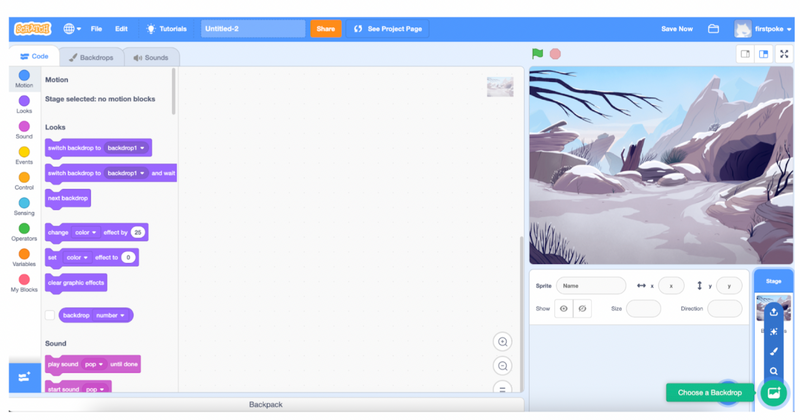
Start a new Scratch project. Keep or remove the default cat, then select Choose a Backdrop and choose a setting for the pet. A simple room, garden, or outdoor scene leaves space for the pet and its controls.
2. Choose and position the pet
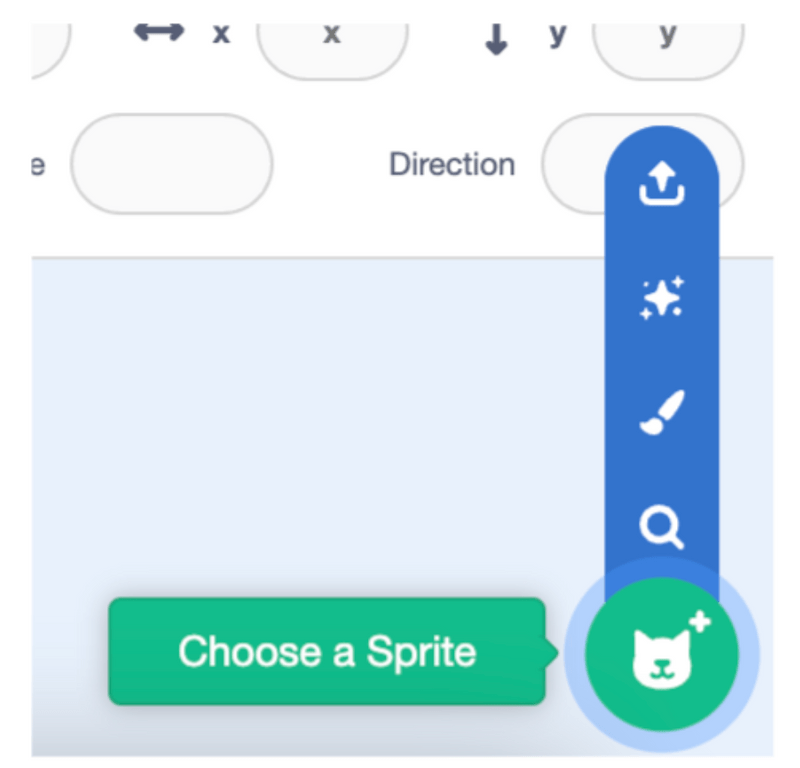
Select Choose a Sprite and pick an animal with at least two useful costumes if possible. Rename it Pet. Place it at its resting position and note the x and y coordinates; you will use those values after the eating animation.
Set the rotation style to left-right if the pet should face the food without rotating upside down.
3. Add voice and eating sounds
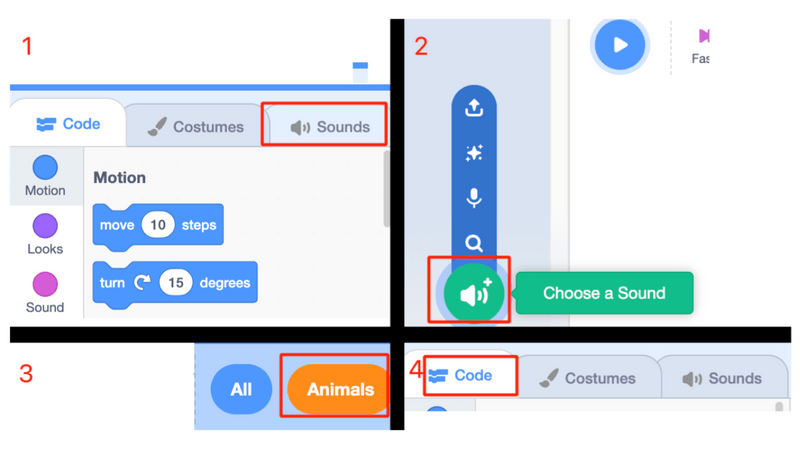
With the Pet selected, open Sounds, choose a short animal sound, and add a second sound for eating. Rename them clearly, such as Pet voice and Chomp.
Short effects work better than long clips because repeated clicks can overlap audio. Use play sound until done when later blocks must wait for the effect to finish.
4. Make the pet respond to a click
Create this script on the Pet:
- when this sprite clicked
- play sound [Pet voice] until done
- say [Hello!] for 2 seconds
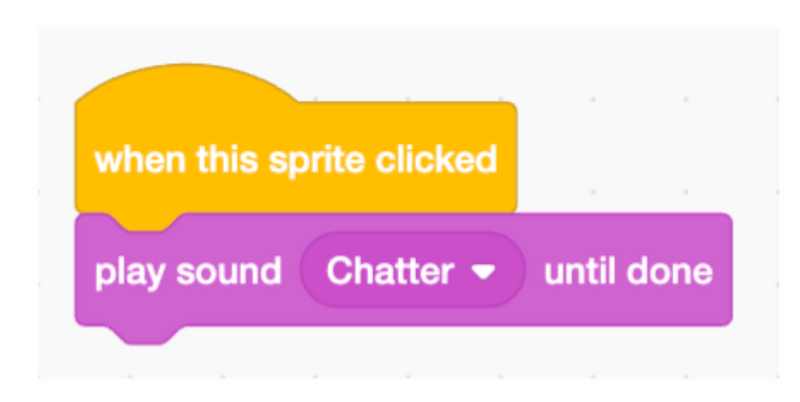
Keep the message short. Later, you can choose a phrase based on hunger or happiness instead of always saying the same thing.
5. Add a food sprite
Choose a second sprite such as an apple, carrot, or bowl and rename it Food. Place it where the pet should eat. Note the Food's x and y coordinates.
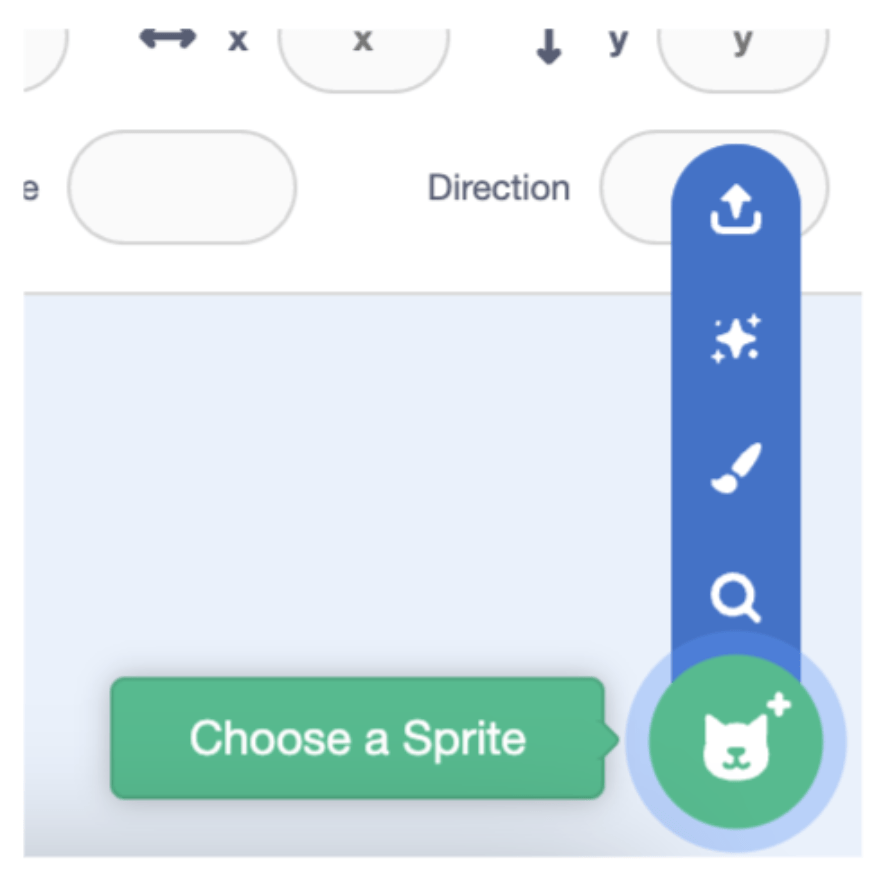
6. Broadcast a Feed message
Select Food and create:
- when this sprite clicked
- broadcast [Feed]
Create Feed as a new message instead of leaving the vague default name message1.
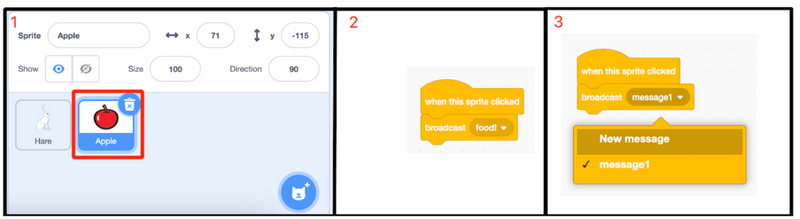
A broadcast lets the Food request an action without containing the Pet's animation code. The Pet can listen for the same message, and other sprites can respond later.
7. Move the pet to its food
Select the Pet and create a new script beginning with when I receive [Feed]. Add:
- Point toward the Food or set the correct direction.
- Switch to a movement costume.
- Glide for 1 second to the Food's x and y coordinates.
- Play the Chomp sound until done.
- Wait briefly.
- Point back toward the resting place.
- Glide to the original x and y coordinates.
- Switch back to the resting costume.
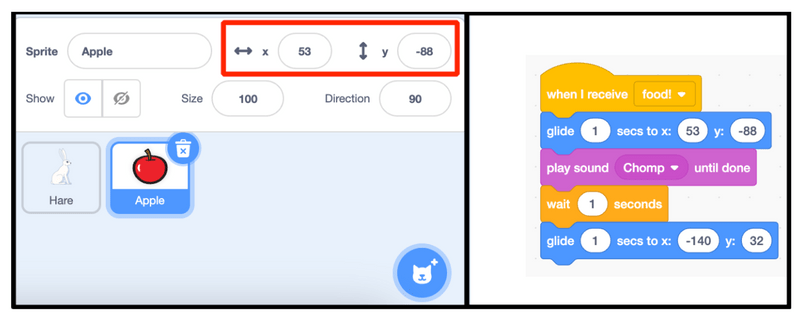
Position the destination so the pet appears next to the food rather than directly covering it. Test the coordinates with the final sprite size.
8. Improve the eating animation
Use go to front layer only when the pet should appear in front of the food. Switch between two costumes during the glide or eating pause, then restore the resting costume and direction.
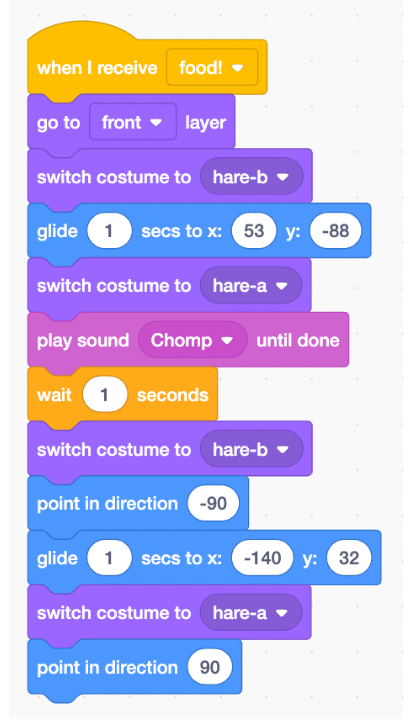
If costume changes make the pet jump sideways, align the costume centers in the Costume editor.
9. Create the Hunger variable
Choose Variables > Make a Variable, name it Hunger, and create it for all sprites. In this project, 0 means not hungry and 100 means extremely hungry.
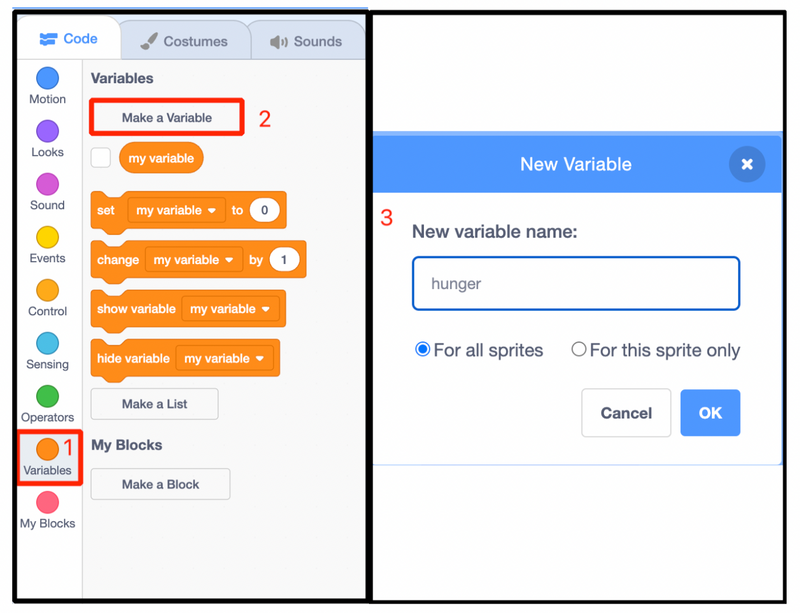
Show the variable on the Stage while testing. You can hide the raw monitor later or replace it with a custom meter.
10. Increase hunger over time
On the Pet, create this reset-and-timer script:
- when green flag clicked
- set [Hunger] to 0
- forever
- wait 5 seconds
- change [Hunger] by 5
- If Hunger is greater than 100, set Hunger to 100
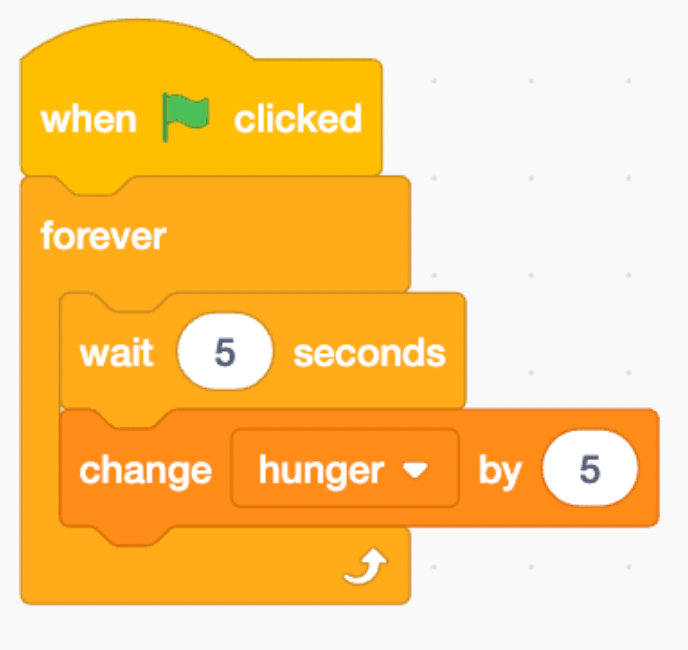
Clamping the value at 100 keeps later comparisons and meters predictable.
11. Warn the player without repeating constantly
A forever loop that says “I'm hungry!” every few seconds becomes noisy. Instead, use two wait until blocks:
- when green flag clicked
- forever
- wait until <Hunger > 60>
- say [I'm hungry!] for 2 seconds
- wait until <Hunger < 40>
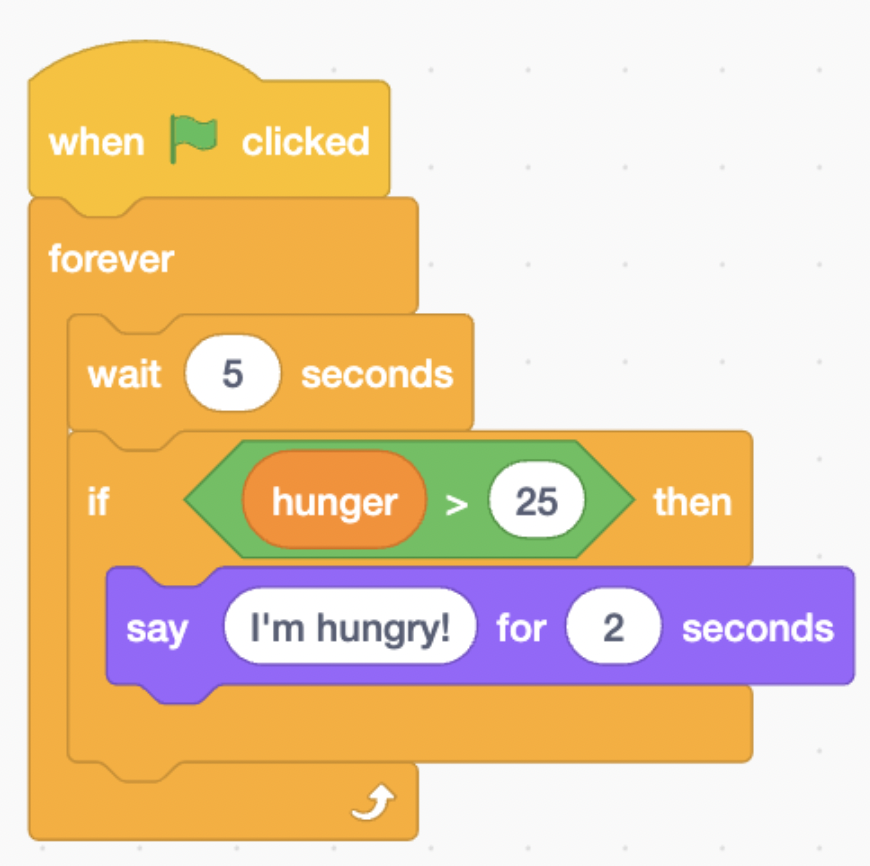
This produces one warning, then waits until feeding lowers Hunger before another warning can occur.
12. Reduce hunger after feeding
In the Pet's when I receive [Feed] script, after the eating sound:
- change [Hunger] by -25
- If Hunger is less than 0, set Hunger to 0
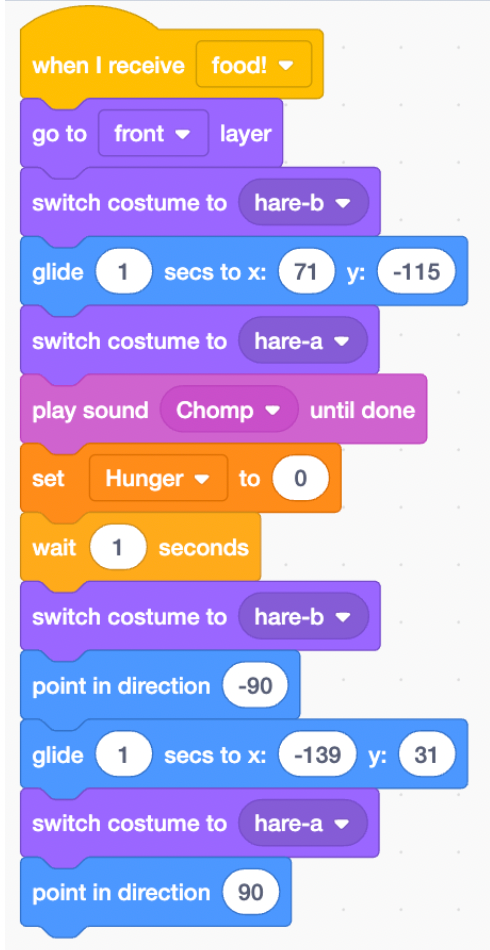
Reducing hunger instead of always resetting it to zero makes repeated feeding meaningful. If you prefer a simpler game, use set Hunger to 0.
Prevent repeated clicks during the animation
Create a variable named Busy. Set it to 0 on the green flag. When Food is clicked, broadcast Feed only if Busy equals 0. In the Pet's Feed script, set Busy to 1 before moving and back to 0 after returning. This prevents several Feed messages from starting overlapping glides.
Reset every sprite on the green flag
| Object | Reset action |
|---|---|
| Pet | Go to the resting coordinates, set Hunger and Busy to 0, show, restore the resting costume and direction |
| Food | Go to its starting coordinates and show |
| Stage | Switch to the normal backdrop |
| Sounds | Stop all sounds if an old effect could still be playing |
Test the pet
- Click the Pet repeatedly and check that sounds do not overlap badly.
- Click Food during movement and confirm Busy blocks another feed.
- Let Hunger exceed the warning threshold and check that the message appears once.
- Feed the pet and confirm Hunger never becomes negative.
- Restart while the Pet is moving and verify that every object resets.
Ideas to extend the game
- Add Happiness and Energy variables with their own controls.
- Change costumes when hunger is low, medium, or high.
- Add a sleep area that restores Energy over time.
- Create a shop where earned points buy different food.
- Save a high score with a cloud variable only if the project and account support it.
- Add accessible visual feedback so important states are not communicated by sound or color alone.
Add one system at a time. Give each variable a clear range and reset rule so the virtual pet behaves consistently after every green-flag restart.
Related Articles
 Basic Scratch Tutorial for Beginners5 minutes read
 How to Make a Piano Game Using Scratch5 minutes read
 Scratch: a Guide to Creating an Opening for a Project5 minutes read
 Instructions for Creating Simple Games on Scratch6 minutes read
 How to Create a Jumping Game in Scratch7 minutes read
 How to Create a Racing Game in Scratch11 minutes read
Reader Comments 0
Sign in with email or Google to join the discussion.