Table of Contents
These five Scratch exercises introduce events, loops, sensing, movement, visual effects, sound, and size controls. They are designed for students in Grades 2–5, but the right pace depends on reading level and previous computer experience. Younger learners may need an adult to read block names and help with mouse control.
For each project, build the smallest working version, predict what the code will do, run it, and change one number. That cycle teaches more than copying a finished script without testing it.
Skills covered
| Exercise | Main Scratch concepts |
|---|---|
| Flying cat follows the cursor | Green flag, forever loop, sensing, direction, movement |
| Jumping sprite | Keyboard event, coordinates, reporters, costumes, glide |
| Color-changing backdrop | Stage code, visual effects, loop timing |
| Sound on click | Sprite event, sound playback |
| Resize with arrow keys | Keyboard events, positive and negative values, limits |
Exercise 1: Make a flying cat follow the mouse
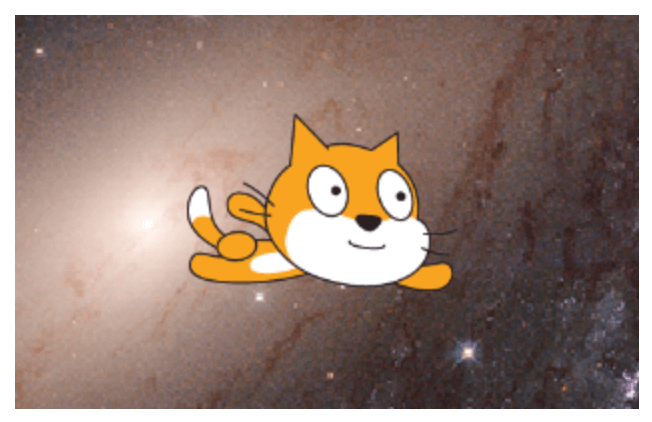
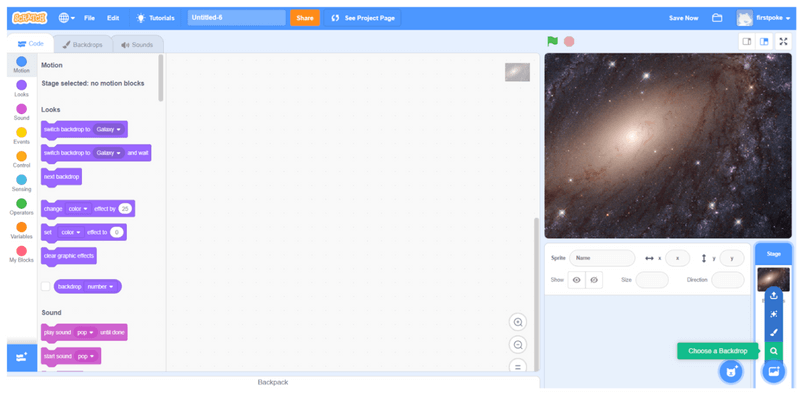
Set up the scene
- Create a new Scratch project.
- Select the Stage, choose a backdrop such as Galaxy, and remove any backdrop you do not need.
- Choose a Flying Cat sprite from the sprite library.
- Place the cat away from the mouse pointer so you can see it begin moving.
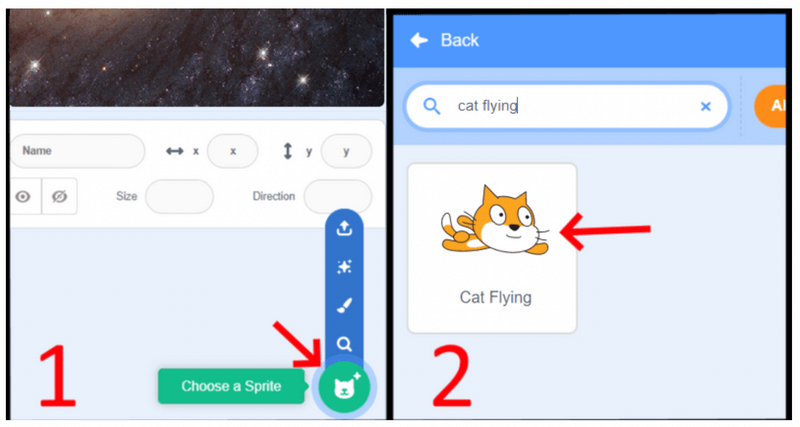
Build the script
On the Flying Cat, connect:
- when green flag clicked
- forever
- point towards [mouse-pointer]
- if <not <touching [mouse-pointer]?>> then
- inside the if: move 5 steps
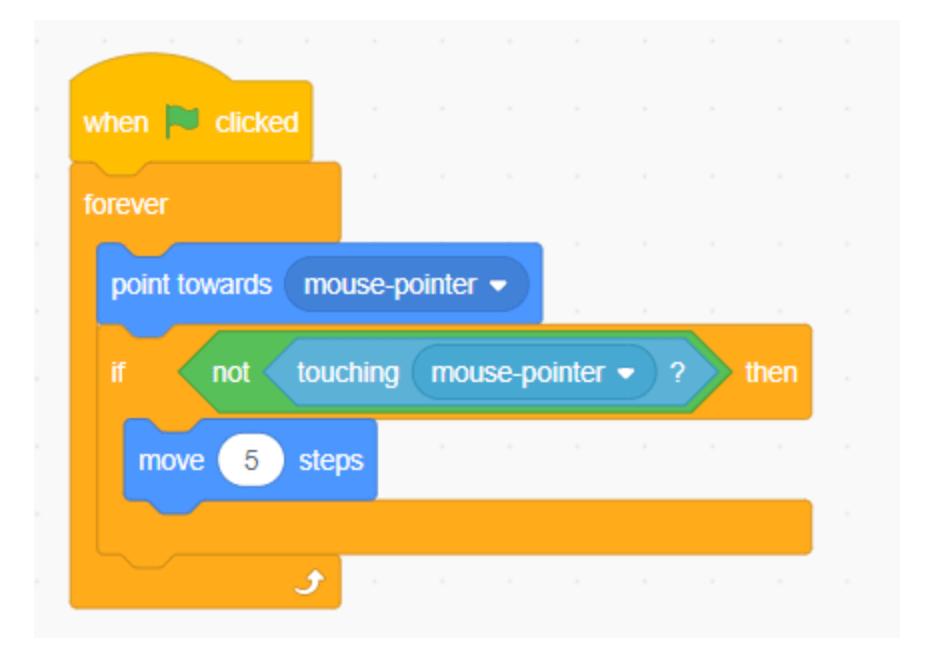
The cat points toward the cursor on every loop and moves only while it is not touching the cursor. Change 5 to 2 or 10 and describe how the motion changes.
Test and extend
- What happens when the cursor moves behind the cat?
- Add if on edge, bounce and compare the behavior.
- Make the cat say “Caught you!” when it touches the pointer.
- Add a Score variable that increases only once each time the cat reaches the pointer.
Exercise 2: Make a sprite jump
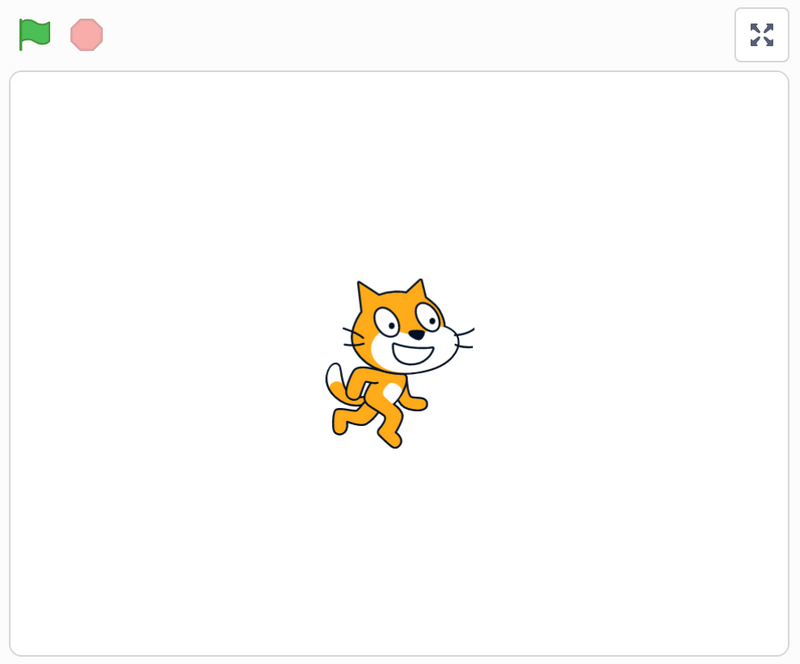
Choose a sprite with at least two costumes. This beginner version moves up and then returns to the starting height.
Build the script
- when [space] key pressed
- set [Start Y] to (y position)
- next costume
- glide 0.2 seconds to x: (x position) y: ((Start Y) + 50)
- next costume
- glide 0.2 seconds to x: (x position) y: (Start Y)
Create Start Y as a variable for this sprite only. Saving the starting value makes the return position explicit and prevents repeated jumps from slowly drifting.
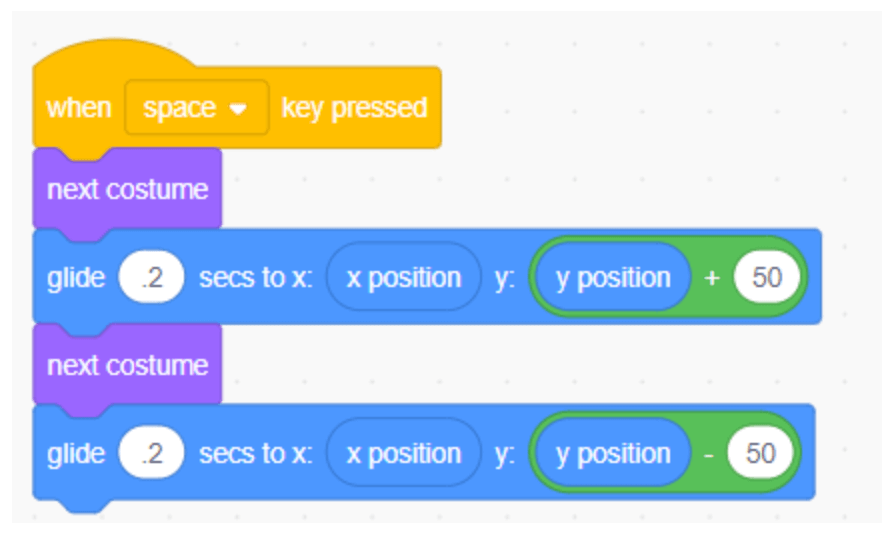
Test and extend
- Change 50 to 25 and then 100. Which height fits the Stage?
- Change 0.2 to 0.5. Does the jump feel slower or faster?
- Play a sound at the start of the jump.
- For a platform game, replace this simple glide with a velocity variable and gravity so the sprite can land on platforms.
Exercise 3: Create a color-changing backdrop
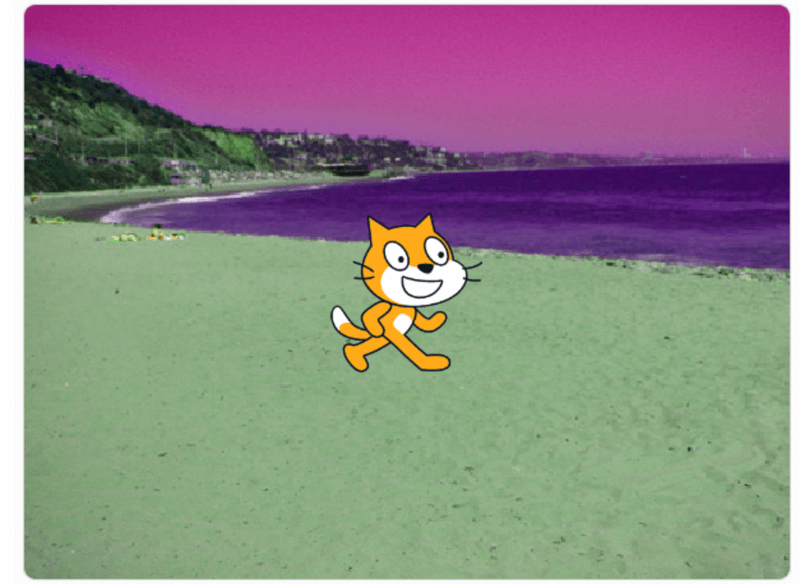
- Select the Stage rather than the sprite.
- Choose a backdrop that changes visibly when a color effect is applied.
- Open the Stage's Code tab.
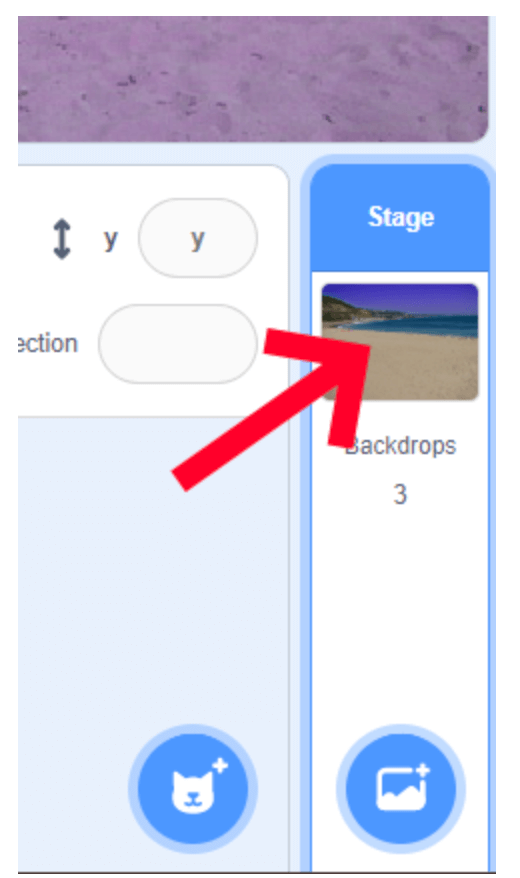
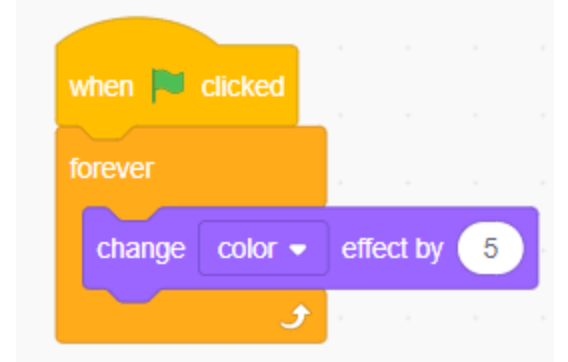
Connect:
- when green flag clicked
- clear graphic effects
- forever
- change [color] effect by 5
- wait 0.05 seconds
The reset block makes every run start the same way. The short wait makes the speed easier to control and prevents an unnecessarily tight loop.
Challenge
Create two keys: one that increases the color-change amount and one that decreases it. Decide on a minimum and maximum so the effect stays manageable.
Exercise 4: Play a sound when a sprite is clicked
Select the sprite, open Sounds, and choose a short effect from the library. Return to Code.
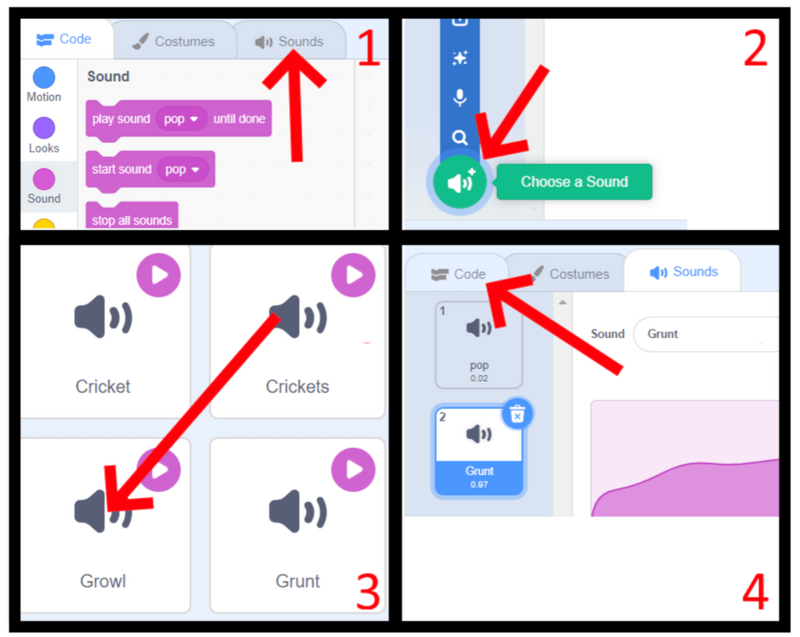
Connect:
- when this sprite clicked
- play sound [chosen sound] until done
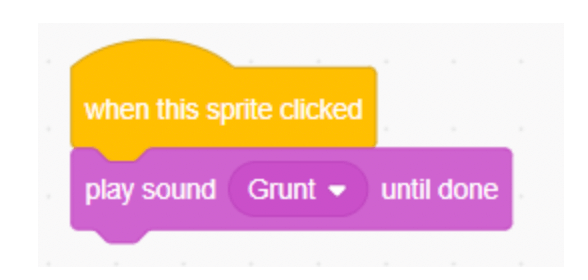
play sound until done waits before continuing; start sound allows later blocks to run immediately. Add a say block after the sound and compare the two sound blocks.
Challenge
Add a second costume and switch to it while the sound plays. Restore the original costume afterward.
Exercise 5: Resize a sprite with the arrow keys
Add two scripts:
- when [up arrow] key pressed → change size by 10
- when [down arrow] key pressed → change size by -10
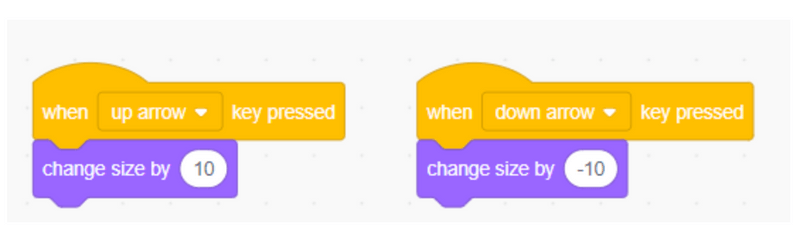
Now prevent extreme values. After increasing, if size > 200, set size to 200. After decreasing, if size < 20, set size to 20. On the green flag, set size to 100 so each run starts consistently.
Test and extend
- Why is -10 used for shrinking?
- What happens without the 20% minimum?
- Display the current size in a speech bubble.
- Replace the keys with clickable plus and minus sprites.
How to teach these exercises
- Predict: ask the student what each block will do.
- Build: add only two or three blocks at a time.
- Run: click the green flag or trigger the event.
- Explain: have the student describe the result in their own words.
- Change: modify one number, input, costume, or sound.
- Debug: compare the prediction with the actual behavior.
Students should be encouraged to rename sprites and variables, choose their own artwork, and add one original feature. The goal is not to reproduce the screenshot perfectly; it is to understand the relationship between an event and the blocks that follow it.
Common beginner problems
| Problem | Check |
|---|---|
| Nothing happens | Is the script attached to the correct sprite or Stage, and was the right event triggered? |
| A block will not connect | Does its puzzle shape fit that position, and is it inside the intended loop or condition? |
| The wrong object moves | Select the intended sprite before adding code. |
| Several scripts keep running | Click the stop button, then restart with the green flag and reset values. |
| A sprite disappears | Check size, x/y position, visibility, and whether it moved behind another sprite. |
Reflection questions
- Which block starts each script?
- Which exercise uses a loop, and why?
- What is the difference between x and y position?
- What positive and negative numbers did you use?
- Which feature did you invent, and how did you test it?
Related Articles
 Basic Scratch Tutorial for Beginners5 minutes read
 C ++ Exercises About IF ELSE: Explained2 minutes read
 Please Download VnDoc's Exercises App to Make Learning Easier5 minutes read
 Points to Know About the New Scratch 3.0 Version7 minutes read
 C ++ Exercises Have Solutions (Sample Code)17 minutes read
 How to Make Snow Fall in Scratch9 minutes read
Reader Comments 0
Sign in with email or Google to join the discussion.